mike5im5
VIP Member
I'm not sure if there is a proper guides section so mods please move if this is posted in the wrong place. However, a few members have asked me for the dimensions of the drawer I built and I didn't want to hijack the other thread so I've jotted down some details. Apologies for the lack of measurements but I built it with trial and error so I don't have them all here. I can go back and measure and add anything I've missed at a later date.
I'm no DIY guru so I'd say most people could attempt this with a bit of know how and the right tools. I haven't included price for parts as these change daily, however I calculated at time of build I spend £91 on parts plus what I already had (nuts/bolts/rivets etc). The biggest cost was the pair of heavy duty rails at £49.
Parts:
Tools:
I completed everything with a decent hacksaw, mitre block, tape measure, drill and rivet gun. If you've got a mitre saw that would speed things up and create cleaner cuts.
Frame:
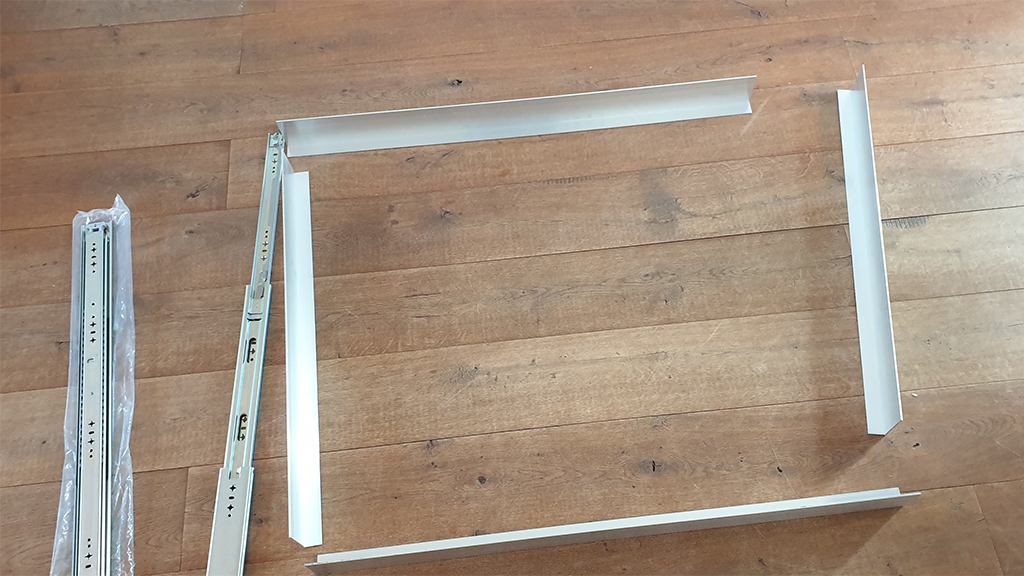
Cut two 32x32 aluminium angles down to 730mm for the sides.
For the other leave the full length and from ~89.5mm inside each edge cut out two 90degree corners (leaving the 104cm inside measurement) for the front and back.

Now bend the end inwards to create the corners.

Do this carefully and you'll end up with a need corner without any sharp edges. I used a few clamps to help me bend it neatly:


Assemble the frame by putting 2 rivets on the bottom and 2 on the sides. Use more if you feel it needs it.


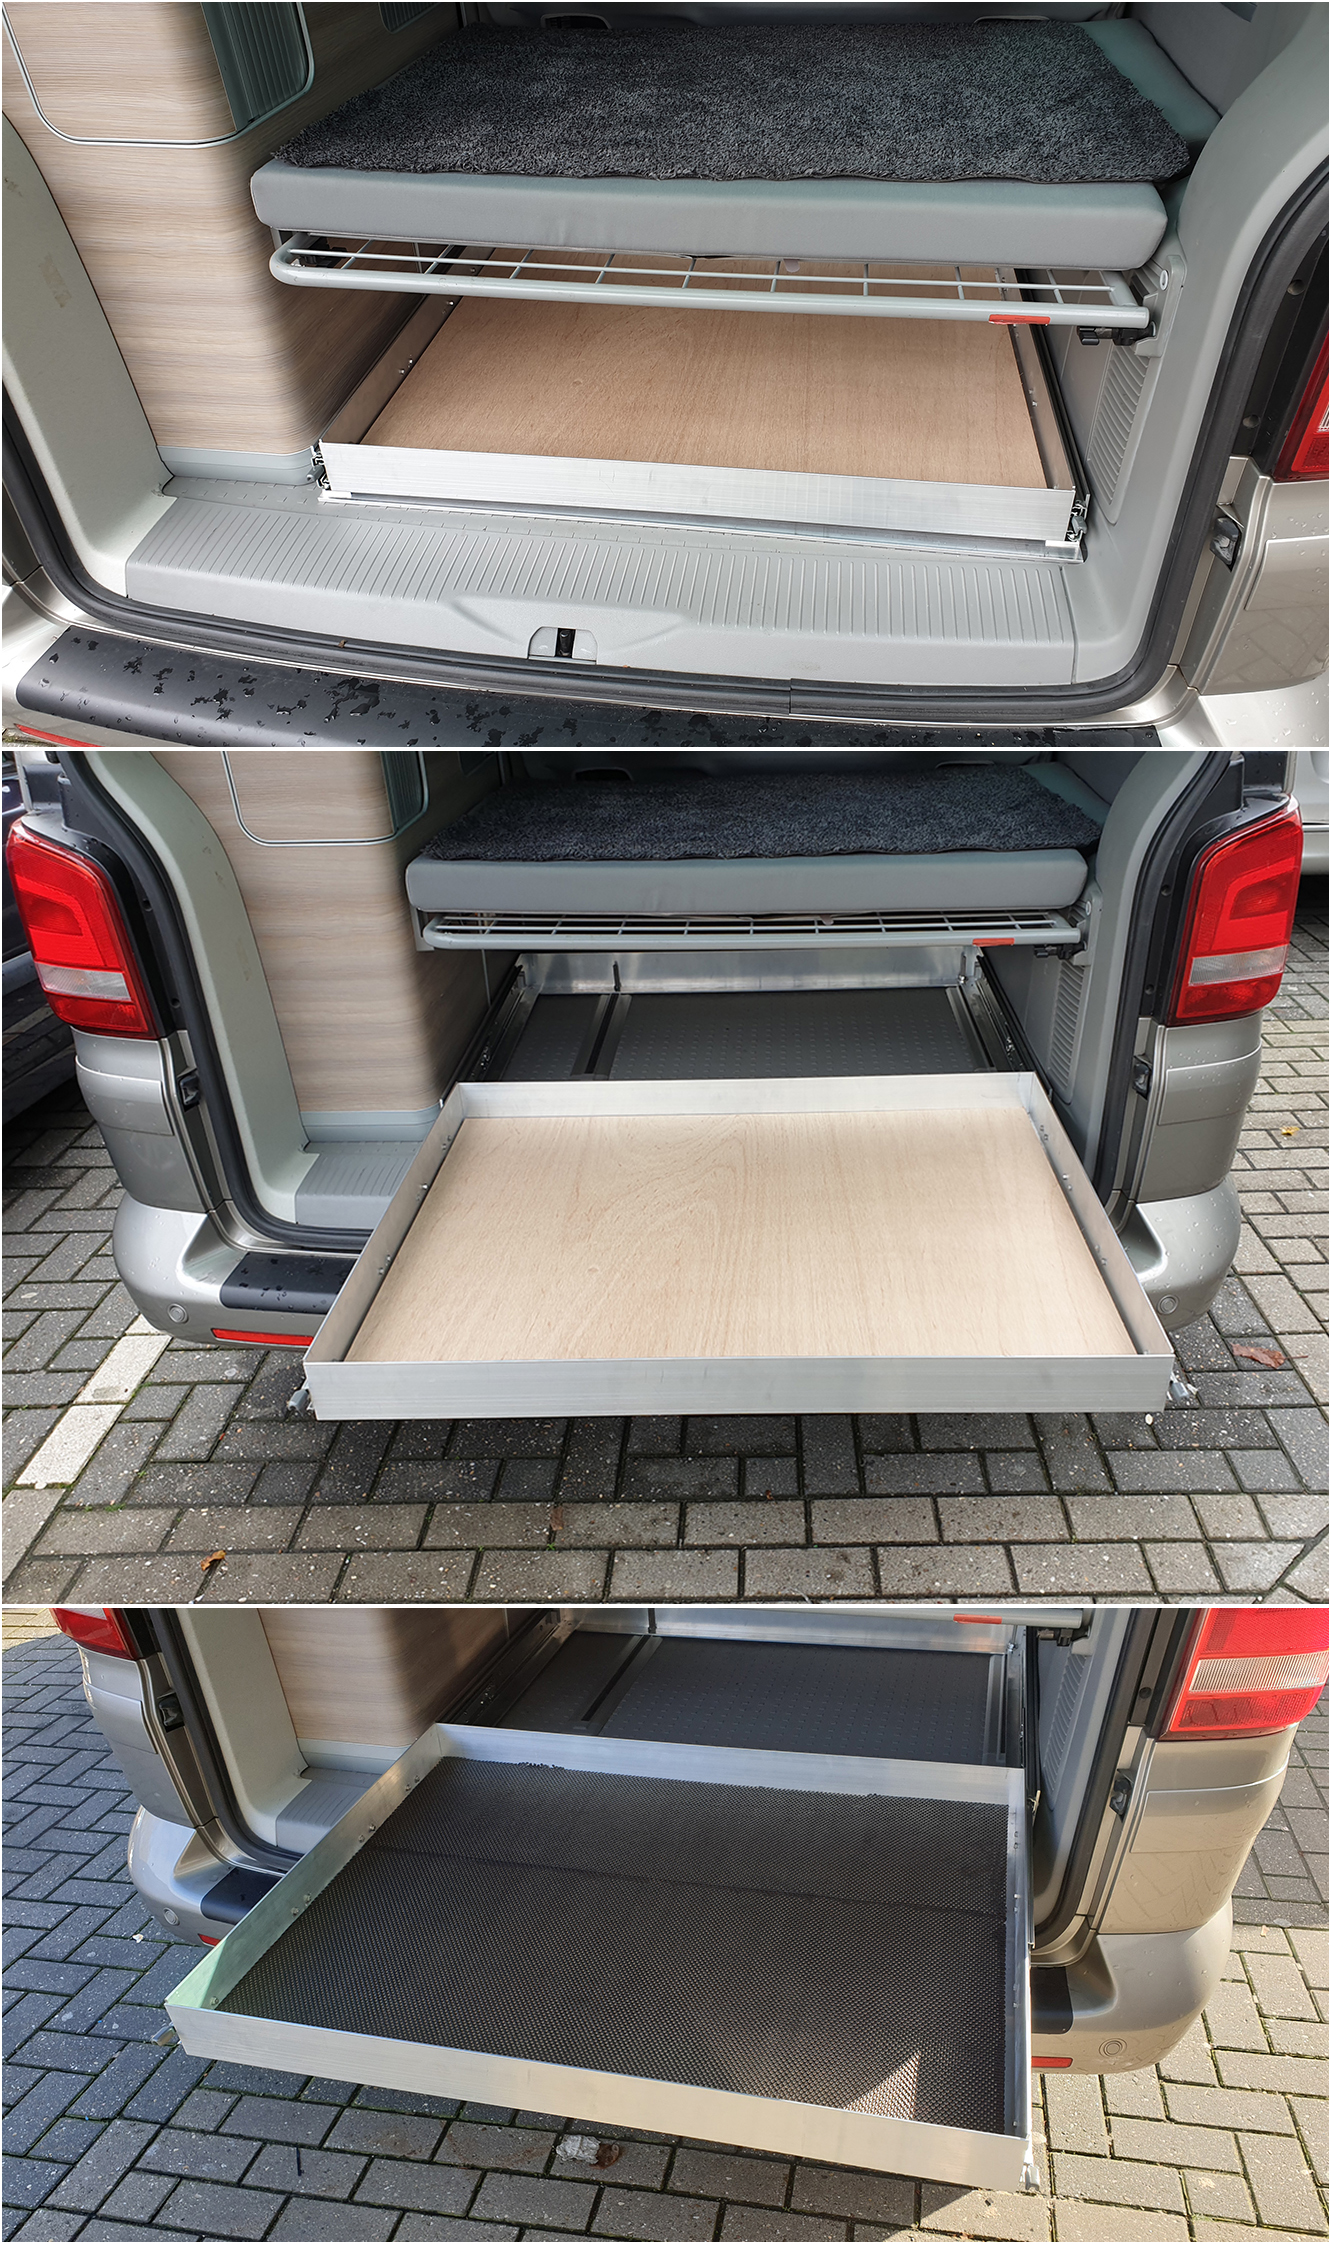
Finally, fit the plywood board (or suitable alternative) to the frame. I drilled holes in the frame and screwed up into the base. For a stronger fix (or if you have used thinner board to sheet metal) you can rivet this together. This should make the whole things pretty stable.

Brackets and fitting:
Finally to make the brackets I cut the 50x50 aluminium angle in half and cut 2 sections out of each.

The three holes on the side fix to the slider with bolts. A single hole at the back fixes to the multi-flex rail (with the rail bolt) and the tab slides under the multi-flex (you'll see a gap once you loosen this and lift up).

I'm no DIY guru so I'd say most people could attempt this with a bit of know how and the right tools. I haven't included price for parts as these change daily, however I calculated at time of build I spend £91 on parts plus what I already had (nuts/bolts/rivets etc). The biggest cost was the pair of heavy duty rails at £49.
Parts:
- 4 x 1.2m 32x32 aluminium angle (1.7mm thick)
- 2 x heavy duty sliders
- 1 x 1.0m 50x50 aluminium angle (3mm thick)
- 2 x Fixing bolts for multi-flex rail
- Plywood or some other strong sheet material for the drawer base
- Nuts, bolts, rivets and screws
Tools:
I completed everything with a decent hacksaw, mitre block, tape measure, drill and rivet gun. If you've got a mitre saw that would speed things up and create cleaner cuts.
Frame:
Cut two 32x32 aluminium angles down to 730mm for the sides.
For the other leave the full length and from ~89.5mm inside each edge cut out two 90degree corners (leaving the 104cm inside measurement) for the front and back.
Now bend the end inwards to create the corners.
Do this carefully and you'll end up with a need corner without any sharp edges. I used a few clamps to help me bend it neatly:
Assemble the frame by putting 2 rivets on the bottom and 2 on the sides. Use more if you feel it needs it.
Finally, fit the plywood board (or suitable alternative) to the frame. I drilled holes in the frame and screwed up into the base. For a stronger fix (or if you have used thinner board to sheet metal) you can rivet this together. This should make the whole things pretty stable.
Brackets and fitting:
Finally to make the brackets I cut the 50x50 aluminium angle in half and cut 2 sections out of each.
The three holes on the side fix to the slider with bolts. A single hole at the back fixes to the multi-flex rail (with the rail bolt) and the tab slides under the multi-flex (you'll see a gap once you loosen this and lift up).
Last edited: