


Buy all your VW California Accessories at the Club Shop Visit Shop

You are using an out of date browser. It may not display this or other websites correctly.
You should upgrade or use an alternative browser.
You should upgrade or use an alternative browser.
comfortz
VIP Member
VIP Trade Partner
- Messages
- 565
This should be ready to go into production any time now - more on the internal liner very shortly 
Bellesca
Is this going to be similar to ISO-top?
Can it stay in place, with roof down?
Can it stay in place, with roof down?
Martin
Administrator
Admin/Founder
Yes, this will be very similar to the Iso Top
Bellesca
That sounds great.
comfortz
VIP Member
VIP Trade Partner
- Messages
- 565
Brian has very kindly helped me with the final adjustments this afternoon. I'm sure he'll comment shortly but we're very happy with the end results. He'd off to the lakes this weekend and was going to opt for a insulated version but after seeing the how much difference the standard version made, and the fact that it can be left in place with the roof down, he's now changed his mind!
What I can confirm is that it has a grey outer water poof surface (which goes very well with the colour of the bellows) and a really nice white material inner fabric finish (it makes the roof feel very, very cozy), The fabric is hypo allergenic, fire retardant and also mold resistant. The liner comes with three internal zipped windows and uses the California's existing roof design to attach (no tools, screws or drilling required!)
We're working hard on getting the product into full production so as soon as I can I'll upload some photos and more details.
comfortz
VIP Member
VIP Trade Partner
- Messages
- 565
 Waterproof
 Bellesca
Fantastic
Put me down for one too
Put me down for one too
briwy
Super Poster
VIP Member
I can confirm that the prototype we tried this afternoon looks superb. Nick has done a great job on this. It really makes the roof look a lot more cosy, lighter and generally a lot nicer place to be, both with the bed up and down.
The liner fits in place with velcro so no mods to the Cali are needed and it stays in place with the roof down so no need for fitting each time.
As Nick said, we were both really surprised at how much warmer it seemed in the roof with this fitted, plenty of ventilation if required with zip openings on the sides and front so no problem there.
Should be a great addition to the range.
Maud
VIP Member
- Messages
- 573
- Vehicle
- T5 SE 180
Any idea, just roughly, of where this will stand price wise? It sounds really good, especially as it lightens it up a bit inside (less grey!) and holds some warmth in too.
Maud
Maud
comfortz
VIP Member
VIP Trade Partner
- Messages
- 565
I'm not 100% on the price just yet, but I'm anticipating around the £300 mark with the typical 10% discount for VIP members.
Argo&Liebe
Very interested
ibis64
VIP Member
- Messages
- 111
- Vehicle
- T5 Beach
Will the new version also fit a Beach
Cheers
Ian
Cheers
Ian
ibis64
VIP Member
- Messages
- 111
- Vehicle
- T5 Beach
Yes I have been speaking to Nick and was going to go for a topper plus the insulated front screen covers but I am going to wait and see what the new setup looks like. Would like to get something before Easter as I am planning on going up to Glencoe if conditions are good.
Ian
Ian
briwy
Super Poster
VIP Member
Well the liner was well and truly tested over the weekend up at Wasdale Head up in the Lakes.
We didn't put the external topper on as the idea was to test the new internal liner and see how it performed.
As usual in the Lakes in mid February the weather wasn't good. Friday night we had a mixture of rain, sleet and snow, very heavy at times. Saturday night it pretty much rained all night and the wind also got up blowing the rain sideways into the roof.
Pleased to say the inside of the roof stayed bone dry all weekend with the liner in. On Sunday morning I opened one of the side "windows" in the liner and felt the inside of the roof canvas. This was fairly damp and I'm sure that without the liner the mattress would also have got wet where it touched the roof canvas sides.
We normally sleep upstairs but as it was around freezing we decided to stay downstairs but left the bed platform raised to see what effect the liner had on retaining heat. I wasn't really expecting it to do much as after all it's not designed to be a thermal barrier. However it really made a difference as it virtually cuts out any drafts. A bit of air still comes in round the top of the liner as it's impossible to seal it completely around the top so we still had some ventilation. Normally in these conditions we would definitely have had the bed board down and the slats closed up.
The internal light grey colour makes the inside of the van considerably lighter as well and matches in well with grey Cali plastic trim.
The liner is fastened in with Velcro, top and bottom, so there is no need for any alteration at all to the Cali, about three quarters of an hours job to put all the top connectors in, hang the liner up and fasten the sticky back Velcro to the ledge round the bottom. This means it could be moved from van to van if necessary.
All in all it does what it's designed to do excellently and folds up in the roof without any problems.
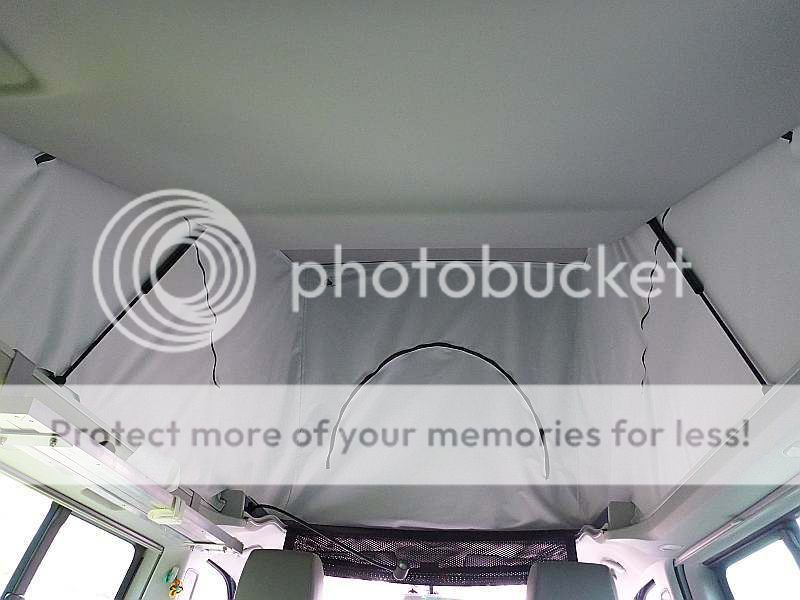
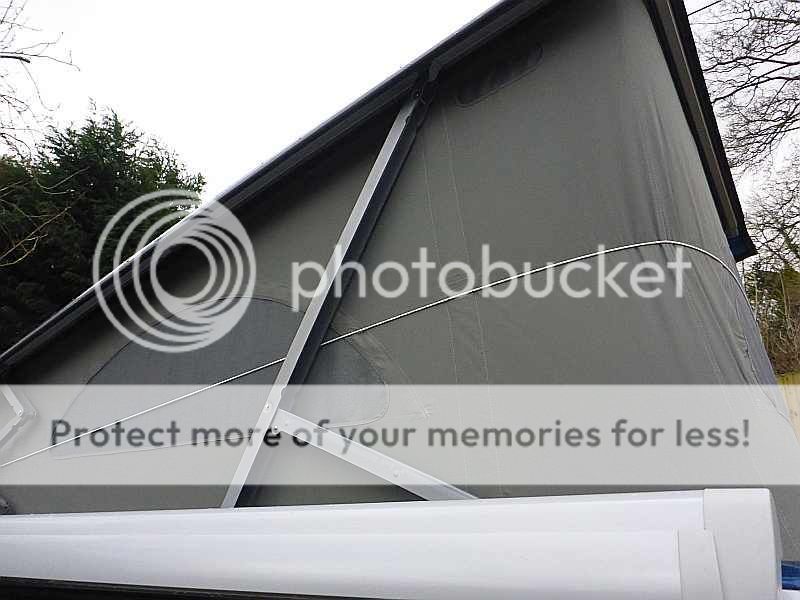
General inside view

Upstairs with the bed board down. The liner is fastened at the top rear with Plasticard sewn to the liner and pushed between the roof liner panel and the actual roof.
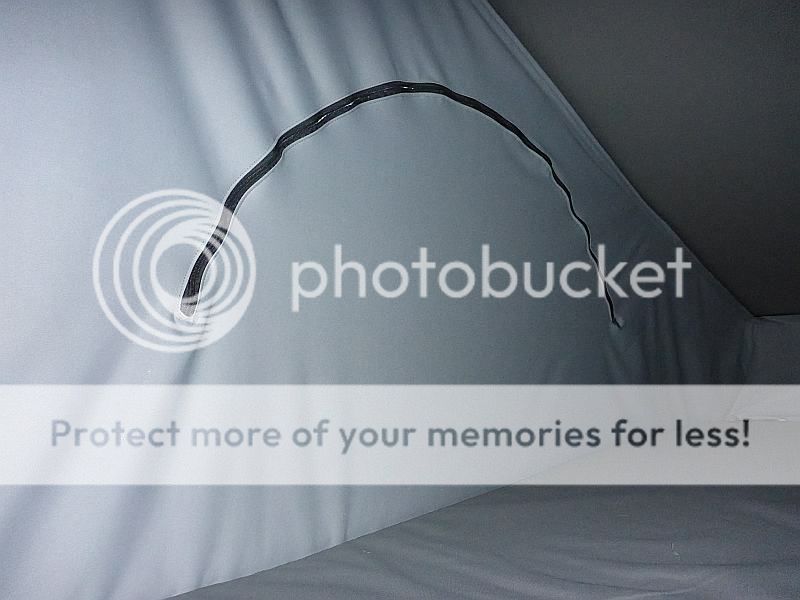
Side "window"
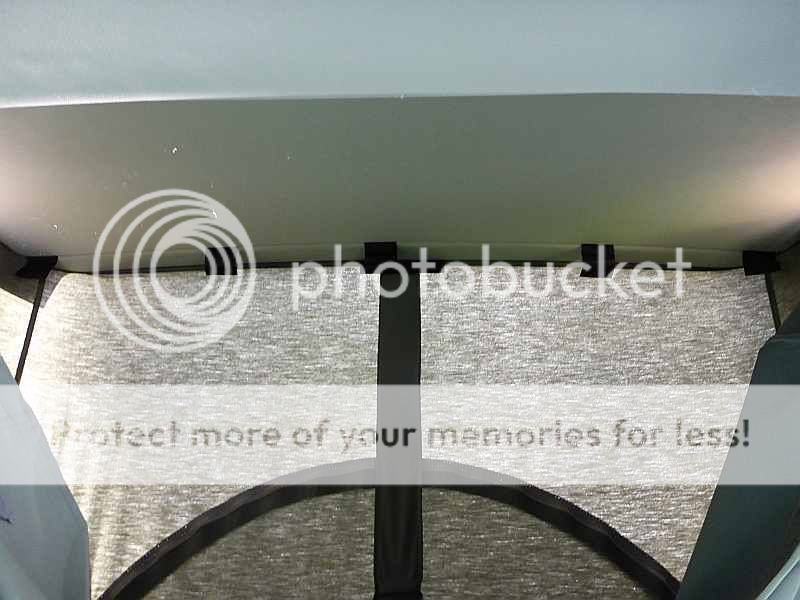
The front hangers in position. These are Plasticard again pushed between the roof liner panel and the roof again like the rear. Velcro is stitched to the card which then connects the liner.
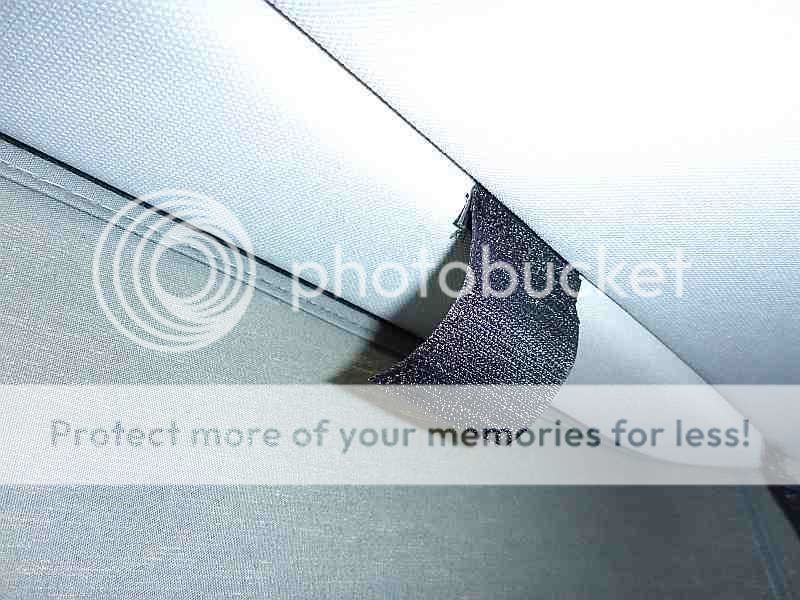
A hanger detail
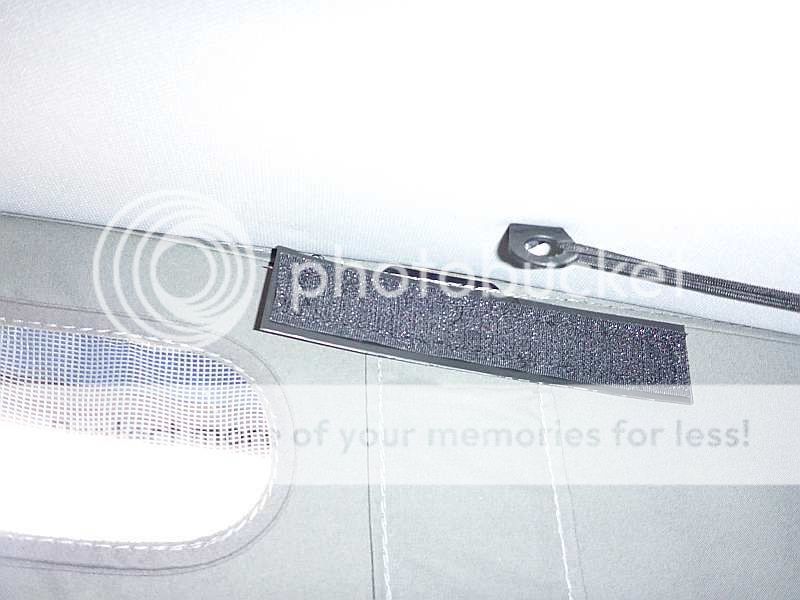
A series of Vecro hangers support the liner down the sides. These again are made from Plasticard which simply slots down into the roof fabric channels.

Use is also made of the existing roof eyelets. Elastic stitched to the liner is threaded through the rear one, then the front and connected back to the rear one with a hook. Turning he rear eyelet round pulls the liner closer in to the side.

Bottom detail at the sides where the liner is notched out to clear the struts. This also shows how the liner is attached at the bottom with the sticky backed Velcro.
I would say that the bungy for pulling the fabric in when the roof is closed is essential to ensure that the canvas and the liner are pulled in safely when the roof is closed. Without this I could see that the liner may bunch up in places and possibly push the canvas outwards trapping it in the pantograph supports.
I hope this gives a reasonably clear indication of how the liner looks and works.
I'm sure Nick at Comfortz will be able to help out with any queries that may arise.
We didn't put the external topper on as the idea was to test the new internal liner and see how it performed.
As usual in the Lakes in mid February the weather wasn't good. Friday night we had a mixture of rain, sleet and snow, very heavy at times. Saturday night it pretty much rained all night and the wind also got up blowing the rain sideways into the roof.
Pleased to say the inside of the roof stayed bone dry all weekend with the liner in. On Sunday morning I opened one of the side "windows" in the liner and felt the inside of the roof canvas. This was fairly damp and I'm sure that without the liner the mattress would also have got wet where it touched the roof canvas sides.
We normally sleep upstairs but as it was around freezing we decided to stay downstairs but left the bed platform raised to see what effect the liner had on retaining heat. I wasn't really expecting it to do much as after all it's not designed to be a thermal barrier. However it really made a difference as it virtually cuts out any drafts. A bit of air still comes in round the top of the liner as it's impossible to seal it completely around the top so we still had some ventilation. Normally in these conditions we would definitely have had the bed board down and the slats closed up.
The internal light grey colour makes the inside of the van considerably lighter as well and matches in well with grey Cali plastic trim.
The liner is fastened in with Velcro, top and bottom, so there is no need for any alteration at all to the Cali, about three quarters of an hours job to put all the top connectors in, hang the liner up and fasten the sticky back Velcro to the ledge round the bottom. This means it could be moved from van to van if necessary.
All in all it does what it's designed to do excellently and folds up in the roof without any problems.

General inside view

Upstairs with the bed board down. The liner is fastened at the top rear with Plasticard sewn to the liner and pushed between the roof liner panel and the actual roof.

Side "window"

The front hangers in position. These are Plasticard again pushed between the roof liner panel and the roof again like the rear. Velcro is stitched to the card which then connects the liner.

A hanger detail

A series of Vecro hangers support the liner down the sides. These again are made from Plasticard which simply slots down into the roof fabric channels.

Use is also made of the existing roof eyelets. Elastic stitched to the liner is threaded through the rear one, then the front and connected back to the rear one with a hook. Turning he rear eyelet round pulls the liner closer in to the side.

Bottom detail at the sides where the liner is notched out to clear the struts. This also shows how the liner is attached at the bottom with the sticky backed Velcro.

I would say that the bungy for pulling the fabric in when the roof is closed is essential to ensure that the canvas and the liner are pulled in safely when the roof is closed. Without this I could see that the liner may bunch up in places and possibly push the canvas outwards trapping it in the pantograph supports.
I hope this gives a reasonably clear indication of how the liner looks and works.
I'm sure Nick at Comfortz will be able to help out with any queries that may arise.
Martin
Administrator
Admin/Founder
looks brilliant, well done Nick
comfortz
VIP Member
VIP Trade Partner
- Messages
- 565
Thanks guys!
Yes I'm very excited about this product seeing the fit on Brian's van I have to say it looked fab!
We will extend this one out to the beach - so volunteers will be required at some point - The size and fittings will be different.
Brian - quick question - would you like a job? Head of R&D or PR perhaps?
Seriously though that's a great review, thank you!, am I ok to copy the pictures for the website?
We're busy now refining the manufacturing process and putting a few in stock so they should be for sale shortly - I'll update the forum when I've added them to the website.
Cheers all,
Nick
Yes I'm very excited about this product
seeing the fit on Brian's van I have to say it looked fab!We will extend this one out to the beach - so volunteers will be required at some point - The size and fittings will be different.
Brian - quick question - would you like a job? Head of R&D or PR perhaps?
Seriously though that's a great review, thank you!, am I ok to copy the pictures for the website?
We're busy now refining the manufacturing process and putting a few in stock so they should be for sale shortly - I'll update the forum when I've added them to the website.
Cheers all,
Nick
comfortz
VIP Member
VIP Trade Partner
- Messages
- 565
Oh, I meant to say we're calling this one the "Cali-Cozy" Inspired by Brian's initial feedback when he first fitted it
Similar threads
- Replies
- 15
- Views
- 2K
VW California Club


About us
The VW California Club is the worlds largest resource for all owners and enthusiasts of VW California campervans.


