Buy all your VW California Accessories at the Club Shop Visit Shop

My New Beach

VanBlancLives

VanBlancLives

Van Sables
VIP Member
Messages
69
Location
Alyth in the Heart of Scotland
Vehicle
T6.1 Beach camper 150
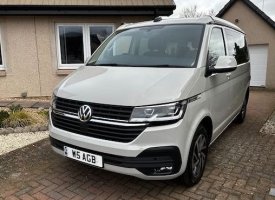
I collected our new beach last week and after a T5, T6 and Crafter its like driving an old friend. We sold our Crafter back in October but 2 weeks ago my other half decided that we couldn't live without a day van. That idea rapidly morphed into a Beach because apparently a day van had to have a pop up roof, somewhere to brew and space. So now we are back to campervanning and planning next years trip to the Nordkapp.

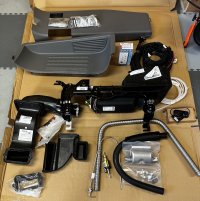
This is the first California we have had our first campervan being a T5.1 that was converted for us and our T6 and New Crafter that we converted. This Beach was new in December - a dealer pre registration. The spec is good but missing a few things that I would have ticked if I was prepared to wait 2 years. I will correct them as best I can starting with a night heater using a Planar with OEM installation parts. The next really annoying feature of the Discover Media head unit is not being able to add station logos - I consider that a safety issue not being able to see which station I am selecting - perhaps I will have to learn to make use of the voice activation. Coming from a Crafter the dash board storage is limited and the hard plastic annoying as things slide around. I have solved the phone charging with a mag charger stuck on the side of the shifter housing and plugged into a USB adapter in the 12V socket.

So now we are back to buying again all of those campervaning accoutrements that we have previously offloaded or need replacing to suit a more minimalist style. There are just a few things that we still have like our original Snugpaks 4 seasons that are still going strong 35 years later or our RidgeMonkey that is a culinary necessity. Cooking on one burner won't be so much of a problem but our Cob has to go simply because won't have space to cart coals around for regular use so I have ordered a Cadac Safari Chef as a more regularly useable item.IMG_6486.jpeg
 
I collected our new beach last week and after a T5, T6 and Crafter its like driving an old friend. We sold our Crafter back in October but 2 weeks ago my other half decided that we couldn't live without a day van. That idea rapidly morphed into a Beach because apparently a day van had to have a pop up roof, somewhere to brew and space. So now we are back to campervanning and planning next years trip to the Nordkapp.

This is the first California we have had our first campervan being a T5.1 that was converted for us and our T6 and New Crafter that we converted. This Beach was new in December - a dealer pre registration. The spec is good but missing a few things that I would have ticked if I was prepared to wait 2 years. I will correct them as best I can starting with a night heater using a Planar with OEM installation parts. The next really annoying feature of the Discover Media head unit is not being able to add station logos - I consider that a safety issue not being able to see which station I am selecting - perhaps I will have to learn to make use of the voice activation. Coming from a Crafter the dash board storage is limited and the hard plastic annoying as things slide around. I have solved the phone charging with a mag charger stuck on the side of the shifter housing and plugged into a USB adapter in the 12V socket.

So now we are back to buying again all of those campervaning accoutrements that we have previously offloaded or need replacing to suit a more minimalist style. There are just a few things that we still have like our original Snugpaks 4 seasons that are still going strong 35 years later or our RidgeMonkey that is a culinary necessity. Cooking on one burner won't be so much of a problem but our Cob has to go simply because won't have space to cart coals around for regular use so I have ordered a Cadac Safari Chef as a more regularly useable item.View attachment 104922
Are you sure you can’t upload the radio station logos? In our Skoda (similar head unit) I uploaded dozens last week. Found a site via Google with all the UK radio station logos that were downloadable. Just saved them on a usb stick and popped that in the usb in the head unit you can then from radio station settings delete and add logos to individual stations. Worth a look:thumb
 
Are you sure you can’t upload the radio station logos? In our Skoda (similar head unit) I uploaded dozens last week. Found a site via Google with all the UK radio station logos that were downloadable. Just saved them on a usb stick and popped that in the usb in the head unit you can then from radio station settings delete and add logos to individual stations. Worth a look:thumb
Yes I am sure. I have been able to on all my other VWs but it’s a known shortcoming of Discovery Media head units with USB C.
 
Yes I am sure. I have been able to on all my other VWs but it’s a known shortcoming of Discovery Media head units with USB C.
OK, fair enough, Good luck with your heater install, looks like a few cups of tea will be required for that one:)
 
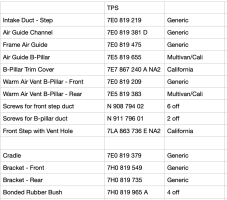
Im going to do the same, do you have the part number for the b pillar plastic and the step one? i already have everything else but would prefer not to cut the original ones.
Here is the complete parts list. It is California specific checked to the VIN from a new T6.1 Beach the dealer had with a Parking Heater.Screenshot 2023-02-19 at 11.21.16.png
 
Don’t forget to do some “how to” photos and a write up :thumb to help others
Don't worry I will. I decided to bite the bullet on Sunday as the weather didn't look too bad for the week ahead. However I didn't factor how much older I am now since I last did this on the drive in winter so perhaps it will more than just a few days.:rolleyes:
 
Here is a first instalment of my heater install - the inlet duct.

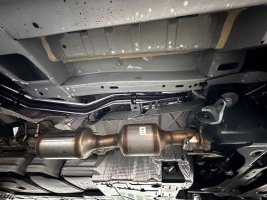
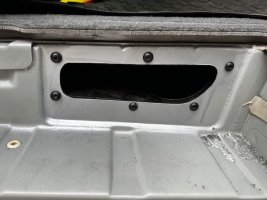
This is the space where the heater goes with the undertray removed. A word to the wise the spring clip retainers are supposed to unscrew but don‘t be fooled and buy a packet of them off eBay. if you look closely you can see I have put the 6no M6 hex rivnuts in. I didn’t have the van high enough for the tongs and rivnut pliers with M6 hurt my poor old hands.

IMG_6508.jpeg

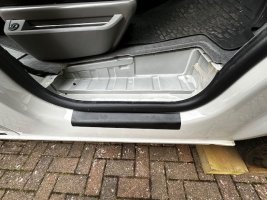
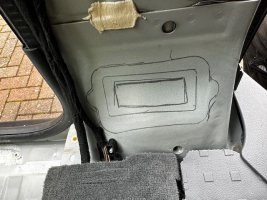
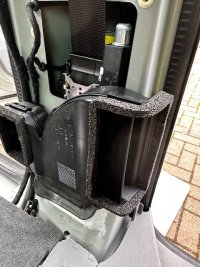
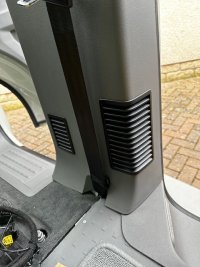
Next job is to first remove the B post trim and then the step. You can see where the vent needs cutting into the side of the step.

IMG_6509.jpeg

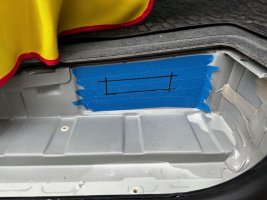
Mark and cut out a rectangle that will be within the vent.

IMG_6511.jpeg

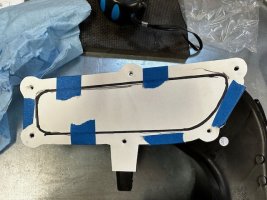
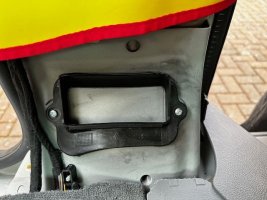
Next make a template of the vent and offer the vent in place while it is fitted to the cradle and brackets so that you can also mark the rectangle on to the template. As well as drawing it I poked a scribe into each corner.
IMG_6512.jpeg


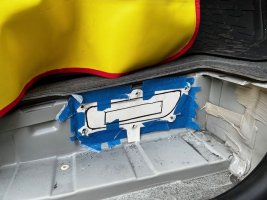
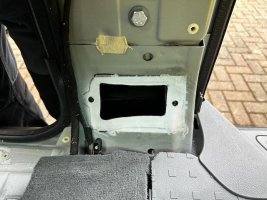
The template can now go over the rectangle and you can cut the shape and drill the holes with your weapons of choice. I prefer a cordless 110mm angle grinder with a 1mm disk and an air saw for the curves.

IMG_6513.jpeg IMG_6517.jpeg
 
Last edited:
My heater install - the heater and cradle.

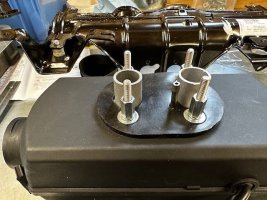
I realised early on that a 2KW heater of whatever make is c40mm narrower that an OE 4kw Webasto so it’s not going to line up. The solution with my Autoterm was to take the fixing studs out and replace them with ones that protrude 35mm or so. I had some 50mm SS bolts so I cut the heads off and with some thread lock screwed them 10mm into the plate. I then used some 20mm long thread joiners with washers to give me the correct offset.

IMG_6515.jpeg

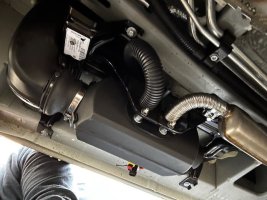
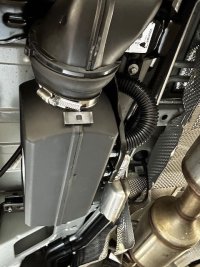
The cradle could now be fitted with the air intake cable tied to the top of it. Once in place I fitted the heater itself after clamping the rubber diesel connector and slipping the exhaust and intake clamps. I left the original boot on the inlet duct and cut a 20mm ring off a silicone tube to make it fit on to the heater snuggly.

IMG_6518.jpeg IMG_6520.jpeg


This afternoon I took the seats and bases out and pulled a few wires. now I have a clear view of the B pillar ready for tomorrow.
 
Last edited:
My heater install - the B pillar duct

So today I braved the biting cold and got on with the job. I started by offering the lower trim up with Y duct and frame inside and white tack on the frame to keep it place when I took the trim away so that I could mark it. That almost worked so I adjusted the frame slightly and held it in place with a couple of self tappers.

IMG_6525.jpeg IMG_6526.jpeg

With the Y duct attached I offered the trim up to see how much if any adjustment was needed and then went for it.

IMG_6527.jpeg

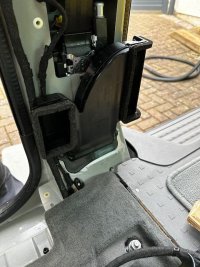
Once it was tidied up and a coat of galvanising spray I could pop the rear duct up through the pillar, fit the longer silicone adapter between the heater and the duct and fit the Y duct and finally refit the trim.

IMG_6528.jpeg IMG_6529.jpeg IMG_6548.jpeg

Tomorrow, and probably the weekend, I will do the fuel line and the wiring.
 
Last edited:
I have a solution to todays frustrations

Today I fitted the fuel pump, removed all 5he undetrays and lowered the back of the tank only to find another problem. I was going to use a fuel line connector on the spare spigot only to find that VW have used it for the aux heater. So i thought I’d connect to that line before the pump but I can’t get to it above the adblue tank and the aux heater.

I am contemplating getting the sender out and fitting the supplied stand pipe which might mean dropping the tank an£ so emptying the adblue tank or I may just have enough odds and sods to cobble both connections into the one connector. Meanwhile more
 
The "solution" and "more" above were wine glass emoticons but it looks like this forum does support them.

Anyhow lying under the van this morning I realised a the answer so another part on order.
 
Thanks so much for sharing the heater install, i will have to do the same soon
 
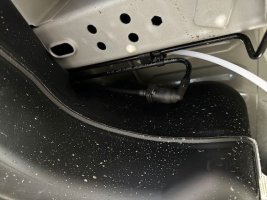
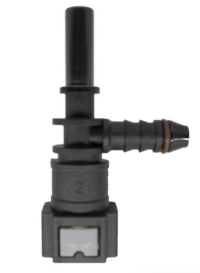
We now have heating! I found the solution to the fuel connection was an inline connector at the rear of the tank for the aux coolant heater that needed a tee connection added.
IMG_6547.jpeg Screenshot 2023-02-25 at 13.09.46.png
 
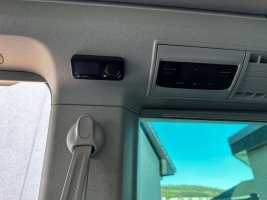
The control I mounted on the trim above the C pillar next to the AC control. getting the cable there is easy up the B pillar and through the trim over the door. I had to extend the cable and wrapped it in carbon mesh sleeping so that it won't rattle.

IMG_6549.jpeg
 
What tank? the fuel tank or near the adblue tank? do i have to drop either tank?
Assuming you have the now std aux coolant heater then at the back of the main fuel tank. You have to remove the undertray and you may want to undo the tank and lower a little so you can feed the line through. On the side of the chassis rail above the tank there are clips ready for another fuel line.
 
Assuming you have the now std aux coolant heater then at the back of the main fuel tank. You have to remove the undertray and you may want to undo the tank and lower a little so you can feed the line through. On the side of the chassis rail above the tank there are clips ready for another fuel line.
Note: You may need to purge that new fuel line of air, before firing the new heater heater up.

when
 
Back
Top