Buy all your VW California Accessories at the Club Shop Visit Shop

Replacing Halls Sensors myself (hopefully)

Lambeth Cali

Lambeth Cali

Top Poster
VIP Member
Messages
1,526
Location
London
Vehicle
T5 SE 174
Hi
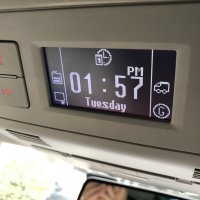
I‘ve been having trouble with my roof. Actually it goes up and down fine but the control unit seems to think it’s up all the time. This has happened intermittently before but having replaced my control unit last summer as the screen finally died, the brand new one now chimes to alert me that the roof is open. Having read the various threads I think I try and fix this.
I have ordered 4x the BMW Hall sensors and am waiting for them to arrive. I’ve watched an amusing video on YouTube of a chap trying to fix them and a loom on BMW.
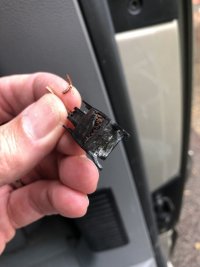
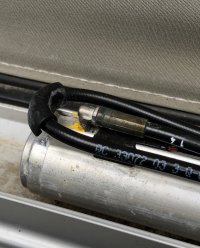
Today I had a quick look and I think perhaps only one is broken as it appeared swollen as if rust had taken hold.
DE7E8355-E904-4E5B-AD93-D72CACEEE1F3.jpeg
This appeared to have a 3 written on it. I was surprised by how small they are. I might just replace this one first and see if that fixes the problem.
I have quite a lot of question having now taken a look. My main concern is whether I need to disconnect the batteries to wire in the new sensor?
Another is, my roof makes 3 distinct sounds when it’s shutting. Is one of those this lock bolting under here? If so I’m guessing then that as long as hear those 3 sounds the roof is safely shut. Locked effectively? I’ve never seen anyone mention that before.
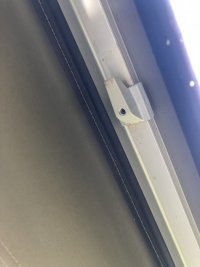
D79F1576-4F5B-4463-94AA-199351B6FEF2.jpeg
95172A54-2BA9-4B68-BE7F-78A6F338201C.jpeg
 
My California is a 2008 T5 SE 174 Auto 2wd. I’ve owned it since 2009.
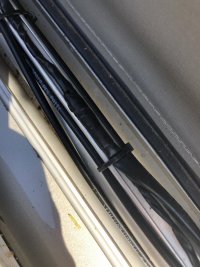
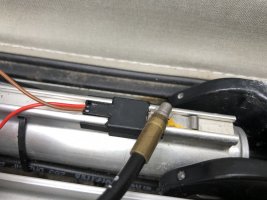
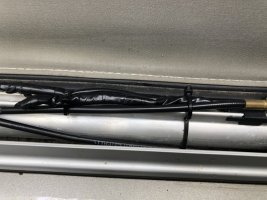
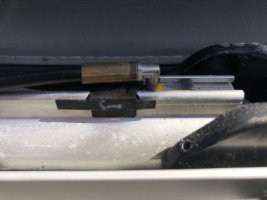
I was surprised that the wiring of the sensors is just wrapped around electrical wire. This rests on top of the hydraulic ram under the plastic. I presume this is waterproof enough.
F0E00CCC-DBC0-494F-9BE7-B49E91DE7198.jpeg
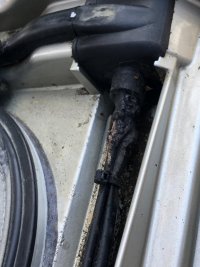
The roof appeared to have water sat in it when we got back from France last summer and I think that probably caused the problem. It’s dry now and I’ve checked the drains. The picture is before I cleaned away the gunk.
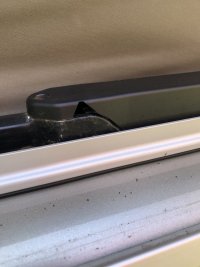
7E3BD98B-71B2-4770-A70D-22B9B67B0F6D.jpegThe plastic cover that sits over the rams has a ‘v’ shape cut out of it that you would think would let water in if roof up in a downpour. Is this required to let air in for the hydraulics? Like opening windows when lowering the roof?
5670609E-645E-41D8-A8C3-6199C7107A8E.jpeg
 
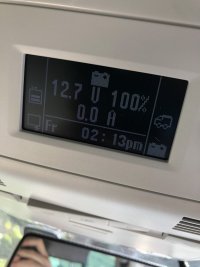
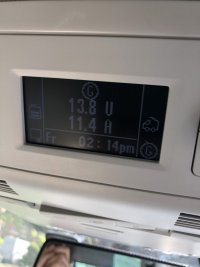
When I looked at all of this yesterday and then lowered the roof I noticed it was showing down for the first time in weeks. Had I fixed it by jiggling the wires? Nope. I started the engine and the roof showed as up again. Chimes started “Roof Open”. I turned the engine off and LCD roof symbol went back to roof down. As I removed the key this switched to roof up again.
15DB9DE9-5C90-4253-8D41-1EDE6CDCA048.jpeg
4509E397-2B55-4B6D-BBB9-C2736DF16B6D.jpeg
It was definitely removing the van key that changed this. Curious.
One of my neighbors has a 2.5 Westfalia that has just been resprayed. He’s just putting back in the entire interior with wiring fridge etc. He lent me the torx screwdriver required to remove the plastic ram cover. Our little chat encouraged me to think “I can fix this”!
Now just waiting for the Hall sensors...
 
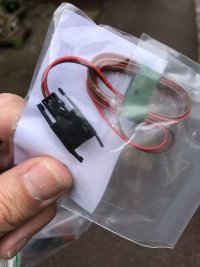
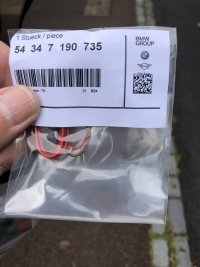
Exciting arrival, and no Brexit charges either. Hopefully I’ll only need one of the four I bought.
B67B765E-9A98-4E3D-9311-39EC7477C8E9.jpeg

86816AD6-5732-4FD2-8E8D-8B4CE8E5FC7C.jpeg
Hopefully I won’t need that Cali Hardtop I was dreaming about! I’ll post how I get on.
 
  • Like
Reactions: Loz
I may have a crack on Saturday. The question remains, shall I disconnect the batteries.
I’m minded to remove the control panel only and make sure no key in the ignition.
Looking at YouTube, Hall sensors seem to only have very small currents running through them.
 
I may have a crack on Saturday. The question remains, shall I disconnect the batteries.
I’m minded to remove the control panel only and make sure no key in the ignition.
Looking at YouTube, Hall sensors seem to only have very small currents running through them.
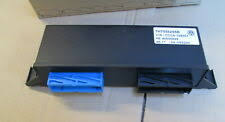
The hall sensors are powered by the Roof ECU (see pic) not the Control Panel.

1620924222133.png

My strong recommendation is to disconnect the batteries, the ECU "should" have protected outputs however inputs often have poor protection, so not worth the risk in my view. If it was a pure connector disconnect and re-connect then i would risk it, but given you will be dealing with cutting and joining wires, which could short together or short to the body.
 
Thanks RBK.
I was hoping someone would have an informed view
 
Tried this yesterday. Disconnected 3 batteries. Took out rusty sensor.
Van still beeping “Roof Open”.
Not the outcome I was hoping for.
825C2490-7880-4066-B118-47076D091536.jpeg
 
Hi If it helps i had the same isuue with roof as you i replaced all four of my roof sensors 2 months ago . And found that allthough they all looked fine the problem was solved. so obviously the rusted one is not working but my guess is that one of the other three is faulty but not visibly so. Also re issue with symbol showing open or closed i had the thing and concluded that the ecu only checks sensors when ignition is on.(As you need ignition on to raise or lower roof). I am sure you are on the right track just change all sensors.Hope this helps.
 
Tried this yesterday. Disconnected 3 batteries. Took out rusty sensor.
Van still beeping “Roof Open”.
Not the outcome I was hoping for.
View attachment 78504
The roof fully open sensors are the ones nearest the front of the van on both sides, the roof fully closed and locked ones are the rear ones. What I don't know is the logic, i.e. is the roof always "open" unless the fully closed switches are seen.

If the roof up symbol is shown on the control panel correctly when the roof is fully up, then I would start with the fully closed switches, but given most of the effort is disconnecting the batteries, taking off the covers, stripping of the harness tape , as others have said, replacing all four would give the best chance of success.
 
Last edited:
Hi If it helps i had the same isuue with roof as you i replaced all four of my roof sensors 2 months ago . And found that allthough they all looked fine the problem was solved. so obviously the rusted one is not working but my guess is that one of the other three is faulty but not visibly so. Also re issue with symbol showing open or closed i had the thing and concluded that the ecu only checks sensors when ignition is on.(As you need ignition on to raise or lower roof). I am sure you are on the right track just change all sensors.Hope this helps.
I just did the front drivers side which was visibly rusted. I had originally hoped to do all 4 but thought it a good idea to do this one.
My plan was that if that didn’t fix it I would press on with the others. My only resistance is that to be honest I found that one quite difficult. Admittedly it rained half way through. Getting them out and then new one in is very difficult. Does anyone have a knack of this? The hydraulic tube above is in the way.
01346655-878C-48ED-BFE9-85D0894DF414.jpeg
Even twisting them out of the way it is difficult to get at them. Am I doing something wrong?
Also to end with a tidy job you don’t want too much excess wire but that makes it difficult to join them. It’s a bit of a trade off. Did you just cable tie up the excess? I’m no electrician.
3C681177-2B2C-487A-90AD-B735752C544E.jpegFinally I slightly busted one of my 4 and so used another. That means I have 2 good ones and one where the plastic catches are broken but actually I can’t see them ever getting out of their position once in so I reckon that one will still work.
You have given me the shove to have a go at the others.
I don’t have many other choices. I’m off away in 2 weeks.
Many thanks for help.
 
I just did the front drivers side which was visibly rusted. I had originally hoped to do all 4 but thought it a good idea to do this one.
My plan was that if that didn’t fix it I would press on with the others. My only resistance is that to be honest I found that one quite difficult. Admittedly it rained half way through. Getting them out and then new one in is very difficult. Does anyone have a knack of this? The hydraulic tube above is in the way.
View attachment 78531
Even twisting them out of the way it is difficult to get at them. Am I doing something wrong?
Also to end with a tidy job you don’t want too much excess wire but that makes it difficult to join them. It’s a bit of a trade off. Did you just cable tie up the excess? I’m no electrician.
View attachment 78532Finally I slightly busted one of my 4 and so used another. That means I have 2 good ones and one where the plastic catches are broken but actually I can’t see them ever getting out of their position once in so I reckon that one will still work.
You have given me the shove to have a go at the others.
I don’t have many other choices. I’m off away in 2 weeks.
Many thanks for help.
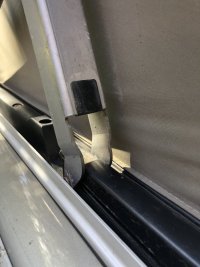
So, I haven't done this my self, but with the sensors, the little legs clip into the channel. You might find it helpful to use something like a cocktail stick under each one of the legs to hold them out of the channel, rather than trying to wrestle them out at once. I would say if you can get enough slack on the hoses, they will rotate 180 out of the way.

In terms of the wire length, there is no issue cutting the sensor wires to the required length, i would say don't go shorter than 150-200mm, for no other reason than to keep the joint away from the sensor, if you do it very close it will just be a pain. All you need to do it cut the wire and strip off some of the insulation to expose the wire and then join as you did before.
I was nervous about twisting the hoses. Why do they have the blob of paint on them? That implied they shouldn’t be twisted. The one at the back is pretty hard to get at!
FF8596AF-88C2-4D29-805F-8FEF6E76B0E1.jpeg
Looks like Tuesday for another go if rain holds off.
 
I rotated hydraulic hose as far as possible. As you did then removed two of retaining catches from one side of sensor then slid in horizontaly as i also couldnt get them in from the top without removing hydraulic pipe which i didnt want to do. They are such a tight fit in slot i dont think they would ever come out.
 
I was nervous about twisting the hoses. Why do they have the blob of paint on them? That implied they shouldn’t be twisted. The one at the back is pretty hard to get at!
View attachment 78541
Looks like Tuesday for another go if rain holds off.
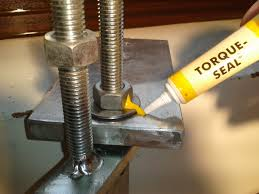
The yellow paint marks are likely to be overcheck marks at the factory, one person will install the pipes and then push the clip in place, someone else will double check and then mark with paint pen to confirm they have done the 2nd check. I guess the prospect of the brand new van and canvas being covered in oil has meant this is deemed a critical joint. (or they have put in an extra check, after someone forgot to push the clip home). I have used stuff called torque seal before, which does break if rotated, but that tends to be thicker and applied in a straight line.

1621184913271.png
 
Well if you’ve done it at least I know it possible.
 
The yellow paint marks are likely to be overcheck marks at the factory, one person will install the pipes and then push the clip in place, someone else will double check and then mark with paint pen to confirm they have done the 2nd check. I guess the prospect of the brand new van and canvas being covered in oil has meant this is deemed a critical joint. (or they have put in an extra check, after someone forgot to push the clip home). I have used stuff called torque seal before, which does break if rotated, but that tends to be thicker and applied in a straight line.

View attachment 78549
I noticed the seat bolts have a similar paint mark on them. Useful when putting them back.
 
I fixed it!!
Jesus Mary and Joseph and the wee donkey, I’m so happy.
It took me 6 hours on Saturday to replace the first one. Well it did rain and I had to wait an hour to borrow a big spline socket for the passenger seat. But today I replaced the other 3 in 3 hours. I charged it up for an hour to be sure, and it worked first time. No error codes this time either. It chucked out 7001 on Saturday.
Thanks to you all for your encouragement and help.
I’ve taken about 50 pictures so I’ll write up what I did next week. Total cost €100 for 4 hall sensors, £7 for a TT25 torx screwdriver, £11.50 for a spline socket set and £11 for a wire stripping tool. We’ve had Delphine for 12 years and great to be able to fix stuff. This Forum is just brilliant. Thanks again!
Off camping in two weeks!
2424A5CB-F87F-4245-819A-A48AA3315E88.jpeg
 
I fixed it!!
Jesus Mary and Joseph and the wee donkey, I’m so happy.
It took me 6 hours on Saturday to replace the first one. Well it did rain and I had to wait an hour to borrow a big spline socket for the passenger seat. But today I replaced the other 3 in 3 hours. I charged it up for an hour to be sure, and it worked first time. No error codes this time either. It chucked out 7001 on Saturday.
Thanks to you all for your encouragement and help.
I’ve taken about 50 pictures so I’ll write up what I did next week. Total cost €100 for 4 hall sensors, £7 for a TT25 torx screwdriver, £11.50 for a spline socket set and £11 for a wire stripping tool. We’ve had Delphine for 12 years and great to be able to fix stuff. This Forum is just brilliant. Thanks again!
Off camping in two weeks!
View attachment 78622
Well done.
If/when you write it up could I suggest a new thread title “ How to replace roof sensors “ or something similar so the Forum search engine can find it easily.
Once again, Well Done.:cheers
 
This is hugely helpful. Well done. I hope it doesn't become necessary but should it happen at least we know it is feasible. Thank you.
 
Well done, were all the old sensors rusty?
 

Similar threads

Lambeth Cali
Replies
6
Views
1K
flying banana
flying banana
J
Replies
48
Views
8K
two-saabs
two-saabs
Lambeth Cali
Replies
41
Views
7K
WelshGas
WelshGas
soulstyledevon
Replies
40
Views
5K
leightonjthomas
leightonjthomas
Back
Top