Buy all your VW California Accessories at the Club Shop Visit Shop

Side Panels for Awning

T

Topcatbuggy

VIP Member
Messages
32
Has anyone made their own side panels for their awning? We're thinking of giving it a go..........does anyone have any tips?
 
Hi, I have also thought about this but don't have Cali yet for sizes. Heavy duty open ended zips in any size seem quite readily available online for attaching sides over the roll out awning rails, I think Velcro all the way along would be a nuisance. The awning beading can also be bought easily for the front panel. I like the look of the panels from the Cali's on the farm pic gallery, link below. I think it would be good to have something that can be sloped out or brought straight down when req'd but would need a way of reducing length or two rows of pegging positions. Were you thinking something more substantial for sleeping in etc or, like me, just light and easily for putting on when needed?

gallery/image_page.php?album_id=131&image_id=902

Does anyone know if the panels pictured were made as one off or readily available to buy?
 
They look very similar to the Brandrup ones that we have.

Simon
 
Yeap your right simon they are brandrup Awning panels that we have :thumb

very strong and well made they reflect the heat and sun as well as being waterproof and can take quite a beating from the english weather when it takes a turn for the worse as i found out ;)
 
Thanks for the tips......I do think that the brandrup ones are the way forward. Homemade ones just won't look the same. It's just that the other half gets very twitchy when I mention that they're £170ish per panel! I think I'll just have to do what I normally do when he's trying to be 'careful' (yes tight!)..........just buy them anyway! :bananadance
 
Topcatbuggy said:
Thanks for the tips......I do think that the brandrup ones are the way forward. Homemade ones just won't look the same. It's just that the other half gets very twitchy when I mention that they're £170ish per panel! I think I'll just have to do what I normally do when he's trying to be 'careful' (yes tight!)..........just buy them anyway! :bananadance

Our sponsors SMG will give you a membership discount and post them if needed..
The comfortz ones are very good as well ,but give you a different look and use ... they will create an extra enclosed room if needed with a door etc being weatherproof and the brandrup will give you the screening and more of an airy feel ,but still have some privacy and wind protection .
 
Dig around in the photos. Someone - apologies to them that I can't remember who - posted some great home made side panels. You may get some clues there.
 
As well as a Cali we own a caravan and over the years we have accumulated awnings. The one thing about all the awnings, both full and porch, is that we can sit in the awning in inclement weather and watch the world go by on both the front and sides ie; we still feel as if we are on a camp-site and part of our surroundings.

Why does nobody do sides for a Cali awning that zip or connect together, to reduce draughts, and have windows big enough to be able to still see out when sitting down? Fiammi do it for their awnings, it's almost as if manufacturers feel you should be ashamed to be sitting in an awning.

The Comfortz Leisure awning window, on the front only, seems far too high to be of any use than to give a degree of light or to look out when standing up. And do the front and sides connect together to complete a room?
 
We like the idea of the windows being higher up as it gives you more privacy, we would only stay inside the awning if we really had to as we prefer to be outside the van chatting and playing games
 
Topcatbuggy said:
Has anyone made their own side panels for their awning? We're thinking of giving it a go..........does anyone have any tips?


Hi I made my own side panel . I bought the canvas from eBay which was the same spec as my comforts Cali topper. Sewed a hem all the way round and then using an eyelet kit put 4 eyes on the top and 4 eyes on the bottom. Using ball ended bungies threaded through the eyelet then stretched over the awning crossmember with the loop then hooked over the ball means a pretty robust fixing. Ball ended bungies again threaded through the bottom eyelets and pegged out did the job.
Used this for 2 weeks in Italy last year and cost £20 .
I was going to make a front panel utilising the Fiamma awning rail eyelets ( think they sell them in the shop on here) to attach it and using exactly the same method of eyelets but using the Fiamma hooks at the top into the eyelets and bungies at the bottom. I could even put an eyelet at either side to attach to the awning legs with bungies.

It's never going to be as good as comforts or brandrup but for under £50 for 2 sides I don't mind getting tree sap / bird lime or any other nasties on it.

John
 
Sounds great and very good value for money, can you post an image?
Thanks
 
This is it I place and unfolded

[album]1352[/album]
[album]1354[/album]

It's really difficult to take a good picture but is just a rectangle with eyelets top and bottom.

I thought T-bar bungies would have been better than ball ends but the balls work just fine and as I had them already it was just as well.
If you have or have access to a sewing machine and a hammer for the eyelet kit, this is easy to do..

Regards

John
 
This looks great. Can you tell me what search you put in on eBay for the fabric please? It looks as if I may be getting the sewing machine out!
 
I put in 600 denier polyester into eBay.

The place I got it from no longer has it but there are others on there.

John
 
colin said:
we have got the Comfortz ones with the opening door, i think they sit better than the brandrup ones to make it in to a proper room
http://www.comfortzleisure.co.uk/#/awni ... 4575231836
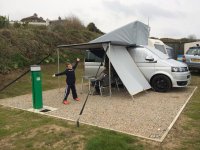
I've just bought the Comfortz set, very nice quality but one panel has to be returned due to a manufacturing error but the chap on the phone says no problem to send me a replacement and collect faulty panel so all is good (fingers crossed)
 
Material purchased from eBay, enough for 2 panels (£23.00) so watch this space!
It will very much depend on my skills with the sewing machine though :D
 
I picked up a single Brandrup panel brand new for a bargain price on ebay.

used it for the first time last weekend and was very impressed with it, suits the colour of my van perfect.

I was initially dubious about the way it curves out at the bottom but it works really well and served as a good wind break and gave a spacious feel.. i'll be on the look out for the other panels in the future!

IMG_8360_zps84ba34d8.jpg
 
Topcatbuggy said:
Material purchased from eBay, enough for 2 panels (£23.00) so watch this space!
It will very much depend on my skills with the sewing machine though :D

That sounds great, looking forward to seeing them. Having seen home made cushions, seat covers, porta potti disguises, roof toppers etc, but then struggle to find them later in threads, maybe starting an 'I made this for my Cali . . .' thread would be a good idea as a central place to look for inspiration? It wouldn't need to be limited to just those who can sew. I saw a wonderful innovation for an 'office chair' a while back.
 
Looby said:
Topcatbuggy said:
Material purchased from eBay, enough for 2 panels (£23.00) so watch this space!
It will very much depend on my skills with the sewing machine though :D

That sounds great, looking forward to seeing them. Having seen home made cushions, seat covers, porta potti disguises, roof toppers etc, but then struggle to find them later in threads, maybe starting an 'I made this for my Cali . . .' thread would be a good idea as a central place to look for inspiration? It wouldn't need to be limited to just those who can sew. I saw a wonderful innovation for an 'office chair' a while back.

Or DIY in the accessories section may work.
 
Calincolnshire said:
This is it I place and unfolded

[album]1352[/album]
[album]1354[/album]

It's really difficult to take a good picture but is just a rectangle with eyelets top and bottom.

I thought T-bar bungies would have been better than ball ends but the balls work just fine and as I had them already it was just as well.
If you have or have access to a sewing machine and a hammer for the eyelet kit, this is easy to do..

Regards

John

Very Cool John :thumb if you fancy a career change give me a call
 
Hope the link works for you to have a peep at an altered gazebo we were given !! managed to keep the windows, bought a sturdy zip to make the door, and added Velcro straps so it can all be rolled up. the side fit around the awning bars again with Velcro and the front slides into the awning channel....

:D

https://www.facebook.com/photo.php?fbid ... 661&type=1
 
Hubby got his own way & i have to admit it, he was right to insist we made our own panels so thank you everyone for the tips. We bought the material from ebay & the bunge cord & eyelets from Go Outdoors. The cost for 2 panels in total was under£40. We've only made one so far but are delighted with our handywork. I want to put a photo on but for some reason dont seem to be able to choose from 'my gallery' on my ipad........does anyone know what i'm doing wrong? :oops:
 

Similar threads

Back
Top