MattBW
Here to help
Super Poster
Lifetime VIP Member
I had an accident a few years ago. A bungee wasn't attached to the fridge properly in the beach. On a tight bend the fridge hit the table in the sliding door pretty hard, leaving a permanent cracked indent in it.
I posted a few threads asking how to fix it, but I never got around to actually sorting it. At the Denmark meet last year I had some great advice from Bob as a professional french polisher on how he would fix such a problem. My plan was to add a vinyl topper to the table so I could fill the hole, he gave me a great tip for getting a smooth surface ready for that vinyl.
 First we cleaned the table top with white spirit.
As advised I used a car body filler. Specifically I used Isopon P38 body filler to fill the dent (£6.99 for 4 packets). I used only a tiny part of 1 small packet, added the hardener and applied to the hole, smoothing the surface and ensuring there was enough inside. Within 20-30 minutes it was cured (see pic of unsanded filler) fully hardened and ready to sand. I used a fine sanding block to ensure a completely flat surface. It took probably only a minute or two for such a small hole to be completely smooth so that I couldn't feel the difference with my finger. It's important to note the sanding also took the texture off the table surface in that area, but as it would be covered I wasn't worried and it wasn't obvious to the eye.
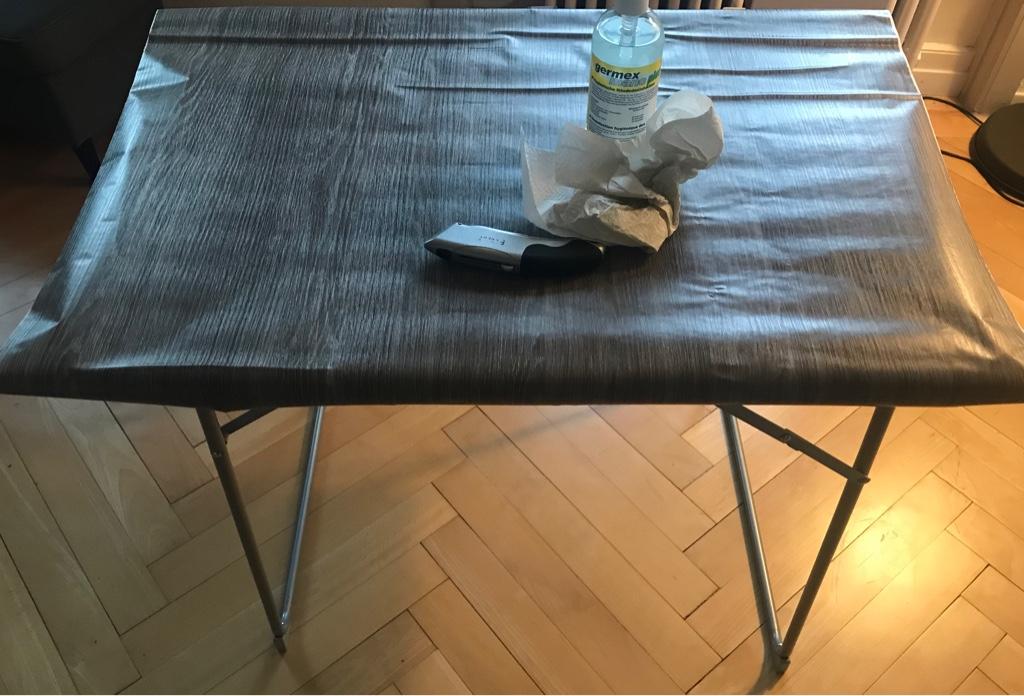
Then we added the vinyl wrap, this was ordered to a size to ensure the whole of the table was covered. The door table measures 89cm x 51cm, so I just made sure it was slightly longer and wider to give room to trim. My vinyl was ordered from Pixers.
 It was relatively simple, we measured the table and accounted for the centre point at each end, the rear has a small gap in the trim in the centre, we also marked with a pencil on front edge. As we had a wood panel pattern it was relatively easy to line it up although perfection wasn't possible as the image wasnt perfectly symmetrical.
Application is very much like applying a decal, we peeled back the very end and folded over the backing, then stuck the first of the edge down. From there we used a Felt Edged Squeegee to ensure it was perfectly flat with no air bubbles. We then gradually peeled the backing off underneath, and squeegeed it as we went ensuring a good finish with no air bubbles. This worked better with two people.
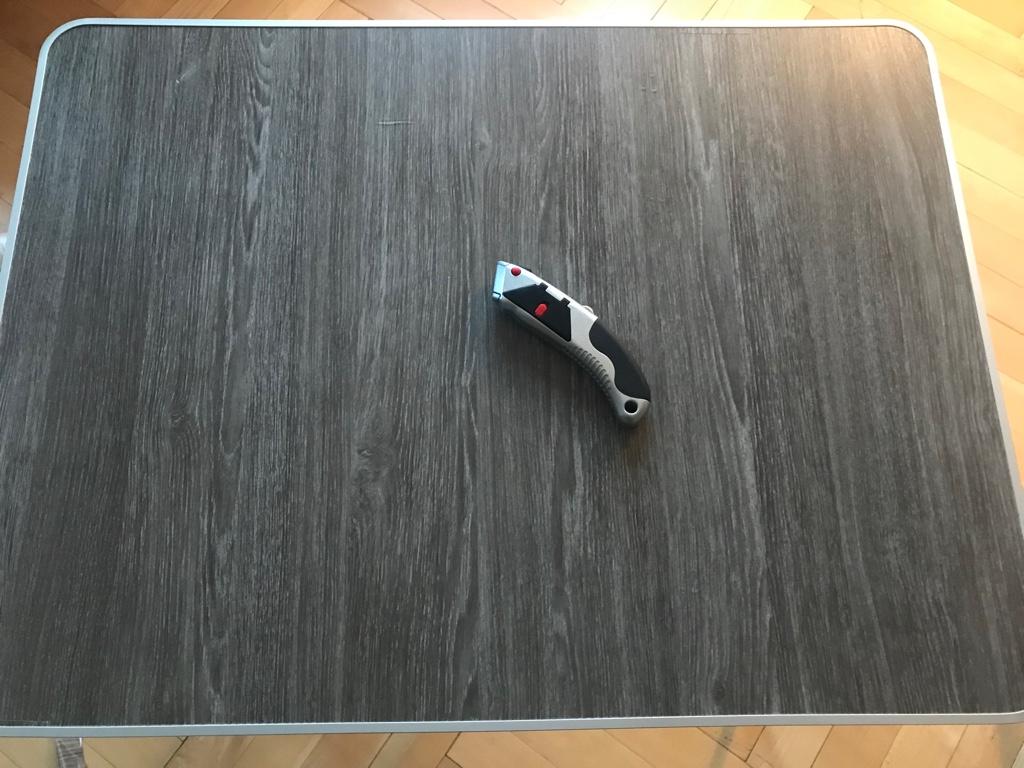
Then it was simply a case of using a sharp craft knife and cutting around the edge, again using the trim edge on the table made this very easy, with the knife angled outwards slightly and taking our time. V did this part to ensure a good smooth edge.
All in all it took about 10 minutes to cut the vinyl and we are super happy with the results. Best of all if we fancy a change we can order a different pattern, remove this and reapply in a few minutes. I am no longer annoyed looking at that dent in my table, now I am loving the new look.
P.s. we did film a little to make a little video to show how easy it was, so that you don't do as I did and put it off for 2 years worried about making a mess.


I posted a few threads asking how to fix it, but I never got around to actually sorting it. At the Denmark meet last year I had some great advice from Bob as a professional french polisher on how he would fix such a problem. My plan was to add a vinyl topper to the table so I could fill the hole, he gave me a great tip for getting a smooth surface ready for that vinyl.
First we cleaned the table top with white spirit. As advised I used a car body filler. Specifically I used Isopon P38 body filler to fill the dent (£6.99 for 4 packets). I used only a tiny part of 1 small packet, added the hardener and applied to the hole, smoothing the surface and ensuring there was enough inside. Within 20-30 minutes it was cured (see pic of unsanded filler) fully hardened and ready to sand. I used a fine sanding block to ensure a completely flat surface. It took probably only a minute or two for such a small hole to be completely smooth so that I couldn't feel the difference with my finger. It's important to note the sanding also took the texture off the table surface in that area, but as it would be covered I wasn't worried and it wasn't obvious to the eye.
Then we added the vinyl wrap, this was ordered to a size to ensure the whole of the table was covered. The door table measures 89cm x 51cm, so I just made sure it was slightly longer and wider to give room to trim. My vinyl was ordered from Pixers.
It was relatively simple, we measured the table and accounted for the centre point at each end, the rear has a small gap in the trim in the centre, we also marked with a pencil on front edge. As we had a wood panel pattern it was relatively easy to line it up although perfection wasn't possible as the image wasnt perfectly symmetrical.Application is very much like applying a decal, we peeled back the very end and folded over the backing, then stuck the first of the edge down. From there we used a Felt Edged Squeegee to ensure it was perfectly flat with no air bubbles. We then gradually peeled the backing off underneath, and squeegeed it as we went ensuring a good finish with no air bubbles. This worked better with two people.
Then it was simply a case of using a sharp craft knife and cutting around the edge, again using the trim edge on the table made this very easy, with the knife angled outwards slightly and taking our time. V did this part to ensure a good smooth edge.
All in all it took about 10 minutes to cut the vinyl and we are super happy with the results. Best of all if we fancy a change we can order a different pattern, remove this and reapply in a few minutes. I am no longer annoyed looking at that dent in my table, now I am loving the new look.
P.s. we did film a little to make a little video to show how easy it was, so that you don't do as I did and put it off for 2 years worried about making a mess.
Last edited:
")