Buy all your VW California Accessories at the Club Shop Visit Shop

Awning fabric replacement

J

jonddd

Messages
47
Location
Poole
Vehicle
T5 Beach
Our six year old awning started to split across the join during a warm morning of 29c in the South of France recently.
We removed the fabric (a relatively simple job needing just one screwdriver) and had it sewn the length of the seam by a sailmaker which temporarily solved the problem.
The Thule agent, Rose awnings have just quoted me £392 for a replacement single-piece fabric (without fitting which would be extra).
Has anyone managed to replace the fabric (with a single piece) more cheaply?
 
Last edited:
Our six year old awning started to split across the join during a warm morning of 29c in the South of France recently.
We removed the fabric (a relatively simple job needing just one screwdriver) and had it sewn the length of the seam by a sailmaker which temporarily solved the problem.
The Thule agent, Rose awnings have just quoted me £392 for a replacement single-piece fabric (without fitting which would be extra).
Has anyone managed to replace the fabric (with a single piece) more cheaply?
Probably worth ringing around some domestic sun shade/awning dealers. They must carry out replacements to patio awnings.
Might be worth a try……
 
Last edited:
Someone recently posted a photo of their new colourful awning canopy, and recommended the company which made it for them. I’ve not been able to find the photo or post.
 
Someone recently posted a photo of their new colourful awning canopy, and recommended the company which made it for them. I’ve not been able to find the photo or post.
Is this the post you’re referring to?
 
Is this the post you’re referring to?
Contact details here.


I love the idea of having matching awning canopy, front and sides.
 
Thanks for that. I would rather have a single piece of fabric if possible.
I'd always taken the awning for granted and hadn't realised just how important it is until we didn't have it. It makes a dramatic difference to both sunny and rainy days.
 
Thanks for that. I would rather have a single piece of fabric if possible.
I'd always taken the awning for granted and hadn't realised just how important it is until we didn't have it. It makes a dramatic difference to both sunny and rainy days.
The 2 piece awning material was probably a cost saving exercise that went horribly wrong and ended up costing either VW or Thule many thousands of pounds and Euros. It could have been made in one piece right from the start and saved an awful lot of heartache for their customers. It’s just another thing that will go wrong sooner or later. The one piece is far superior.
 
Replacing Fabric:
In recent very heavy rain in Ireland, my awning filled up with water. I tried to empty it before I realised I should at least partially retract it. It did not split, but pulled the bolt ropes partially out and would not then wind in properly. So yesterday I had a go to repair it. I took the awning off the van leaving the two brackets (easy just two bolts then lift UP. Good idea to mark position of bolts for replacement). I could not find out, from previous threads, how to take off the fabric, but realized that to get at the two small screws holding the fabric at the roller end, I had to completely dismantle it. First I turned it upside down and infolded it on the floor. You will see from the photo that I used a rope to pull together the two struts just to give a bit of slack to the material. So I took off both plastic ends at the front of the awning (4 screws at top, two at bottom). Then I pulled out the roller and aluminium fabric retainer that slides into it. Took out two small screws at bottom of awning and the bottom bolt rope slide out. Once the fabric was out, I could get at the two screws at the top and pull the fabric out of the top aluminium slider (see folded back section at top in first photo)IMG_1163.jpegIMG_1165.jpeg. Getting the roller back into its socket was not easy, but a small rope twice round it, helped to lift and turn it until it located. You will see from the photo that I then tied it to hold the roller in place. The bolt ropes went back into place. I stretched it tight and now it is all working perfectly.
First photo is as dismantled, second is sliding it back together.
It is worth taking photos as you go to remember how it goes back together !
Hope his helps other awning owners !
 
I replaced my Thule Omnistor Awning fabric replaced for £109 today in approx 1 hour!
Fabric was £59.82 from Attwools online. It's a 680gsm PVC coated Polyester mesh fabric, ideal fr this application and it's available in loads of colour options.
The Keder strip was £9, you need 2x sizes, 5mm for the van/winder side and I used 8mm for the wind out edge.
A local sewing services company did the sewing of the Keder to the fabric for £40 (I could have got this even cheaper but there was a 4 week wait, the guys who did it for £40 had. 24hr turnaround.
Fitting the fabric was very easy. In hindsight this could have been done without removing the awning from the van at all but handling of the fabric would have been a bit more tricky. I took the awning off the van which was super easy, only 2x Torx screws to remove a the awning supply lifts off (there is a video on you tube shows this).
To replace fabric you simply:
1. Remove 2x small screws on the wind out rail which retain the fabric
2. Remove the plastic endcaps from main housing and wind out rail on the opposite end to winder handle.
3. Withdraw the fabric from the awning. (on the van side of the awning the aluminium tube comes out with the fabric)
4. Remove 2x small screws on the aluminium tube which retain the fabric
5. Remove the fabric from the aluminium tube.
6. Slide the replacement fabric back into the aluminium tube
7. Replace the 2x small screws to secure the awning fabric.
8. Slide the tube back into the awning and the front edge of fabric into its rail
9. Replace the plastic end caps.
10. Replace the 2x small screws in the wind out rail to secure the fabric.
11. Put the awning back on the van.
These instructions may sound a little complicated, but it really isn't, me & my wife were amazed how easy the job was and how quickly we sorted it ... saving £266 on the fabric (cheapest OEM fabric was £375 and goodness knows what VW would charge to fit it !!
Feel free to message me if you want more info.

5.jpeg

8.jpeg

2.jpeg

1.jpeg

6.jpeg

9.jpeg

4.jpeg

3.jpeg

7.jpeg
 
I've just tried to replace the awning fabric, but have failed at the first hurdle - removing the cassette from the van. I need to buy the correct Torx head screwdriver to remove the torx screws that hold the cassette to the van. Does anyone know what size I should buy please?
 
Don’t recall the size but I just bought a set as very cheap on amazon

3FB7620F-7FD5-4307-899C-61AD0B2AAEA4.png
 
I've just tried to replace the awning fabric, but have failed at the first hurdle - removing the cassette from the van. I need to buy the correct Torx head screwdriver to remove the torx screws that hold the cassette to the van. Does anyone know what size I should buy please?
Google is turning me into a Torx expert. I've measured the screw head and it seems that a T30 might be right. I'll order a set containing one above and below this to make sure and update all in due course, just in case anyone else has the same query in the future.
 
I replaced my Thule Omnistor Awning fabric replaced for £109 today in approx 1 hour!
Fabric was £59.82 from Attwools online. It's a 680gsm PVC coated Polyester mesh fabric, ideal fr this application and it's available in loads of colour options.
The Keder strip was £9, you need 2x sizes, 5mm for the van/winder side and I used 8mm for the wind out edge.
A local sewing services company did the sewing of the Keder to the fabric for £40 (I could have got this even cheaper but there was a 4 week wait, the guys who did it for £40 had. 24hr turnaround.
Fitting the fabric was very easy. In hindsight this could have been done without removing the awning from the van at all but handling of the fabric would have been a bit more tricky. I took the awning off the van which was super easy, only 2x Torx screws to remove a the awning supply lifts off (there is a video on you tube shows this).
To replace fabric you simply:
1. Remove 2x small screws on the wind out rail which retain the fabric
2. Remove the plastic endcaps from main housing and wind out rail on the opposite end to winder handle.
3. Withdraw the fabric from the awning. (on the van side of the awning the aluminium tube comes out with the fabric)
4. Remove 2x small screws on the aluminium tube which retain the fabric
5. Remove the fabric from the aluminium tube.
6. Slide the replacement fabric back into the aluminium tube
7. Replace the 2x small screws to secure the awning fabric.
8. Slide the tube back into the awning and the front edge of fabric into its rail
9. Replace the plastic end caps.
10. Replace the 2x small screws in the wind out rail to secure the fabric.
11. Put the awning back on the van.
These instructions may sound a little complicated, but it really isn't, me & my wife were amazed how easy the job was and how quickly we sorted it ... saving £266 on the fabric (cheapest OEM fabric was £375 and goodness knows what VW would charge to fit it !!
Feel free to message me if you want more info.

View attachment 105509

View attachment 105510

View attachment 105511

View attachment 105512

View attachment 105513

View attachment 105514

View attachment 105515

View attachment 105516

View attachment 105517
Thanks for posting this. We’ve now replaced our awning (did it with the cassette in situ). Top tip is to take photos of the bits you are dismantling in order to put it all back again easily. Agree that it was quite straightforward. As others have said, a third person is needed for the 2 min slide back in.
 
Used this guide to repair my awning - thanks for posting it !
For mine there was a tear along the front edge just behind the face plate - running about 200mm.
I removed the fabric, repaired the tear with Gorrilla weather proof tape, and reversed the fabric so the tear was on the cassette side. THis means the tear never even gets unwound (there is just over one complete roll on the roller even when fully extended. Perfect, and saved hundreds of pounds.
All in, this took less than two hours start to finish - removing the cassette from the van to make things a little easier, cleaning the entire fabric, disassembled, repair, reassemble, and refit.
 
Google is turning me into a Torx expert. I've measured the screw head and it seems that a T30 might be right. I'll order a set containing one above and below this to make sure and update all in due course, just in case anyone else has the same query in the future.
Mine required T25 and T20... if that helps anyone...
 
I need to repair my own awning as the seam has failed. I have a few questions after reading this thread. Can someone confirm or correct my understanding please:
  • There is mention of 2 bolts but also torx. If I just want to remove then refit then I just undo the two bolts accessed from inside the awning cassette. The torx bolts are to attach the brackets to the van but I don't need to touch these in this scenario
  • To access the 2 bolts inside the cassette I only need to wind out the awning by around 0.5M
  • To remove and refit leaving the brackets on the van I don't need to pop the roof
I am limited on space at home on the drive so if the awning needs to be fully wound out then I'd need to find a suitable place.
 
I actually found a further torx bolt that I couldn’t access with the driver I had bought. This led me to make the repair in situ and I’m glad I did it that way now. Really no need to take off the cassette if you have the space on the drive.
 
I need to repair my own awning as the seam has failed. I have a few questions after reading this thread. Can someone confirm or correct my understanding please:
  • There is mention of 2 bolts but also torx. If I just want to remove then refit then I just undo the two bolts accessed from inside the awning cassette. The torx bolts are to attach the brackets to the van but I don't need to touch these in this scenario
  • To access the 2 bolts inside the cassette I only need to wind out the awning by around 0.5M
  • To remove and refit leaving the brackets on the van I don't need to pop the roof
I am limited on space at home on the drive so if the awning needs to be fully wound out then I'd need to find a suitable place.
I can't remember which bolts you undo now, but I can definitely confirm that you can remove the awning case from the van without lifting the roof and without removing the brackets attached to the van. You have to wind the awning out a bit and undo some bolts inside of the case like you said but the exact details have gone from my memory. I think it will be clear when you are looking at it though.
 
Just to conclude our repair experience, I thought I would post an update.

In our case, the awning needed to be fully unwound to access the bolts that secure the cassette to the van. We moved to a local car park to be able to do this as we don't have sufficient space at home.

Having some strong cord or rope available to hold the tension off the awning arms was essential. Thank you to @tod's campervan for mentioning this up in post #9

On our T5.1, there are 2x T25 bolts which secure the cassette to the van. These were treated with Threadlocker (which I reapplied on refitting), so required a bit of force to break the bond. I purchased this rachet and driver set from Screwfix to help undo these https://www.screwfix.com/p/1-4-drive-standard-socket-set-38-pieces/2497v as the handles on my existing torx drivers were slipping as I tried to apply enough torque.

We also found that the front/right torx bolt was blocked by the awning arm. I marked the position of the arm clamp and loosened the hex bolt with a conventional socket set to be able to slide the arm to the side to allow access. Be careful to mark the position of the clamp, as the position affects the ability of the awning to close fully.

Finally, to echo the advice above from @warny15, mark the positions of the fabric on the kador rails and take photographs at every stage.

We purchased the replacement one-piece fabric from the club shop. Even before discount, it was the cheapest source by some margin and delivery was prompt.
 
I replaced my Thule Omnistor Awning fabric replaced for £109 today in approx 1 hour!
Fabric was £59.82 from Attwools online. It's a 680gsm PVC coated Polyester mesh fabric, ideal fr this application and it's available in loads of colour options.
The Keder strip was £9, you need 2x sizes, 5mm for the van/winder side and I used 8mm for the wind out edge.
A local sewing services company did the sewing of the Keder to the fabric for £40 (I could have got this even cheaper but there was a 4 week wait, the guys who did it for £40 had. 24hr turnaround.
Fitting the fabric was very easy. In hindsight this could have been done without removing the awning from the van at all but handling of the fabric would have been a bit more tricky. I took the awning off the van which was super easy, only 2x Torx screws to remove a the awning supply lifts off (there is a video on you tube shows this).
To replace fabric you simply:
1. Remove 2x small screws on the wind out rail which retain the fabric
2. Remove the plastic endcaps from main housing and wind out rail on the opposite end to winder handle.
3. Withdraw the fabric from the awning. (on the van side of the awning the aluminium tube comes out with the fabric)
4. Remove 2x small screws on the aluminium tube which retain the fabric
5. Remove the fabric from the aluminium tube.
6. Slide the replacement fabric back into the aluminium tube
7. Replace the 2x small screws to secure the awning fabric.
8. Slide the tube back into the awning and the front edge of fabric into its rail
9. Replace the plastic end caps.
10. Replace the 2x small screws in the wind out rail to secure the fabric.
11. Put the awning back on the van.
These instructions may sound a little complicated, but it really isn't, me & my wife were amazed how easy the job was and how quickly we sorted it ... saving £266 on the fabric (cheapest OEM fabric was £375 and goodness knows what VW would charge to fit it !!
Feel free to message me if you want more info.

View attachment 105509

View attachment 105510

View attachment 105511

View attachment 105512

View attachment 105513

View attachment 105514

View attachment 105515

View attachment 105516

View attachment 105517
Hi Warny

my awning has split (adhesive has failed), and I'm rather peeved to find that VW excludes this from their extended warranty coverage. I really don't want to spend nearly 500 quid on a replacement. Your solution looks like the best option to me at the moment. May I ask which fabric from Attwoolls you used, please? Was it the fire retardant PVC coated polyester, currently at £31.62 per metre? Or maybe one of the other options?
Current selection is here: https://www.attwoollsmanufacturing.co.uk/pvc-fabric/

Presumably there no problem winding the fabric back, it was flexible and thin enough to fit and close correctly? And was the size of the fabric you ordered 2.0 x 2.6 metres?

Thanks
 
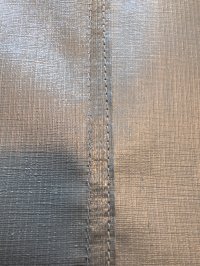
Hi Mouseinagouse, the fabric i chose was 680gsm PVC coated polyester (see pic). it seems as close to the original thickness as pos just without the texture of the original (and a tenth of the price!)

Image 02-08-2023 at 18.25.jpeg
 
I just changed the awning fabric with the product in the club shop. Not cheap but looked good. I had the two piece which fell apart. I did it whilst awning was on the van, no need to remove. You need to be able to extend the awning once fitted to make sure all ok. it was a lot easier than I thought. I used these instructions as a guide https://e4m5t2b9.rocketcdn.me/wp-content/uploads/2023/03/TO-4900-Fabric-Replacement-4AY904-00-.pdf but they are for a different model so not exact.

basically you just take it apart and slide the fabric out. Unscrew everything and refit, easy. You need 2 hands and at one point I had 3 inc me, just to thread it back in.
taKen photos if nervous, make sure you know which way it winds and i reckon most people could do this.
all done in less than an hour.
good luck.
 
Back
Top