A drive fit for a Cali

Amarillo

Amarillo

Tom
Super Poster
VIP Member
Messages
10,128
Location
Royal Borough of Greenwich
Vehicle
T6 Beach 150
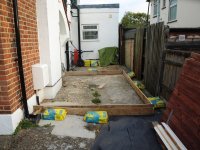
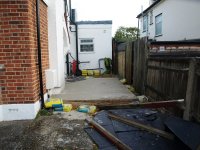
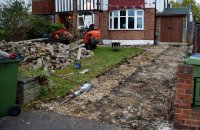
My drive is in a lamentable condition The concrete is cracked, and the retaining wall is at an angle of about 8 degrees to the vertical. The subsoil is London clay.

See photo below

Original photo (1280x1000).jpg

We have taken the decision to have a new driveway built which will be sufficiently wide for the van and a car side by side using just one exit to avoid the need for planning consent.

I have drawn up a design for the new front garden for the contractors which shows four distinct areas:
1. Drive area
2. Patio area
3. Lawn area
4. Flower beds

The drive area will be kerbed to the patio area, and I have tried to plan it so that when the wheels of the Beach hit the kerb at the back, there will be sufficient space for a VW Polo or similar sized car to reverse in side by side with the Beach.

See below:
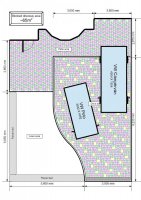
Drive blocks 02.jpg
The vehicle footprints are to scale, as are the positions of the wheels on the Beach. (Ignore the block paving colours - the colour will be brindle).

Does it appear that there is sufficient space to reverse a small car side by side with the van easily, or will the campervan need to be parked further back?

Each of the curves are an arc of 45 degrees with a 4m radius. The wall-wall turning circle of a California is 11.9m, I am unclear if that includes wing mirrors or not: perhaps someone know the answer... If wing mirrors are included, the turning circle of the centre of the vehicle will be a radius of 4.8. The wall-wall turning circle of a VW Polo is 10.6m implying a central turning radius of 4.35m.

Given these turning radii, is 4m a sensible radius for the arcs?
 
Looks fine to me, you could practice by outlining the Cali position on your drive in chalk or wheelie bins etc. and try reversing the Polo onto the drive/grass and into a parallel position to try it before you make a final decision. I would consider including some sort of removeable security post at the entrance of your drive seeing as though your Cali will be on display to everyone.
 
Oh to even have a drive.... :rolleyes:

Looks like a fine plan.. just looking; does your boundary follow this fence line straight up, is there dead (wasted) space between your garage and the fence?
When are you going to grow the garage to take the Cali? :)
 
Looks nice but I would not split up the car(van) area and the patio area I would rather be flexible so the van can go back further if required or even over by the front door,
 
How high you think the diffrence would be on the step between patio and driveway ?
If you got rear mudflaps they wont last long....
Or towbar....
Start mesuring!
 
As others have asked - is the patio the same level & construction as the driveway with just different pavers ? I wouldn't put a step between the two so you can always got the option of moving the van back further just in case you need to get a bigger car in front.

What are you putting under the pavers? If just on compacted type2 fill the cali is heavy enough to compact it further.

Looking at that diagram the problems I see are:
1. if parked like that assuming both are reversed in, no one can get out the passenger doors.
2. hard to wash the cali without moving it & getting the other car wet.
3. where are you going to drain the acco drain to? you probably need a new soakaway preferably not under where your heaviest vehicle is going to be parked.
 
sorry auto-correct failure should read ACO, the drainage grille running across the end of the drive, I presume thats what it is shown on the plan. Usually insisted on when hard landscaping to prevent run off into public sewer.
 
Thanks, thought it was an extra on the Beach :D
 
Oh to even have a drive.... :rolleyes:

Looks like a fine plan.. just looking; does your boundary follow this fence line straight up, is there dead (wasted) space between your garage and the fence?
When are you going to grow the garage to take the Cali? :)

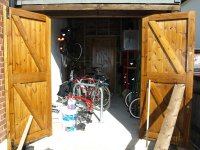
That's not a garage, it's a bike shed:
000.jpg
001.jpg 005.jpg

And yes, there is about 40cm of wasted space down the side. There is also an enclosed courtyard, the only access being through the door at the back of the bike shed.
 
How high you think the diffrence would be on the step between patio and driveway ?
If you got rear mudflaps they wont last long....
Or towbar....
Start mesuring!

Maybe 1½ or 2 inches of bullnose kerb. See the kerb to the lawn here and imagine it rising to the same style and colour but different pattern patio area. I want the rise to be sufficient to define the areas, but low enough to bump up if needed.

2.jpg
 
Last edited:
As others have asked - is the patio the same level & construction as the driveway with just different pavers ?

The patio area will be relatively flat, a slight slope to the front to aid drainage. The driveway will be a steeper slope to the public footway. The kerb height will be a minimum of 30mm on the front edge, rising to about 50mm along the left edge of the patio

1. if parked like that assuming both are reversed in, no one can get out the passenger doors.

Yes - the rear passenger door is on the off side, but the front passenger will have to either get out before reversing in, or get out through an off side door. I hope to be able to park the smaller car parallel to the van so that all doors can be opened.

2. hard to wash the cali without moving it & getting the other car wet.

Yes again, not something I had considered, but it will be easy enough to park one car on the road and move the other to wash.

3. where are you going to drain the acco drain to? you probably need a new soakaway preferably not under where your heaviest vehicle is going to be parked.

The soakaway will go under the front flowerbed.

What are you putting under the pavers? If just on compacted type2 fill the cali is heavy enough to compact it further.

This is a serious concern of mine, and I see the problem in neighbours' driveways.

The subsoil is London Clay. On top of the subsoil will go a membrane, and then I have specified 2 x 7½ cm type 1 foundation, each layer to be compacted independently. Then the usual 4cm of sharp sand, and finally the blocks. I intend the watch the builders like a hawk when they lay the foundation - this is a common cheat of builders, to skimp on the foundation, or to lay all 15cm in one go so it doesn't properly compact.
 
The subsoil is London Clay. On top of the subsoil will go a membrane, and then I have specified 2 x 7½ cm type 1 foundation, each layer to be compacted independently. Then the usual 4cm of sharp sand, and finally the blocks. I intend the watch the builders like a hawk when they lay the foundation - this is a common cheat of builders, to skimp on the foundation, or to lay all 15cm in one go so it doesn't properly compact.

Due to the London Clay I would be happy to put a substantial bet on that you will end up with dips in the drive where your Cali wheels sit, it might take a year or two but it will happen & theres not a lot you can do about it.

You will get better compaction using 3x 50mm layers of fill.

Also make sure that on the edges, the kerbs are fixed on a proper concrete foundation, not just bedded on the fill.

Next invest in a wire brush on a broom handle ( for want of a better description) so you can spend your weekends pulling the weeds out of the joints between the blocks.
 
Also make sure that on the edges, the kerbs are fixed on a proper concrete foundation, not just bedded on the fill.

That is not in the specification, I thought it too obvious.

Next invest in a wire brush on a broom handle ( for want of a better description) so you can spend your weekends pulling the weeds out of the joints between the blocks.

Or I can spray every six months like the council does with pavements.
 
Or to avoid the dips and weeds, you could fill with 16mm gravel which can be raked back to flag very easiily. Also might be cheaper than paviors. You could also do away with the grate along the front edge as it would drain itself.

We have 16mm basalt on our front ( must update the photo on our avatar). Works a treat, although Penelope Pitstop (as my brother in law calls SWMBO) has had to slow her entrances down a bit!
 
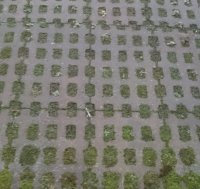
Bit late. We have a hidden 2nd drive which can support 30 tonnes with blocks which allow grass to grow so can be discreet. Also drains well.
Perth Council also have similar with black plastic block sections which are similar but much more discreet. We had mono block but it was sinking all over the place with the weight and constant need for maintenance.
Sample stripped back to show blocks


driveblocks.jpg
 
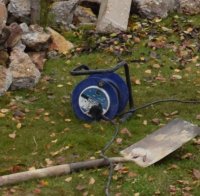
Is that really a 240v breaker running on a domestic extension lead ?
I'm assuming, from what you say, that it is potentially bad. They have some sort of box plugged into a socket in the bike shed. The extension lead is plugged into that box, and the drill into that extension. The cable on that extension lead is somewhat thicker than normal extension leads.
DSC_0002 (2).JPG
 
Bit late. We have a hidden 2nd drive which can support 30 tonnes with blocks which allow grass to grow so can be discreet. Also drains well.
Perth Council also have similar with black plastic block sections which are similar but much more discreet. We had mono block but it was sinking all over the place with the weight and constant need for maintenance.
Sample stripped back to show blocks


View attachment 17707

We are also planning to have our font garden "drived" over 9not proper English I know) for the California
 
I'm assuming, from what you say, that it is potentially bad. They have some sort of box plugged into a socket in the bike shed. The extension lead is plugged into that box, and the drill into that extension. The cable on that extension lead is somewhat thicker than normal extension leads.
View attachment 17710
Im just amazed that anyone other than a DIYer is using 240v

I am responsible for a number of large building sites & would not let anyone use any 240v equipment on site apart from battery chargers for tools inside site cabins.

From HSE website "Whilst health and safety law does not ban 230v tools on construction sites, HSE strongly advises that 110v tools are preferable given the wet, dirty and dusty nature of construction sites and the possibility of mechanical damage to cables and tools"

"Tools, plugs and cables designed for DIY and domestic use are not suitable for site conditions. You should use cordless tools or those that operate from a 110V centre tapped to earth (CTE) supply system so that the maximum voltage to earth does not exceed 55V."

I hope the box he has plugged into in your shed is an appropriate RCD!

Put simply a 55v shock when you are standing in the rain using a metal power tool shouldn't kill you, the risks are far higher using 240v. also 110v cables are invariably yellow so as to be more visible - running a black cable across the ground when you are working with any machinery is just asking for trouble.

Then looking at the design of the breaker it does not look like a modern piece of equipment - there are now strict regulations in place to limit operators exposure to hand / arm vibration & I would be happy to bet that the time limit on that would be something like a couple of minutes use per day. Even the most modern designs of breaker have a maximum use of an hour per day.
 
Back
Top