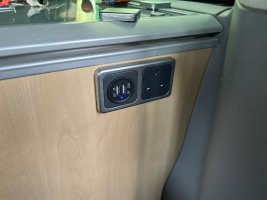
Changing Sockets in 2008 Cali SE

C

CaliAndyScotland

Messages
15
Location
Scotland
Vehicle
T5 SE 174
Hi all,

I have a 2008 California SE. On the end of the kitchen units behind the passenger seat there are 2 power outlets. One outlet is a 2 pin European type and the other is a form of cigarette type connection (which I have an adapter for to connect USB type chargers etc).

How straight forward is it to change these 2 outlets to standard UK 3 pin type? If it is relatively straight forward, where would I get suitable sockets?

Thanks

Andrew
 
As I understand it the two pin is integral to the inverter (could be wrong)
Majority of people use an adapter
 
We have a 2010 SE with a similar two socket set up, We have a UK 3 pin socket that is fed directly from the EHU and so only works when we are plugged into the mains. and the same 12v round socket that runs of the leisure batteries only, so always live. There is also a 240v inverter socket on the base of the B frame pillar that also runs off the leisure batteries.
If you have a similar set up you may be able to change the European mains socket to a UK 3 pin but not the 12v round socket.
Hope this helps
 
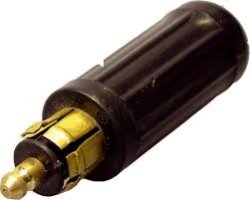
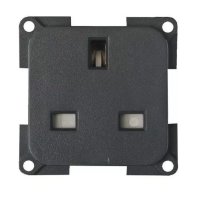
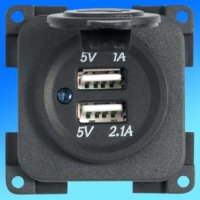
I think what you are describing is the same set up as my van was, with the two pin euro 230V socket and a hella or DIN type 12v socket. Both of these can easily be changed to the same UK 230V 3 pin socket and 12v accessory socket that's found on the later vans. I am pretty sure the brand VW used was CBE. A USB socket is now available so maybe that's of more use to you rather than the 12v socket. I have attached an image of the Hella plug. If the one on your van is the same as the picture it's called a Hella socket or a DIN socket. The plastic frame around the sockets can be reused with the new sockets.

Unknown-1.jpeg

cbe-230v-3-pin-socket---grey26626 copy.jpg

c-line-twin-usb-socket-–-5-volt-1-amp-and-21-amp-47594.jpg
 
Thanks for the input.

I have ordered the CBE USB outlet and Socket. Will attempt to change these over :thumb

Is there a simple way to isolate the leisure batteries from the outlet circuits or am I best just disconnecting the batteries? If I do disconnect the batteries, is there anything I should look out for when reconnecting (control panel issues etc?)?
 
if you want to isolate the power from the leisure batteries to the kitchen unit 12v socket just remove the fuse that’s underneath the front passenger seat. Tbh I would just pull the two spade connectors from the old 12v socket to the new one. Worst that will happen if you touch the two cables together you pop the fuse. I hopefully shouldn’t have to mention but obviously don’t have your 230v mains hooked up to any power.
Another thing from memory that you might have to do is remove the sink or at least pull it out of the way a touch to get rear access behind those two power outlets. Remove the trim cover first and unscrew the socket face plates first and see if they both come out. If they do then there is no need to remove the sink.
 
CBE C Line sockets come in three parts, back box, face plate and surround and the front face is square.

Berker sockets are round but very similar, if your original fit sockets are round then the like for like UK replacement is a Berker, I have changed some previously and the C line (better made) needs a slightly bigger hole
 
Once again, thanks for the input.

I ordered up some sockets and took a look at this at the weekend. How simple is it to remove the cooker / sink top? Plumbing side for the water / drainage looks straight forward enough but the gas all looks to be hard piped? Does anyone have any experience on doing this?

The circle cut outs in the unit carcass give access to nuts which look to hold the sink / cooker unit in place.

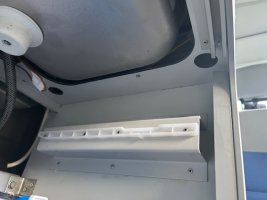
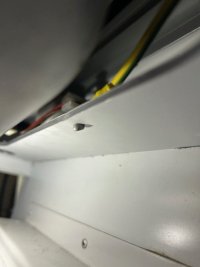
Would it be easier to take a multi-tool to the underside of the carcass, trim it a couple of locations back to create additional room for access to the rear of the sockets? thumbnail_IMG_0722.jpgthumbnail_IMG_0724.jpg
 
Once again, thanks for the input.

I ordered up some sockets and took a look at this at the weekend. How simple is it to remove the cooker / sink top? Plumbing side for the water / drainage looks straight forward enough but the gas all looks to be hard piped? Does anyone have any experience on doing this?

The circle cut outs in the unit carcass give access to nuts which look to hold the sink / cooker unit in place.

Would it be easier to take a multi-tool to the underside of the carcass, trim it a couple of locations back to create additional room for access to the rear of the sockets? View attachment 132468View attachment 132469
You would just have to disconnect the gas at No 16 on the diagram below.
But your idea has merit and would avoid dismantling the sink/cooker and any damage.

452068100.png
 
Thanks for the image. As I thought, would need to take a part a section of the gas pipework. Think i will tackle it with the multitool and see how I get on :Nailbiting
 
Manged to finally get a look at this again last night and its a lot more straight forward than I thought to get the sockets out etc. I will pull together a how too guide once complete with pictures.

One question I do have, on a 2008 SE Cali, could anyone advise what fuse cuts the power feed to the two sockets?
The mains socket is not fused and only live if plugged into the EHU .
The 12v socket is fused by a 15amp fuse under the front passenger seat RHD. The fuse position varies from vehicle to vehicle but always 15amp and under passenger seat.
 
The sockets are installed from the outside, removing the faceplate with a small flat blade screwdriver should reveal a frame held in with 4 screws, removing the screws will allow you to pull the socket out from the front, the only thing you need to do behind is create some cable slack if the original installer was a swine! Refitting new is the same but in reverse.

 
Update. Finally got this done at the weekend!

Relatively straight forward to complete in the end. Only challenge was cable length which meant the USB is installed on its side which in my eyes isn't an issue but it kept things simple.

I have to core a larger hole for the USB socket as the old penetration was too small.

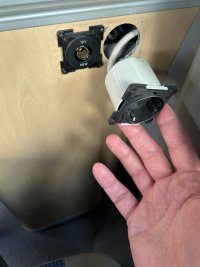
Cover plate removed with flat head screw driver and hex type allen keys used to remove socket screws. IMG_1669.JPG

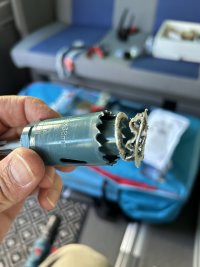
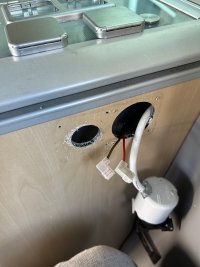
Had to core a larger hole for the USB using 2 core saws, smaller 1 for the guide through existing and larger for the new hole. The cabinets are a some kind of corrugated / sandwiched metal. The red and brown cables you can see below were connected to the old "din" type socket and connected straight in to the USB outlet I got.
IMG_1680.JPGIMG_1681.JPG

Unscrewed the old European type socket from the original holder /cables and replaced it with a UK spec 3 pin socket. All screwed back in place with the cover plate back on. I didn't get sockets that could take the fold down cover plates as I just found they got in the way. Makes the sockets a bit more useable and now don't need to carry adapters!

Thanks for everyone's advice :thumb

IMG_1688.JPG
 
Update. Finally got this done at the weekend!

Relatively straight forward to complete in the end. Only challenge was cable length which meant the USB is installed on its side which in my eyes isn't an issue but it kept things simple.

I have to core a larger hole for the USB socket as the old penetration was too small.

Cover plate removed with flat head screw driver and hex type allen keys used to remove socket screws. View attachment 136582

Had to core a larger hole for the USB using 2 core saws, smaller 1 for the guide through existing and larger for the new hole. The cabinets are a some kind of corrugated / sandwiched metal. The red and brown cables you can see below were connected to the old "din" type socket and connected straight in to the USB outlet I got.
View attachment 136583View attachment 136584

Unscrewed the old European type socket from the original holder /cables and replaced it with a UK spec 3 pin socket. All screwed back in place with the cover plate back on. I didn't get sockets that could take the fold down cover plates as I just found they got in the way. Makes the sockets a bit more useable and now don't need to carry adapters!

Thanks for everyone's advice :thumb

View attachment 136585
Nice job. Worth checking how much current the usb converter is drawing as it will be permanently on, only a possible issue if you don't use or charge your van regularly. You could always fit a switch next to the usb socket if it's an issue.
 
Back
Top