Buy all your VW California Accessories at the Club Shop Visit Shop

Charge / maintain T6.1 main battery with leisure batteries that are being charged with solar MPPT

CaliCampMianch

CaliCampMianch

Messages
26
Location
Netherlands
Vehicle
T6.1 Ocean 204 4 motion
I need some assistance.

I've come across numerous discussions on charging leisure batteries with the Victron DC to DC charger. However, I want to charge the main battery with an intelligent charger since my leisure batteries are already being charged by the solar MPPT. Is it possible to use the Victron DC to DC charger in the reverse direction, from leisure to main?

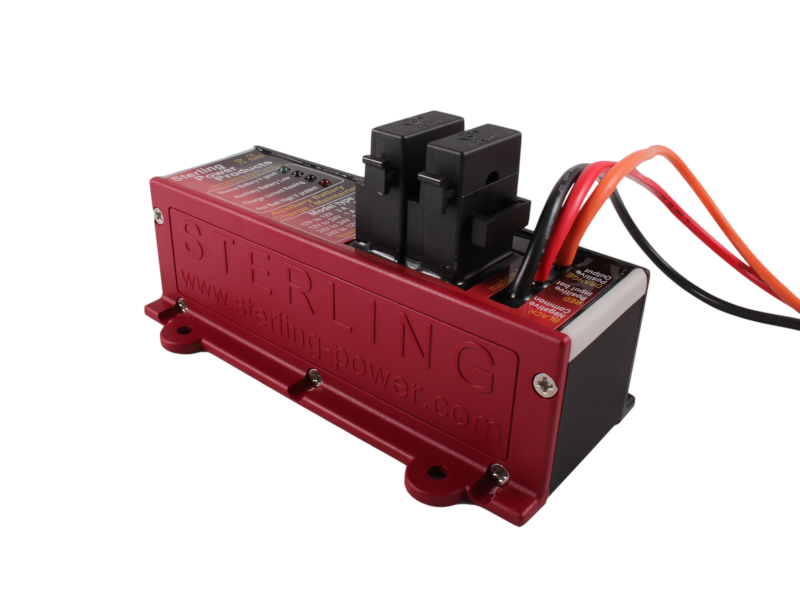
Another option is the Sterling Battery-Battery Maintainer 12V-12V, 3A, but I would need to order it from the UK, and I'm based in the Netherlands.

Ideally, I'd like to install the solution under the driver's seat without having to run cables to the main batteries.

Do you have any tips or tricks on how to achieve this?

 
Depending on how heavily you want to charge your starter battery a trickle charge MPPT will work with your existing solar setup. I swapped my Victron to do just this. It’s fine but won’t charge a starter from flat or allow you to use the radio 24/7. Easy job and wire routing.

I looked at the above solution but decided it was a little too much tinkering than I wanted and if anything went wrong would wreck my warranty.
 
IMG_1234.jpeg
I have this under my passenger seat.
Connected to lesuire and earth.
Then via a switch and to the Starter +ve side of split charge relay under passenger seat.
And earth to seat base bolt with spring washer.
When I arrive at outside car park at airport.
Switch the switch on and leave a “starter charging” Sign in front of dashboard.
Come back to a fully charged starter.
NB: doesn’t work when you park underground or multi-storey at LHR
I switch off my router and dashcam.
 
This will be available in the EU. Votronic Standby Charger 12V https://amzn.eu/d/gfmQETM

You could build one using a Schottky diode and a resistor.
Thanks, I think this is simplest and cheapest solution for my problem. Any guidance on how to connect under the (LHD) drivers seat? Maybe a picture or wiring diagram?
 
View attachment 124597
I have this under my passenger seat.
Connected to lesuire and earth.
Then via a switch and to the Starter +ve side of split charge relay under passenger seat.
And earth to seat base bolt with spring washer.
When I arrive at outside car park at airport.
Switch the switch on and leave a “starter charging” Sign in front of dashboard.
Come back to a fully charged starter.
NB: doesn’t work when you park underground or multi-storey at LHR
I switch off my router and dashcam.
This Orion Tr 12-12 does not seems to be suitable for this as this not has a battery charging funtion?
 
Thanks, I think this is simplest and cheapest solution for my problem. Any guidance on how to connect under the (LHD) drivers seat? Maybe a picture or wiring diagram?

I've not fitted one but here's how I would go about it:

Collect prerequisites:
  • 10mm & 13mm spanners.
  • Ring terminals & crimping tool.
  • Good quality >=1 mm insulated stranded wire. (3A current required)
  • Multimeter.
  • Nut driver or similar (probably 10mm, maybe 8mm)
  • Eye protection.
Method:
  1. Release seat. Unplug airbag and put a note not to start vehicle on steering wheel. Tilt seat out the way. Some people find it unnecessary to unplug the airbag.

  2. Measure the voltages at both terminals of the split charge relay under the left seat. There should be a slight difference between the two. We will use this to locate the leisure battery side of the split charge relay. You can confirm with a continuity (resistance) test.

  3. Measure the voltage at the battery positive. Whichever connector of the spilt charge relay has the exact same voltage we will call the battery terminal. The other we will call the start terminal.

  4. Disconnect 3 battery negatives: under seat, in engine bay, in wardrobe cupboard.

  5. Make up two leads with suitable ring connectors. Connect one to the start terminal the other to the battery terminal.

  6. Tie the trickle charger down somewhere suitable under the seat. Route and trim the leads, strip the ends and connect the start terminal to battery and the battery terminal to bord on the trickle charger. Looking at the device from above with the connector at the bottom the conventional current flow is from the right hand terminal to the left hand terminal. Refer to the teardown below to confirm.

  7. Connect the under seat battery negative. Connect the airbag. Replace the seat. Connect the remaining two batteries.

  8. Start the vehicle and drive a short distance until all the errors clear.

========

(In practice I've done a very similar exercise with only disconnecting the one leisure battery, however there is some risk in this. Wear eye protection)

Here's a teardown of the "trickle charger" if you prefer to make your own.

Edits: formatting, punctuation & prerequisites. Device polarity.
 
Last edited:
I've not fitted one but here's how I would go about it:

Remove seat. Unplug airbag and put a note not to start vehicle on steering wheel.

Measure the voltages at both terminals of the split charge relay under the left seat. There should be a slight difference.

Measure the voltage at the battery positive. Whichever connector of the spilt charge relay has the same voltage we will call the battery terminal. The other we will call the start terminal.

Disconnect 3 negatives. Under seat, in engine bay, in wardrobe cupboard.

Make up two leads with suitable ring connectors. Connect one to the start terminal the other to the battery terminal.

Trim the leads, strip the ends and connect the start terminal to bord and the battery terminal to battery on the trickle charger. Tie it down somewhere suitable under the seat.

Connect the under seat battery negative. Connect the airbag. Replace the seat. Connect the remaining two batteries.

Start the vehicle and drive a short distance until all the errors clear.

========

(In practice I've done very similar exercise with only disconnecting the one leisure battery, however there is some risk in this)
Before unplugging airbag, I was told to remove starter motor battery negative -ve.
 
This Orion Tr 12-12 does not seems to be suitable for this as this not has a battery charging funtion?
I was told directly by a Victron reseller, actually two companies, that this is the perfect solution.
Midsummer energy and 12volt planet.

You can adjust the voltage that it provides to the starter motor battery.
I have mine set to 12.5v
When it reaches this it stops providing voltage.
If it drops below, it switches on and provides voltage.
 
I've not fitted one but here's how I would go about it:

Collect prerequisites:
  • 10mm spanner
  • Ring terminals & crimping tool.
  • Good quality >=1 mm insulated stranded wire. (3A current required)
  • Multimeter.
  • Nut driver or similar (probably 10mm, maybe 8mm)
  • Eye protection.
Method:
  1. Release seat. Unplug airbag and put a note not to start vehicle on steering wheel. Tilt seat out the way. Some people find it unnecessary to unplug the airbag.

  2. Measure the voltages at both terminals of the split charge relay under the left seat. There should be a slight difference between the two. We will use this to locate the leisure battery side of the split charge relay. You can confirm with a continuity (resistance) test.

  3. Measure the voltage at the battery positive. Whichever connector of the spilt charge relay has the exact same voltage we will call the battery terminal. The other we will call the start terminal.

  4. Disconnect 3 battery negatives: under seat, in engine bay, in wardrobe cupboard.

  5. Make up two leads with suitable ring connectors. Connect one to the start terminal the other to the battery terminal.

  6. Tie the trickle charger down somewhere suitable under the seat. Route and trim the leads, strip the ends and connect the start terminal to battery and the battery terminal to bord on the trickle charger. Looking at the device from above with the connector at the bottom the conventional current flow is from the right hand terminal to the left hand terminal. Refer to the teardown below to confirm.

  7. Connect the under seat battery negative. Connect the airbag. Replace the seat. Connect the remaining two batteries.

  8. Start the vehicle and drive a short distance until all the errors clear.

========

(In practice I've done a very similar exercise with only disconnecting the one leisure battery, however there is some risk in this. Wear eye protection)

Here's a teardown of the "trickle charger" if you prefer to make your own.

Edits: formatting, punctuation & prerequisites. Device polarity.
Thanks. I'll keep you posted on the progress,
 
I have the Sterling fitted for a few years now and it works perfectly, maintaining the starter battery from the leisure batteries / solar.

 
I have the Sterling fitted for a few years now and it works perfectly, maintaining the starter battery from the leisure batteries / solar.

This was also reccomended by MidSummer Energy and 12boltplanet
 
I’m really happy with it and it’s easy to install under the passenger seat.
 
I’m interested in this so I am watching the thread for reference. I bought a new solar kit from a member here and have yet to collect it from my friend who picked it up for me. So the Battery maintainer is something I will be looking at when I get back from France
 
Pertinent previous thread

 
I have the Sterling fitted for a few years now and it works perfectly, maintaining the starter battery from the leisure batteries / solar.

Do you have any photos installed / instal process ?
&
where did you route the cables from under the passenger seat to starter Bat (did you have to remove carpet etc)

or did you tap into the wiring under the passenger seat ?
 
Last edited:
Thanks. I'll keep you posted on the progress,
Here's an other thread.


In my view I now just connect the this up at the relay. Right picture is what I have put together.

Relais.png

20240616_140412351_iOS.jpg
 
Do you have any photos installed / instal process ?
&
where did you route the cables from under the passenger seat to starter Bat (did you have to remove carpet etc)

or did you tap into the wiring under the passenger seat ?
It's connected to the starter battery feed under the passenger seat. If you buy the Epever MPPT from Roger which has the trickle function, his instructions say to connect this way also.
 
In my view I now just connect the this up at the relay. Right picture is what I have put together.
Agreed, with the caveat that the first picture shows the "input" from the starter and "output" to the leisure battery. You probably want it to flow the opposite direction.
 
Looks nice. Which bus is the tracker on? Maybe you could post a write up of all the tools, consumables, steps and pitfalls etc for the next person trying to do the job?
 
Further reading of the Votronics documentation suggests a silicon diode not a Schottky. So voltage drop of about 0.6V but less reverse leakage.

If you have a chance it'd be nice to document what you needed, what you did and if you're happy with the results.
 

Similar threads

Ch1pbutty
Sorry Now Sold Sold
Replies
4
Views
336
Ch1pbutty
Ch1pbutty
M
Replies
13
Views
932
a892374923874
A
BenPcaliman
Replies
0
Views
2K
BenPcaliman
BenPcaliman
Greg&Mel Australian Cali
Replies
15
Views
2K
Greg&Mel Australian Cali
Back
Top