Buy all your VW California Accessories at the Club Shop Visit Shop

Galli Compact pitching help

CampervanTime

CampervanTime

VIP Member
Messages
1,070
Location
Melton Mowbray, Leicestershire, UK
Vehicle
Westy Sven Hedin
Hi everyone

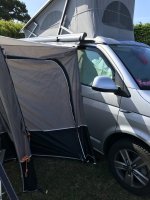
I’ve been nicknamed “Mr Sweary” by my wife now after our first attempt at pitching our new Galli Compact awning.

We’ve got the factory roll out awning on our Cali and we’ve used the drive away kit (double kador strip and figure of 8).

I think we need some help / pointers as we spent ages trying to get it in the right place and to get some sort of order to the tunnel doors.

Our biggest issues seem to be;

Awning sliding off the rail when pitching
Tunnel doors being too flappy / not at the right angles
What order to pump up the air beams (and when)
The sliding door catching on the plastic figure of 8 when opening / closing the door.

We pitched it thus;
1. Kador strip in to awning rail, closed awning rail fully. Attached figure of 8, then put awning in figure of 8.
2. Then tried to peg out the far sides of the awning to the floor
3. Then pumped up the air beams, rear one first then middle then front.
4. Pegged the front and rear tension straps to get some form of shape to it
5. Tried to sort the doors on the tunnel
6. Repegged, guyed etc.

We’ve also found that we can’t close the tunnel door now either (we pitched it with it open).

It just generally felt far too difficult, like we were missing something or just being inept.

We really like the space it gives us but we have to get more proficient at this, for the sake of our camping neighbours alone!!

Any tips / photos of a proper setup / help much appreciated!!
 
Hi everyone

I’ve been nicknamed “Mr Sweary” by my wife now after our first attempt at pitching our new Galli Compact awning.

We’ve got the factory roll out awning on our Cali and we’ve used the drive away kit (double kador strip and figure of 8).

I think we need some help / pointers as we spent ages trying to get it in the right place and to get some sort of order to the tunnel doors.

Our biggest issues seem to be;

Awning sliding off the rail when pitching
Tunnel doors being too flappy / not at the right angles
What order to pump up the air beams (and when)
The sliding door catching on the plastic figure of 8 when opening / closing the door.

We pitched it thus;
1. Kador strip in to awning rail, closed awning rail fully. Attached figure of 8, then put awning in figure of 8.
2. Then tried to peg out the far sides of the awning to the floor
3. Then pumped up the air beams, rear one first then middle then front.
4. Pegged the front and rear tension straps to get some form of shape to it
5. Tried to sort the doors on the tunnel
6. Repegged, guyed etc.

We’ve also found that we can’t close the tunnel door now either (we pitched it with it open).

It just generally felt far too difficult, like we were missing something or just being inept.

We really like the space it gives us but we have to get more proficient at this, for the sake of our camping neighbours alone!!
I think that your big mistake was #2.

After attaching the awning to the rail, with or without the wind out wound in or out, peg down the nearside, then the far side, then inflate, then the remainder of the pegging out.

We have a Kela, and experience with where to peg out the nearside helps.

In fine weather we do this.
1. Wind out canopy fully.
2. Attach driveaway to canopy.
3. Peg out nearside (2 pegs)
4. Peg out farside (2 pegs)
5. Inflate
6. Peg out remainder + flies as appropriate
7. Tension canopy

Only rarely do we attempt to attach to the canopy with no gap, and this usually results in a very baggy looking driveaway.
 
Thanks for the tips!

One of the things we have struggled with is the angles on the tunnel doors. The van attachment strip is the same length as our awning (2.5m) but then the tunnel attaches to the awning at about 1m long, so the side doors are at an angle to the van, if that makes sense ?

I’ve attached an image, to try to explain!

ACD89AE6-7A93-4689-B1B0-7CCE7D972AC7.jpeg
 
Thanks for the tips!

One of the things we have struggled with is the angles on the tunnel doors. The van attachment strip is the same length as our awning (2.5m) but then the tunnel attaches to the awning at about 1m long, so the side doors are at an angle to the van, if that makes sense ?
Have you viewed this:
 
Yes we did. Just makes it look so easy doesn’t it!! I think we just need some reference points on the van.

We were just looking at if the throw over straps would be better than trying to use the kador strip as they would hold the tunnel up higher on the van and then make the doors a better shape. I didn’t bring them with me on this trip but maybe next time.
 
i wind the van awning out, fully erect the vango (dont peg it down) insert kador, move tent footprint to suit, wind van awning back in to take slack, peg footprint down.

i used it this weekend, and didn't even bother attaching it to the van, just had it a few meters away from the van!
 
We have the Vango Cruz (last years model) have only used 4 times and we’ve had the problem of the tunnel not appearing to fit right and if it has a “really” tight tension across the roof of the tunnel then the strip doesn’t get affected by the door sliding open. We peg out the footprint first ensuring it’s square as poss to van.
We unwind the awning a couple of inches, attach cador strip and wind back fully.
Inflate first beam nearest van, pulling out tunnel to suitable tension and peg. Continue to inflate beams, doing porch last. Ensure awning is straight to the footprint and finish pegging out. We use a different coloured peg next to front wheel to mark where to stop to re join the awning after a day out. Doesn’t take that long.
The last time we were away we “copied” a few others on the field and wound out the awning to meet the Vango without attaching, gives a little air tunnel which is nice in warm weather. We have sides for the wind out should we need to attach them.
 
Just been having some similar issues the first couple of times I’ve tried to pitch our new Galli Compact awning. I left the wind-out awning out by about 6 inches and pitched the Galli with the van door open. When looking at winding the awning all the way in, the figure of 8 caught on the sliding door, I’m not sure how you can wind it all the way in and still open the sliding door without the door fouling the driveaway corridor every time it opens? My plan will be to leave it out at least the 6 inches or like @Amarillo says, even further.

A couple of questions from me though:
  1. The footprint bag comes with 3 parts. One is a large black rectangle obviously for the main room part of the awning. The other 2 smaller grey bits I wasn’t so sure. One is shaped like a trapezium which I presume goes in the corridor part of the driveaway. The other is a long rectangle with cutouts which match the widths of the air beams but I can’t see where this one should go?
  2. There is a zip on the groundsheet of the awning where the door to the main room is from the driveaway corridor. I can’t see what connects into this zip? It looks like it would zip onto the door possibly to stop water getting in when you have left site for the day and left the awning erected but there isn’t a zip on the door to zip it into?
  3. The webbing straps supplied are confusing me. There are a couple which have a connector at one end and peg part at the other and then one which has connectors at each end and a peg part in middle. I’m thinking one is for the front porch and clips into the connector on the left and then pegs down, the one with 2 connectors on clips into both the back connectors and then pegs down in a V shape if anybody can confirm?
  4. On the front porch there are 2 tabs at the top but only one of them has a connector to connect a webbing strap to. The other is just a tab of material, is this right?
Thanks in advance!
Chris
 
We have given up trying to attach our Galli compact to the van. We just use it as a tent which makes driving away a lot easier and no stress at all.
 
Just been having some similar issues the first couple of times I’ve tried to pitch our new Galli Compact awning. I left the wind-out awning out by about 6 inches and pitched the Galli with the van door open. When looking at winding the awning all the way in, the figure of 8 caught on the sliding door, I’m not sure how you can wind it all the way in and still open the sliding door without the door fouling the driveaway corridor every time it opens? My plan will be to leave it out at least the 6 inches or like @Amarillo says, even further.

A couple of questions from me though:
  1. The footprint bag comes with 3 parts. One is a large black rectangle obviously for the main room part of the awning. The other 2 smaller grey bits I wasn’t so sure. One is shaped like a trapezium which I presume goes in the corridor part of the driveaway. The other is a long rectangle with cutouts which match the widths of the air beams but I can’t see where this one should go?
  2. There is a zip on the groundsheet of the awning where the door to the main room is from the driveaway corridor. I can’t see what connects into this zip? It looks like it would zip onto the door possibly to stop water getting in when you have left site for the day and left the awning erected but there isn’t a zip on the door to zip it into?
  3. The webbing straps supplied are confusing me. There are a couple which have a connector at one end and peg part at the other and then one which has connectors at each end and a peg part in middle. I’m thinking one is for the front porch and clips into the connector on the left and then pegs down, the one with 2 connectors on clips into both the back connectors and then pegs down in a V shape if anybody can confirm?
  4. On the front porch there are 2 tabs at the top but only one of them has a connector to connect a webbing strap to. The other is just a tab of material, is this right?
Thanks in advance!
Chris

I have a Galli 2. Haven’t had it that long but so far I have found the best thing is fold up mirrors so as not to bash my head and swivel drivers seat before starting.
wind out the van awning about a foot, insert Kador/fig 8, attach Galli, peg out near side tunnel taut front to back and square-ish. Inflate from back towards front beams. Once up you can re-adjust the awning on foot print, pull it away from the van a bit more and peg out the rest of the awning. Only then do I wind in the awning to tension the tunnel but only until the top edge of the awning cover just touches the awning housing or slightly less. That will then sit at about 45 degrees, the kador will hang down slightly but crucially because the awning isn’t fully closed there is just the right amount of room for the sliding door to clear it in the space between so no catching. Also the gaps in the plastic kador are away from the door enough so any drips go on the ground and not in the door.
Finally I put a bright orange reflective Guy line parallel with the van with a bright peg at wheel centres so when I return I can park in the same spot. (And because it’s a Cali with the door on the ‘wrong’ side you can peer out of the drivers window to check) TTFB (Time to first beer) is rapidly improving but still tweaking and some useful tips elsewhere on the post. I think the Galli is a challenge because it runs along rather than out from the van making the tunnel more difficult to tension.

1. The other 2 parts of the foot print we worked out are for the front porch and the side tunnel. We put them on the carpet inside to put the bikes on, and use big perforated foam mats in the ‘Porch’

2. I think you are describing the electric hook up cable access zip

3. Straps with 2 clips are the storm straps x2 front and x2 rear on Galli. The other straps are the throw over straps which clip to leading edge of tunnel, go over the van and peg to far side if you don’t have a rail.

Which leads to 4....... I would have thought that should have a clip on it. Certainly looks like it from product photos of the compact. Full size one does.

Hope that helps

Thanks for that. I think I’m doing everything in the right order, just need to practice I guess.

1. I’m surprised part is for the front porch because it looked like it had cutouts for the air beams but these could be where the door opens.

2. The zip I mean is one that runs flat to the ground along the door in the side tunnel into the awning so don’t think its for the hook up cable. I know the low level zip you mean for that.

3. Thanks for that.

4. I’ve just checked the product photos and like you say, they definitely both have tabs on. I’ll check this with the shop

Oh in which case that is the zip for the fly screen when you close both doors between the awning and tunnel. That holds the groundsheet up on the lower edge of the flyscreen door. Very useful when a flood comes across you pitch.... it works.
 
Oh in which case that is the zip for the fly screen when you close both doors between the awning and tunnel. That holds the groundsheet up on the lower edge of the flyscreen door. Very useful when a flood comes across you pitch.... it works.

Ahhh ok I’ll check that next time I get it out. Cheers!
 
Back
Top