VincentVan
VIP Member
I’ve removed the rear seat from my Ocean several times to use it as a van. The process is straightforward but the seat is very heavy. Best with 2 people and not a job to do in a rush because it’s so easy to damage some trim as you manoeuvre it out. This is the method I used:
1. First prize out the plastic end caps, one at the end of each seat rail (I used a plastic trim tool)
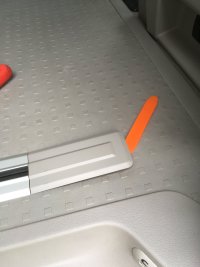
2. Slide the 2 short aluminium sections out (2 on each side)
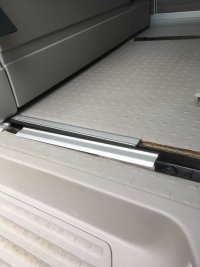
3. Remove the stops(1 on each side) using a flat blade screwdriver
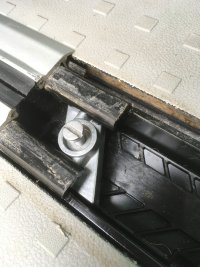
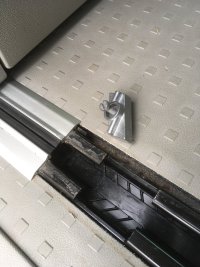
4. Release the seat locking mechanism and put a screwdriver in the hole to jam it open (see the California handbook)
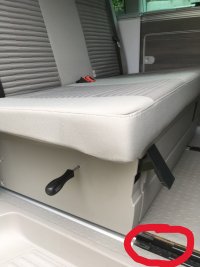
5. Note the cutout gap in the rails (circled in the photo above). Slide the seat forward all the way to the front until the rear feet sit in this cutout. When you do this be careful not to damage the locking release handle when it hits the base of the front seat.
6. Ask an assistant to push down on the back of the seat to rock the front feet up. Slide a plank under the front feet
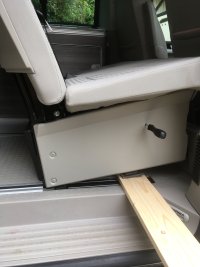
7. Ask the assistant to push the back of the seat forward to raise the rear legs up. Slide a second plank under the rear legs
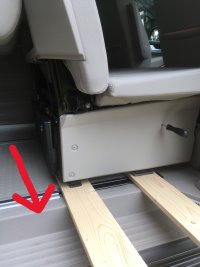
8. Lift the free ends of the planks and shuffle the seat on the planks towards the back of the van until it is nicely in the doorway. Lift the free ends of the planks and slide them out until you can put them on the ground. Shuffle the seat down the planks.
Note that the trim on the step (arrowed) is not screwed to the floor and is quite flappy. Be careful to lift, not just pull the planks, so that the trim is not pulled away during the sliding process
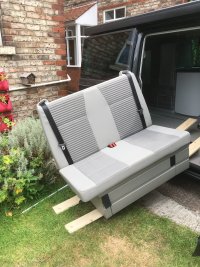
Putting the seat back is an exact reversal of this process. I've never replaced the seat stops and haven't missed them, it's quite handy being able to slide the seat right forwards at times. If driving, don't have the seat right forward to ensure the rear feet are not aligned with the cutouts.
TIPS: Use thicker planks than I did and remember to empty the drawer (mine was full of tin cans!).
Hope this is useful
1. First prize out the plastic end caps, one at the end of each seat rail (I used a plastic trim tool)

2. Slide the 2 short aluminium sections out (2 on each side)

3. Remove the stops(1 on each side) using a flat blade screwdriver


4. Release the seat locking mechanism and put a screwdriver in the hole to jam it open (see the California handbook)

5. Note the cutout gap in the rails (circled in the photo above). Slide the seat forward all the way to the front until the rear feet sit in this cutout. When you do this be careful not to damage the locking release handle when it hits the base of the front seat.
6. Ask an assistant to push down on the back of the seat to rock the front feet up. Slide a plank under the front feet

7. Ask the assistant to push the back of the seat forward to raise the rear legs up. Slide a second plank under the rear legs

8. Lift the free ends of the planks and shuffle the seat on the planks towards the back of the van until it is nicely in the doorway. Lift the free ends of the planks and slide them out until you can put them on the ground. Shuffle the seat down the planks.
Note that the trim on the step (arrowed) is not screwed to the floor and is quite flappy. Be careful to lift, not just pull the planks, so that the trim is not pulled away during the sliding process

Putting the seat back is an exact reversal of this process. I've never replaced the seat stops and haven't missed them, it's quite handy being able to slide the seat right forwards at times. If driving, don't have the seat right forward to ensure the rear feet are not aligned with the cutouts.
TIPS: Use thicker planks than I did and remember to empty the drawer (mine was full of tin cans!).
Hope this is useful
Last edited:


