

soundsk
VIP Member
- Messages
- 92
- Location
- Portugal
I'm posting this hoping it may help others, if this post is in anyway disruptive, please delete it.
Having recently bought two new leisure batteries, with the previous pair just lasting a year and a half, I decided since I was replacing them, I might install a few upgrades to make sure this never happened again and that from now on, I actually know what's going on with the leisure electrics and battery health.
Everything was done with no damage or permanent modification to the van and can be reverted to stock, without any traces traces.
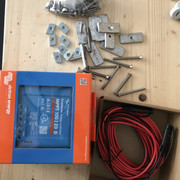
I installed a cut-off switch for each of the leisure batteries, and three energy counters, one for each battery and one for the total energy.
These counters measure voltage and amperage, instantly but also cumulatively. In addition to this, the two battery counters are bi-directional, and you can set the battery capacity, allowing the counter to keep a tally of what goes in and what goes out, and how much you have left. The percentage it shows is based on the Ah capacity rather than voltage.
You can also set a number of alarms for current or voltage or even capacity.
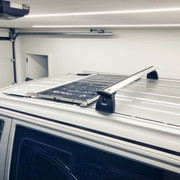
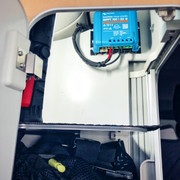
I also installed a solar panel with a Victron controller.
So, from the beginning:
Cables from the rear leisure battery can be easily channeled to the opening inside the cabinet beneath the hob, where you access the waste water dump valve.
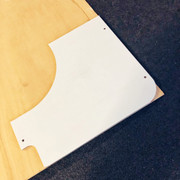
So I cut a new panel out of wood, saving the original one. This panel has the cut outs for the screens and the cut-off switch.
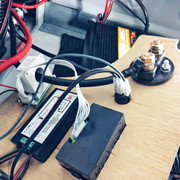
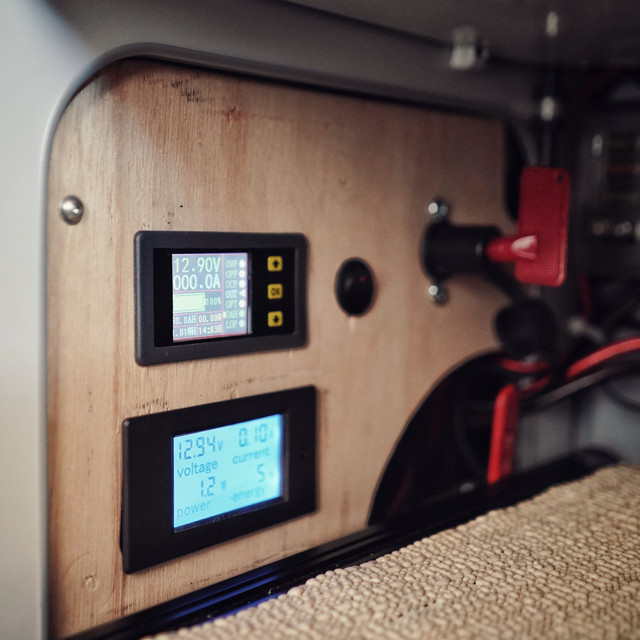
As you can see below, the cable that runs from the positive pole of the battery and is interrupted by the cut-off switch for the rear battery, snakes through a hall sensor that is connected to the rear battery meter (the one on top, color LCD). The meter on the bottom is a different model, and measures the total consumption, via a shunt mounted between the rear earth shunt cable and batteries. The small switch mounted on the panel is for the interior LED strips I mounted, connected to a small fuse box at the rear of this same compartment.
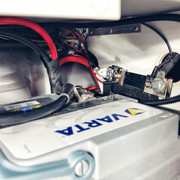
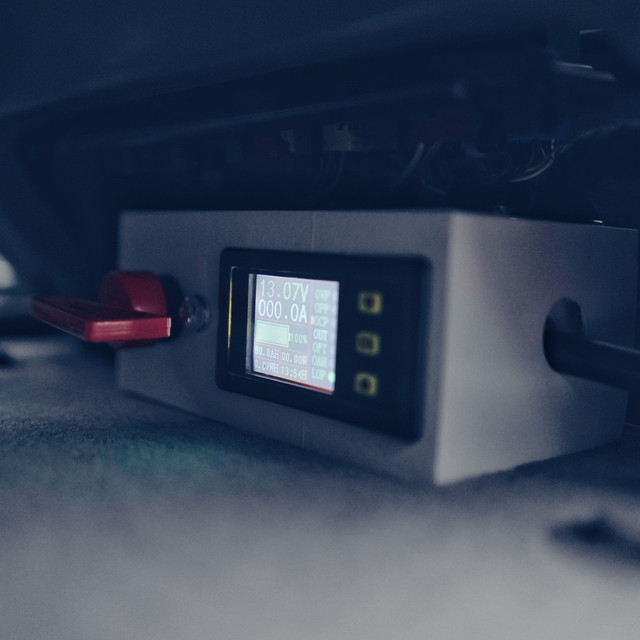
Installed and working, the bottom meter reads the total consumption from the leisure electrics, including the LED lights the inverter I installed. This meter is more accurate but only reads one way. The top meter is for the rear battery only, and this one is a bit less accurate, only reading currents over 0.6A, but it has the advantage of being less intrusive, and much more configurable. I set the battery capacity to 80Ah to match my leisure batteries (as you can see in the image below), and metering current in both directions, it adds to this when charging, or subtracts when discharging, giving you a very good notion of how your batteries are doing.
It has a relay output that can be triggered by the configurable alarms for over-current. over-voltage, under-voltage etc etc.
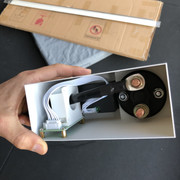
For the front leisure battery, I designed and printed a small box to house the meter and cut-off switch. It fits snugly under the seat, facing forward.
By comparing what comes out or goes in to each battery separately, you can understand if loads are being divided by both batteries equally, or if there is an problem and one of the batteries is taking a hit.
To measure voltage for each separate battery, you just have to switch the other battery off via its cut-off switch. This is also handy to calibrate each of the meters, if necessary.
[url=https://ibb.co/nfx0pwk]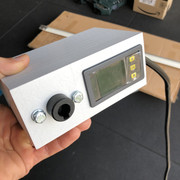
Here are the links for the meters I used:
Hall sensor Coulomb Meter from Amazon
Earth shunt meter from Amazon
You can also find them on eBay.
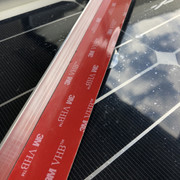
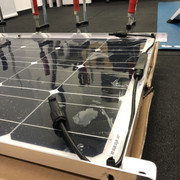
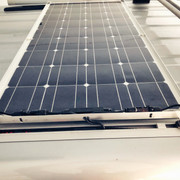
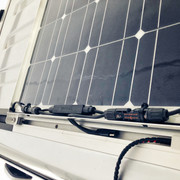
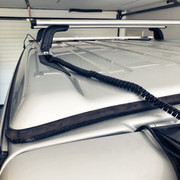
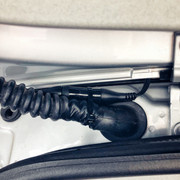
As for the final upgrade, I decided to build and install a solar panel. I know Roger from Solar Camper has good kits for sale, but I'm in Portugal, and the shipping delivery time made me decide to make my own. The Victron controller is the heart here, miles better than any of the chinese cheapo charge controllers you see around.
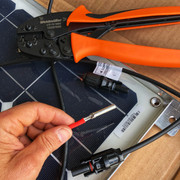
I managed to source some coiled cable, and I used SAE connectors so I can replace or remove the outer cables quite easily.
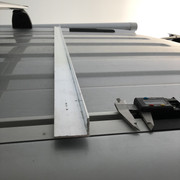
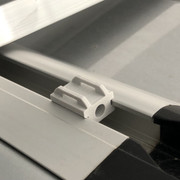
Some aluminium railing from the hardware store, and it's done!

So, over the nest few days I just want to calibrate the meters, and after that I will see how the solar behaves, and if the meters actually provide reliable information, but so far they appear to work well.
I will report back here with feedback, letting you know of any modifications and the performance of the upgrades.
Cheers!
Having recently bought two new leisure batteries, with the previous pair just lasting a year and a half, I decided since I was replacing them, I might install a few upgrades to make sure this never happened again and that from now on, I actually know what's going on with the leisure electrics and battery health.
Everything was done with no damage or permanent modification to the van and can be reverted to stock, without any traces traces.
I installed a cut-off switch for each of the leisure batteries, and three energy counters, one for each battery and one for the total energy.
These counters measure voltage and amperage, instantly but also cumulatively. In addition to this, the two battery counters are bi-directional, and you can set the battery capacity, allowing the counter to keep a tally of what goes in and what goes out, and how much you have left. The percentage it shows is based on the Ah capacity rather than voltage.
You can also set a number of alarms for current or voltage or even capacity.
I also installed a solar panel with a Victron controller.
So, from the beginning:
Cables from the rear leisure battery can be easily channeled to the opening inside the cabinet beneath the hob, where you access the waste water dump valve.
So I cut a new panel out of wood, saving the original one. This panel has the cut outs for the screens and the cut-off switch.
As you can see below, the cable that runs from the positive pole of the battery and is interrupted by the cut-off switch for the rear battery, snakes through a hall sensor that is connected to the rear battery meter (the one on top, color LCD). The meter on the bottom is a different model, and measures the total consumption, via a shunt mounted between the rear earth shunt cable and batteries. The small switch mounted on the panel is for the interior LED strips I mounted, connected to a small fuse box at the rear of this same compartment.
Installed and working, the bottom meter reads the total consumption from the leisure electrics, including the LED lights the inverter I installed. This meter is more accurate but only reads one way. The top meter is for the rear battery only, and this one is a bit less accurate, only reading currents over 0.6A, but it has the advantage of being less intrusive, and much more configurable. I set the battery capacity to 80Ah to match my leisure batteries (as you can see in the image below), and metering current in both directions, it adds to this when charging, or subtracts when discharging, giving you a very good notion of how your batteries are doing.
It has a relay output that can be triggered by the configurable alarms for over-current. over-voltage, under-voltage etc etc.
For the front leisure battery, I designed and printed a small box to house the meter and cut-off switch. It fits snugly under the seat, facing forward.
By comparing what comes out or goes in to each battery separately, you can understand if loads are being divided by both batteries equally, or if there is an problem and one of the batteries is taking a hit.
To measure voltage for each separate battery, you just have to switch the other battery off via its cut-off switch. This is also handy to calibrate each of the meters, if necessary.
[url=https://ibb.co/nfx0pwk]
Here are the links for the meters I used:
Hall sensor Coulomb Meter from Amazon
Earth shunt meter from Amazon
You can also find them on eBay.
As for the final upgrade, I decided to build and install a solar panel. I know Roger from Solar Camper has good kits for sale, but I'm in Portugal, and the shipping delivery time made me decide to make my own. The Victron controller is the heart here, miles better than any of the chinese cheapo charge controllers you see around.
I managed to source some coiled cable, and I used SAE connectors so I can replace or remove the outer cables quite easily.
Some aluminium railing from the hardware store, and it's done!
So, over the nest few days I just want to calibrate the meters, and after that I will see how the solar behaves, and if the meters actually provide reliable information, but so far they appear to work well.
I will report back here with feedback, letting you know of any modifications and the performance of the upgrades.
Cheers!


