N
You are using an out of date browser. It may not display this or other websites correctly.
You should upgrade or use an alternative browser.
You should upgrade or use an alternative browser.
N
Nik_campervan
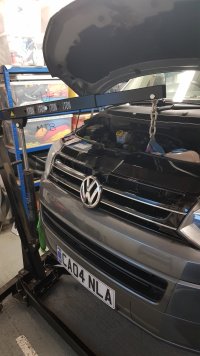
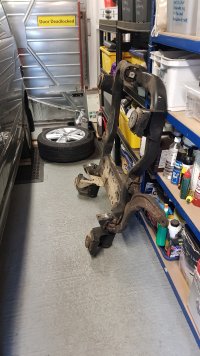
Day1 of clutch & flywheel change, steering rack & arb disconnected from subframe and held up to engine with zipties. Lower balljoints off hubs, driveshafts out. Both balljoints need replacing as boots are drying out with age. Balljoint tapers stuck in lower arms. Front & rear Engine mounts disconnected from subframe, subframe bolts out one at a time and alignment pins fitted to chassis. Subframe out, damn thats heavy. Lower balljoints knocked out with subframe inverted and supported. Engine to gbox bolts all loosened. Damn starter motor is a pain, cant see the upper bolt - job for tomorrow. Gear linkage disconnected and mechanism free of gbox. Engine crane in place. Just need the starter off and hydraulic line off the slave. Hopefully get these off and then the box out. Looking like 3weekends and ill be done. Anyone doing similar pretty much all mounting bolts / nuts are single use thus £140 to the bill.


Defender90
VIP Member
Great read well done I spent years rebuilding a land rover defender nothing more rewarding than bringing a vehicle back to life and you get to know exactly how things work keep the updates coming.Day1 of clutch & flywheel change, steering rack & arb disconnected from subframe and held up to engine with zipties. Lower balljoints off hubs, driveshafts out. Both balljoints need replacing as boots are drying out with age. Balljoint tapers stuck in lower arms. Front & rear Engine mounts disconnected from subframe, subframe bolts out one at a time and alignment pins fitted to chassis. Subframe out, damn thats heavy. Lower balljoints knocked out with subframe inverted and supported. Engine to gbox bolts all loosened. Damn starter motor is a pain, cant see the upper bolt - job for tomorrow. Gear linkage disconnected and mechanism free of gbox. Engine crane in place. Just need the starter off and hydraulic line off the slave. Hopefully get these off and then the box out. Looking like 3weekends and ill be done. Anyone doing similar pretty much all mounting bolts / nuts are single use thus £140 to the bill.
View attachment 101768
View attachment 101769
View attachment 101770
sidepod
Super Poster
Lifetime VIP Member
- Messages
- 6,957
- Vehicle
- T4 PopTop
Good stuff. Nice to see someone actually working on their van. A rare sight on this forum.
N
NessL
VIP Member
I like how organised and tidy your garage isDay1 of clutch & flywheel change, steering rack & arb disconnected from subframe and held up to engine with zipties. Lower balljoints off hubs, driveshafts out. Both balljoints need replacing as boots are drying out with age. Balljoint tapers stuck in lower arms. Front & rear Engine mounts disconnected from subframe, subframe bolts out one at a time and alignment pins fitted to chassis. Subframe out, damn thats heavy. Lower balljoints knocked out with subframe inverted and supported. Engine to gbox bolts all loosened. Damn starter motor is a pain, cant see the upper bolt - job for tomorrow. Gear linkage disconnected and mechanism free of gbox. Engine crane in place. Just need the starter off and hydraulic line off the slave. Hopefully get these off and then the box out. Looking like 3weekends and ill be done. Anyone doing similar pretty much all mounting bolts / nuts are single use thus £140 to the bill.
View attachment 101768
View attachment 101769
View attachment 101770
N
Nik_campervan
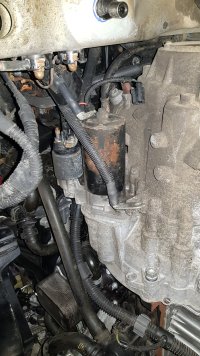
Day2, n/s engine mount off and lowered the engine to reveal the hidden starter bolt, 13mm nut holds a harness cover/bracket then the 18mm box-engine bolt. Gearbox skate in place and removed all box-engine bolts, drop the engine some more and pull the box out. Gearbox is ridiculously heavy to manhandle. Box input shaft has no play and oil was clean when drained so all good internally. New slave/release bearing fitted. Old clutch was original VW with VW brand markings. Plate not bad for 87k, maybe get another 20k from it. DMF has lateral play in centre bearing. Rear main seal slight build up of residue but not enough to pull the sump off and replace so left alone. New flywheel in, had to pop a mtg bolt back in to jam a prybar into ring gear to counter the tourque needed on flywheel bolts. Clutch plate and cover centralized and torqued down. Didnt use a self adjusting clutch fitting tool as cover was correctly preset and just wound down evenly till home on the flywheel. Will continue next weekend.
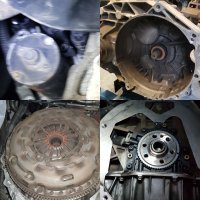
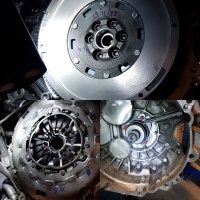


sidepod
Super Poster
Lifetime VIP Member
- Messages
- 6,957
- Vehicle
- T4 PopTop
Nice. I’ve always just used a wooden dowel with duct tape wrapped around to the right diameter for clutch alignment. Good stuff. Keep it coming. 
N
Nik_campervan
Constructive day, battled for a couple of hours to get the box back in, all bolted up, clutch line bled, starter back in, shift cables on. Another couple of hours fighting the subframe back in, jacked it up hard to body over the alignment pins then 1by1 bolted home. 150nm + 180degrees is about my limit it would seem strength wise. Hopefully get this finished tomorrow.
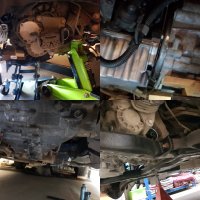

N
Nik_campervan
Day4, steering rack, rear & front engine mount refitted with new stretch bolts. Driveshafts in greased splines, new lower balljoints with new stretch bolts, oil quality sensor reconnected, box filled with fresh oil, new hub nuts, wheels on. Whilst up in the air ran through all gears with engine running. Seems ok, ran out of daylight to roadtest. If you do this DIY its not complicated just time consuming and needs a fair amount of tools.
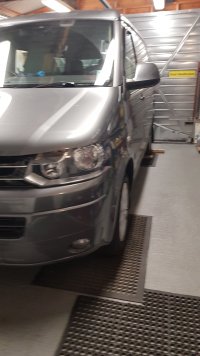

N
Nik_campervan
Coolant heater has never worked since i hot the van, no diagnostic comms and if i fit the 25a fuse the combustion fan runs all the time. Given how much mud was under the van i expected the control board to be dead. Found a complete webasto from a scrap t5.1 cali on ebay with bracket and all fuel pumps seemed worth a chance. It was 3yrs newer and had a later part no suffix but all other id numbers matched. Bought a service kit from butlertechnic (new flame chamber, gaskets and glow plug). Dismantled and serviced the s/h heater today, control board looked good no heat damage. Reassembled and then pulled the dead heater from the van and fitted the serviced heater into the vans original mounting bracket. Refitted to van, coolant hose has poor access and takes patience. Refitted 25a fuse, no combustion fan which is a step fwd. Connected vcds and found the heater was locked due to historic crash fault code (guess that's why it ended up in the scrap yard). Reset the controller to clear the lockout. Forced a heater actiation and we have heat. Coolant circulates, no leaks and engine upto temp quickly. Almost at the end of the repairs now. Will pull the old heater apart out of curiosity to see whats killed it.
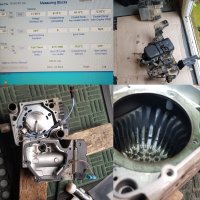
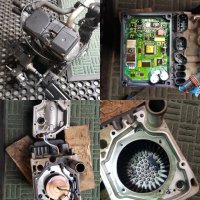


KGCali
Retired and still young at heart!
Lifetime VIP Member
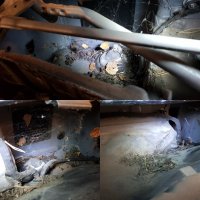
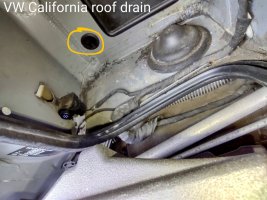
Good job, did mine last year, don't forget to clean the roof drain hole grommets and then wipe them with a little silicone sprayWipers and scuttle panel off to clean out the moss and leaf litter collection.
View attachment 105320
N
Nik_campervan
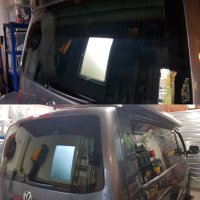
Dark smoke 75% tint applied, side windows straightforward. The rear window took 4 goes. Not straightforward shrinking the film with a heat gun. Too little heat and the film dosent shrink and instead creases. Constantly worried of applying too much heat to the double glazed windows. Pleased with the result not perfect, a couple of small creases in the corners but for £70 pretty chuffed.

L
Lizziwhizz
Hi Nik, we to have a 2010 Cali SE, 140, done a very similar thing to you and gone through entire van mechanicals. We have done some mods with the rear sliding seat and created a fold out rear bed board that clips into the original Cali rear brackets and head rest fixings. My goal was to create more living space in the day, bench seat now slides back, base cushion level with cup holder (which can now be used inc 12 volt plug) so created an extra 40cm in the day and 20cm at night. Created a fixed / removable slide out toilet on heavy duty runners that can be used when bed is fully out. This is a game changer and one of the most ambitious projects I have under taken.
Not sure if it’s the first California to have a fixed slide out toilet! Also have a drop down curtain that is shut away behind folding roof shutter, this can be deployed at night when stealth camping to shut off cabin area.
Moving the bench seat back so it’s now over the rear wheels has improved handling no end.
I also fitted genuine VW T32 front and rear suspension springs to improve and stiffen handling
from the current T28 set up.
Metal ironing / bed board removed. Why VW thought that was a good idea is beyond me. I appreciate storage is vast under there, but you only fill it with crap you don’t really need… I still have loads of storage but most importantly more room in the main living area with better access to wardrobe…
Many thanks for sharing your hard work and it’s nice to see a fellow owner that’s prepared to put in the effort and rebuild etc… So many owners tend to buy nearly or brand new, yet there are so many used examples out there that will do exactly the same for a lot less money. We bought ours and paid for it out right, so it’s paid for, none of this PCP garbage! Yes we could of bought a brand new one, but why spend £65000.00 when you can pick one up used for £32000.00?
I’ve done loads more mods, internal bike rack that locks into floor rails, we can get two full size MTB,s inside, fork mounted, due to the extra living area space created.
Good luck with your future endeavours!
soulstyledevon
Kennycalifornia
Super Poster
VIP Member
- Messages
- 6,519
- Vehicle
- Cali now sold
Hi Nik, we to have a 2010 Cali SE, 140, done a very similar thing to you and gone through entire van mechanicals. We have done some mods with the rear sliding seat and created a fold out rear bed board that clips into the original Cali rear brackets and head rest fixings. My goal was to create more living space in the day, bench seat now slides back, base cushion level with cup holder (which can now be used inc 12 volt plug) so created an extra 40cm in the day and 20cm at night. Created a fixed / removable slide out toilet on heavy duty runners that can be used when bed is fully out. This is a game changer and one of the most ambitious projects I have under taken.
Not sure if it’s the first California to have a fixed slide out toilet! Also have a drop down curtain that is shut away behind folding roof shutter, this can be deployed at night when stealth camping to shut off cabin area.
Moving the bench seat back so it’s now over the rear wheels has improved handling no end.
I also fitted genuine VW T32 front and rear suspension springs to improve and stiffen handling
from the current T28 set up.
Metal ironing / bed board removed. Why VW thought that was a good idea is beyond me. I appreciate storage is vast under there, but you only fill it with crap you don’t really need… I still have loads of storage but most importantly more room in the main living area with better access to wardrobe…
Many thanks for sharing your hard work and it’s nice to see a fellow owner that’s prepared to put in the effort and rebuild etc… So many owners tend to buy nearly or brand new, yet there are so many used examples out there that will do exactly the same for a lot less money. We bought ours and paid for it out right, so it’s paid for, none of this PCP garbage! Yes we could of bought a brand new one, but why spend £65000.00 when you can pick one up used for £32000.00?
I’ve done loads more mods, internal bike rack that locks into floor rails, we can get two full size MTB,s inside, fork mounted, due to the extra living area space created.
Good luck with your future endeavours!
We need pictures…
L
Lizziwhizz
I’ve already posted pictures of the bed system already. I appreciate that many owners may not see the relevance of changing what most would agree is a great well thought out design. I never intended on changing anything in our Cali, but after having a few times when the bed frame came out of its front plastic guide brackets (due to having Brandrup topper hitting the back of the bench seat when raising the metal frame and deploying prop stand) and it dropping on what ever was underneath.. annoyed me to the point of a re-design.
The toilet idea came about when I realised that when bed was fully deployed, we had the whole right cupboard access available, for a possible slide out system.
I know having a toilet under the sink is not everyone’s cup of tea, so haven’t shared any pics of this for that main reason.
Best regards
The toilet idea came about when I realised that when bed was fully deployed, we had the whole right cupboard access available, for a possible slide out system.
I know having a toilet under the sink is not everyone’s cup of tea, so haven’t shared any pics of this for that main reason.
Best regards
Last edited:
L
Lizziwhizz
Many thanks KG Cali for the post on roof drain location under scuttle, never realised that was there!
Really appreciated
Regards
Wayne
Really appreciated
Regards
Wayne
DaisymanS92VW
You have now inspired me to do similar! great work on your TLC projectScrape through the cupboard door finish blended in with some enamel model paint. 10mins work and £9.99. Its the small stuff like this that collectively make a difference.
View attachment 96172
DaisymanS92VW
Thorough job! looks lovelyDriveshaft back in, full service and 50miles to confirm the cooling system holds pressure. Replaced the chinese headunit with a kenwood DMX8020DABS sound much improved, great DAB reception and wireless android auto great too. Washed and ready for a fresh MOT on friday.
Next year ill do the cambelt and replace the exhaust with a standard layout but in stainless.
All in renovations came to £4k making full cost £35k which im happy with knowing its full serviced and ready for years of camping use.
View attachment 97428
KGCali
Retired and still young at heart!
Lifetime VIP Member
What paint did you use for the foot light?
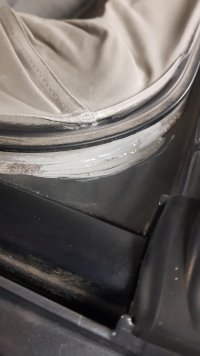
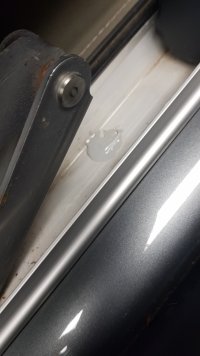
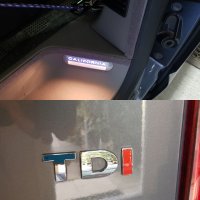
Touched up the step lights with silver paint and repainted the red i tailgate badge. All 3 of the step light housings are cracked but didn't realise until i came to touch up the paint, at £40 each they won't be getting replaced.
View attachment 108582
N
Nik_campervan
Silver paint pen from amazon, nothing fancy not perfect colour/metallic match but improves them no end, aint no way im spending £130-£150 on 3 new lights.What paint did you use for the foot light?
N
Nik_campervan
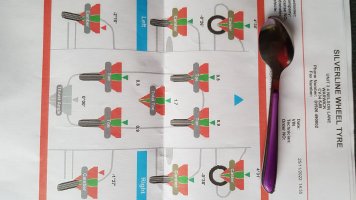
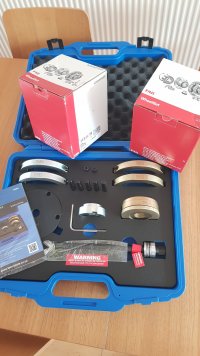
Recent trip to france between Annecy and Verdon droning from the rear i initially thought was sawtooth tyre wear, lowered pressures slightly, swapped tyres diagonally all having no effect. Thankfully we made it a further 1000miles home but the drone was similar to a landrover on old bar grip tyres. Back home no play in the rear wheel bearings but both sound rough passenger side especially so, this weekends entertainment is replacement of both bearings. Also note the plastic plugs that should keep debris out of the bearings are missing on both sides and the inner race of the bearing is corroded. New plugs on order.


About us
The VW California Club is the worlds largest resource for all owners and enthusiasts of VW California campervans.


