Buy all your VW California Accessories at the Club Shop Visit Shop

T4 California Blinds

Notnarb

Notnarb

Messages
17
Location
Paignton
Vehicle
T4 Hightop
Is there a supplier to replace the blinds in our T4 Cali. They are a bit ‘urgh’

2 x side & 1 at the rear.

ALSO. Is there any tutorial on how to remove/replace them?

660982eb75457413b9d0acced72559ac.jpg


Sent from my iPhone using Tapatalk
 
Is there a supplier to replace the blinds in our T4 Cali. They are a bit ‘urgh’

2 x side & 1 at the rear.

ALSO. Is there any tutorial on how to remove/replace them?

660982eb75457413b9d0acced72559ac.jpg


Sent from my iPhone using Tapatalk

Don’t know about a supplier selling aftermarket ones but a little bit of Googling and it appears you can get the originals. If you’re happy to pay around €600 plus for them. Each I imagine.


Sent from my iPhone using Tapatalk
 
GULP.

Thanks, it may be a diy job then.


Sent from my iPhone using Tapatalk
 
GULP.

Thanks, it may be a diy job then.


Sent from my iPhone using Tapatalk

Maybe something a conversion specialist or caravan centre may be able to help with.


Sent from my iPhone using Tapatalk
 
Just to be aware that the curtains in a T4 are made from fire resistant material, for good reason. So any DIY job should consider this.
Second hand parts can be found on Ebay Classifieds in Germany
Is it curtains or blinds you want to replace? If its curtains due to them being dirty, you could wash them.
Regards Padraic
 
Günzl bus shop?
 
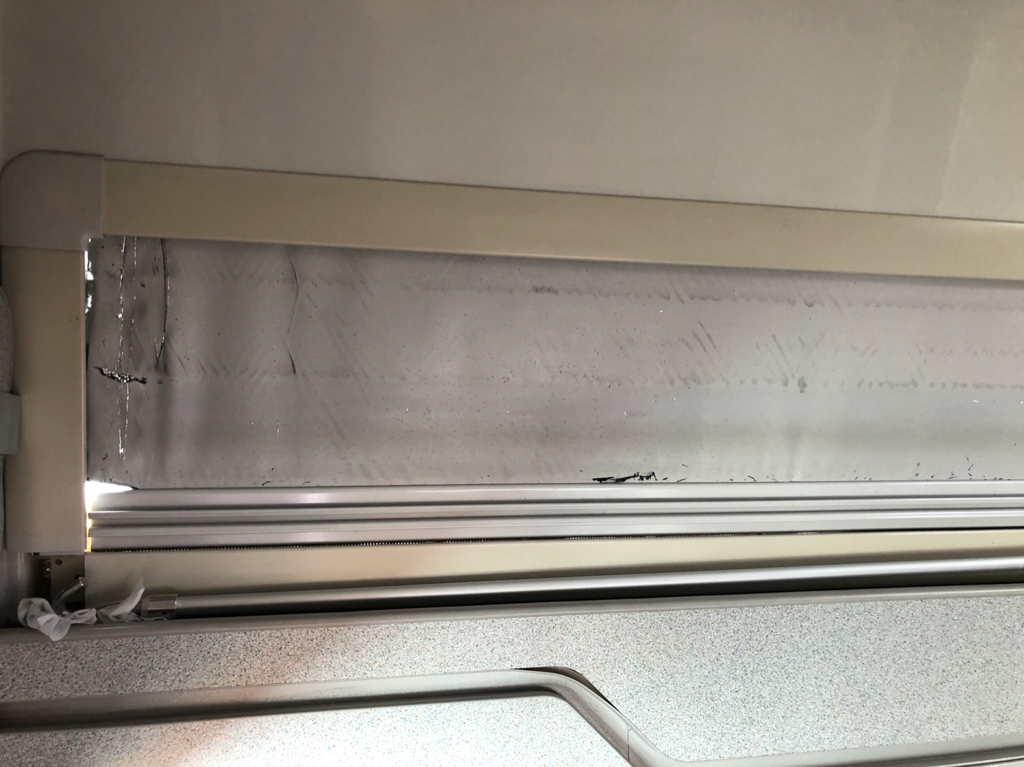
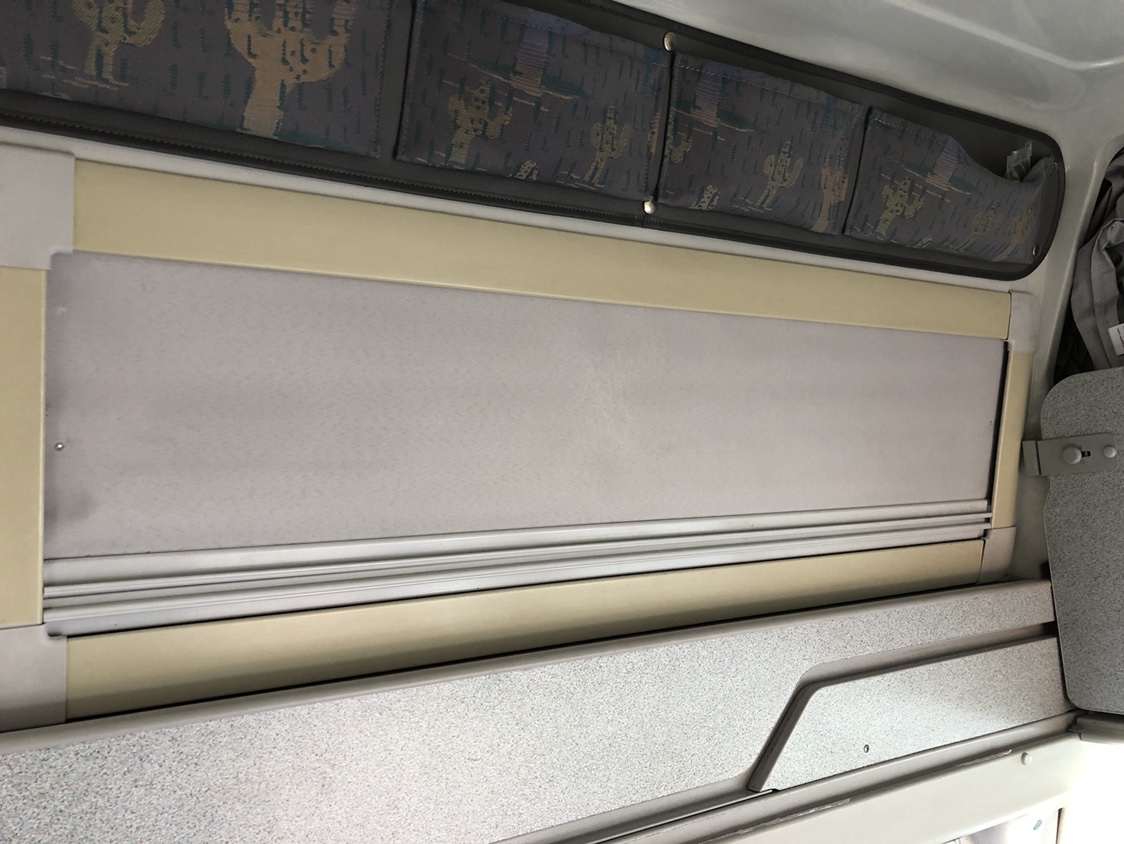
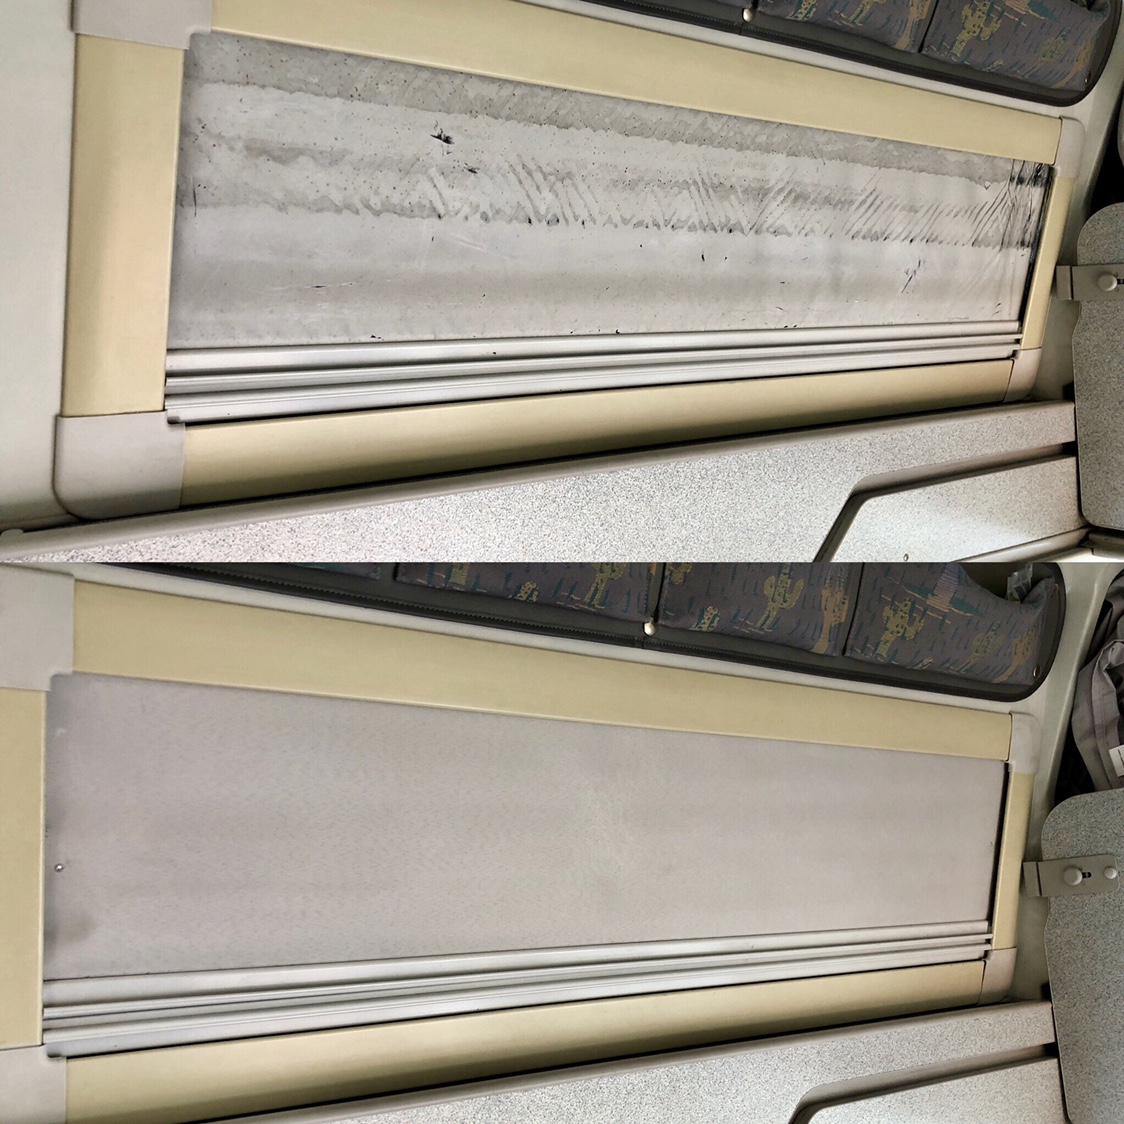
Well. I bit the bullet and decided to replace the sticky and horrible material that has broken down over the years.

Blind removal instructions.
1f33501112dbfdbed757439de833a88c.jpg
c1af78c0e6572793290c66134946c338.jpg
2d3ae102953dfe9099f667b1fa058f80.jpg
6561521fdcddb3da39399985066579ba.jpg
8b79daa0ac8d30acc1540d97f85eb87e.jpg
82879023f40d614dbb7d7ee96c75c040.jpg
990858bec308e131e75fdad5f98d1761.jpg
12c9c5f4ab8a75ad44e6ca12cfcfff9d.jpg
678a1cc14aa58f1739fad0160c2d802c.jpg


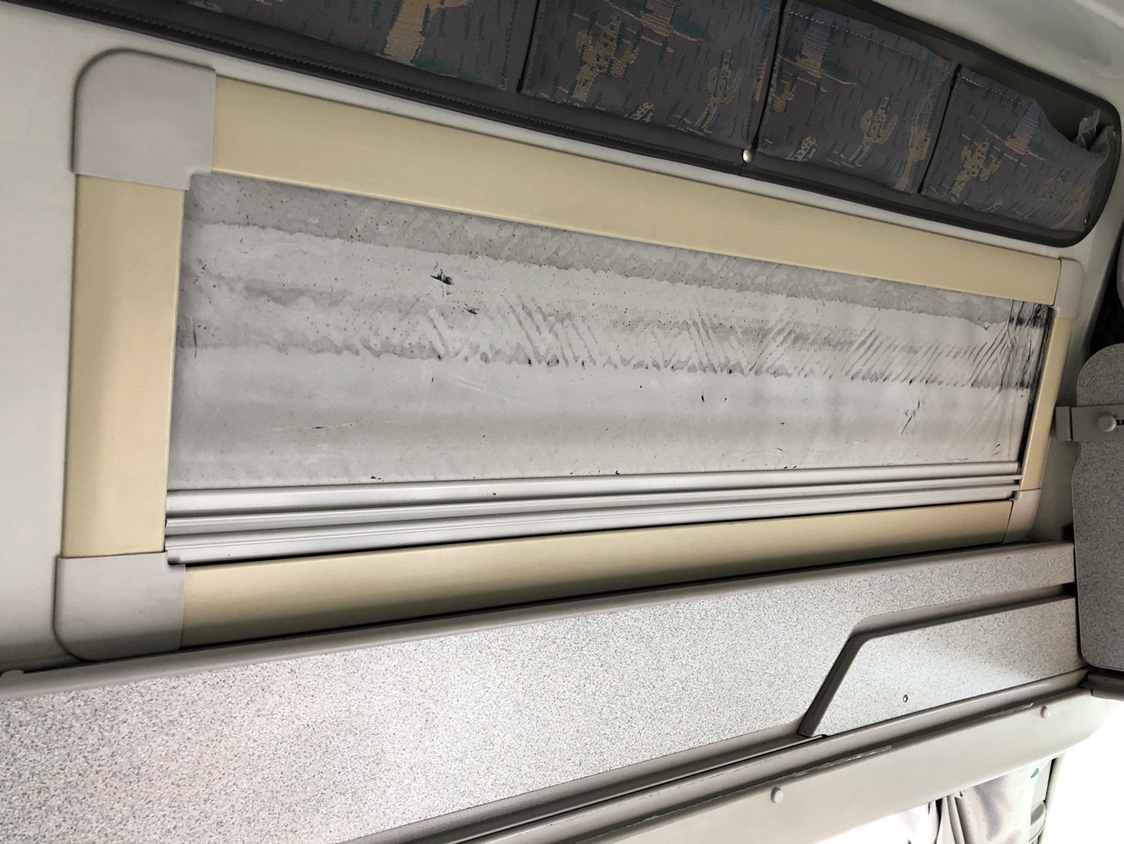
Remove the plastic surrounds. (These pry off) you may have fun with the part closest to the wardrobe as it’s close to the unit. I tapped it up to access bottom screw and back down to access lower one.

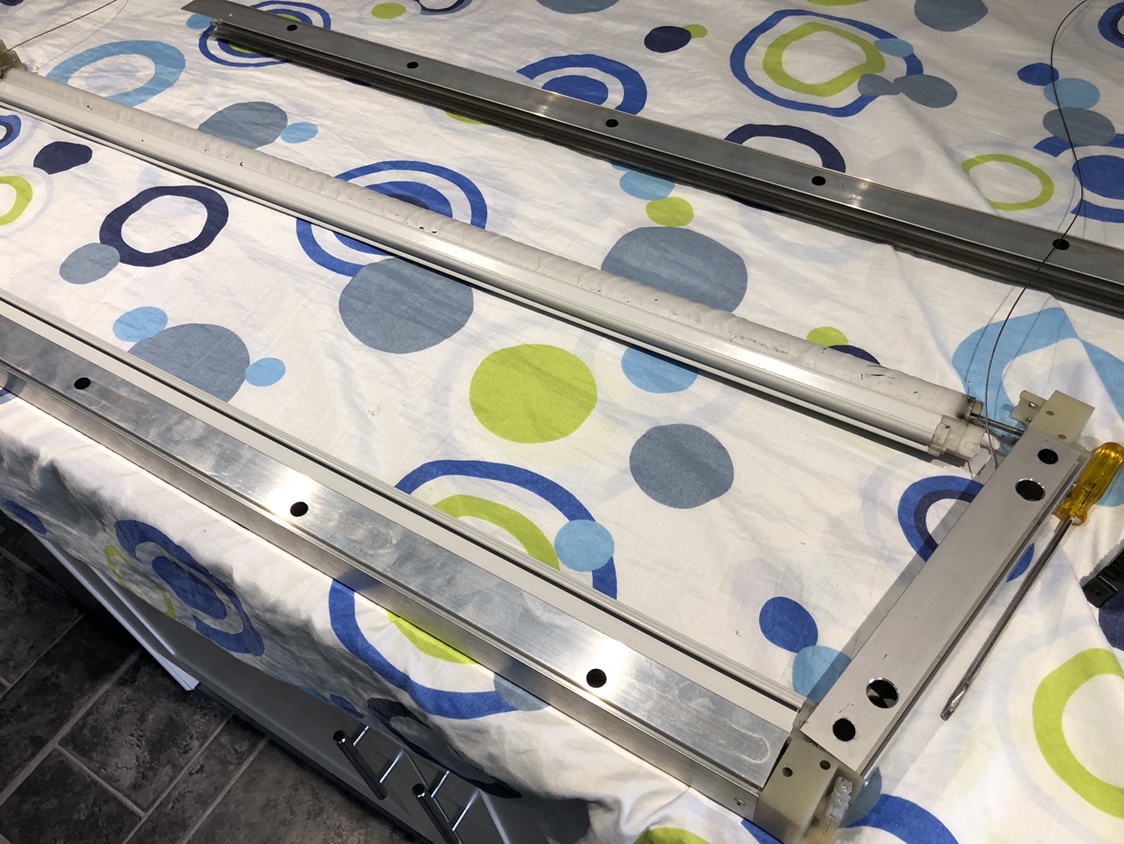
There are 4 Phillips (crosshead) screws holding in the blind cassette. & 2 screws holding the stays. Once these are all removed the cassette / frame is free to work with.

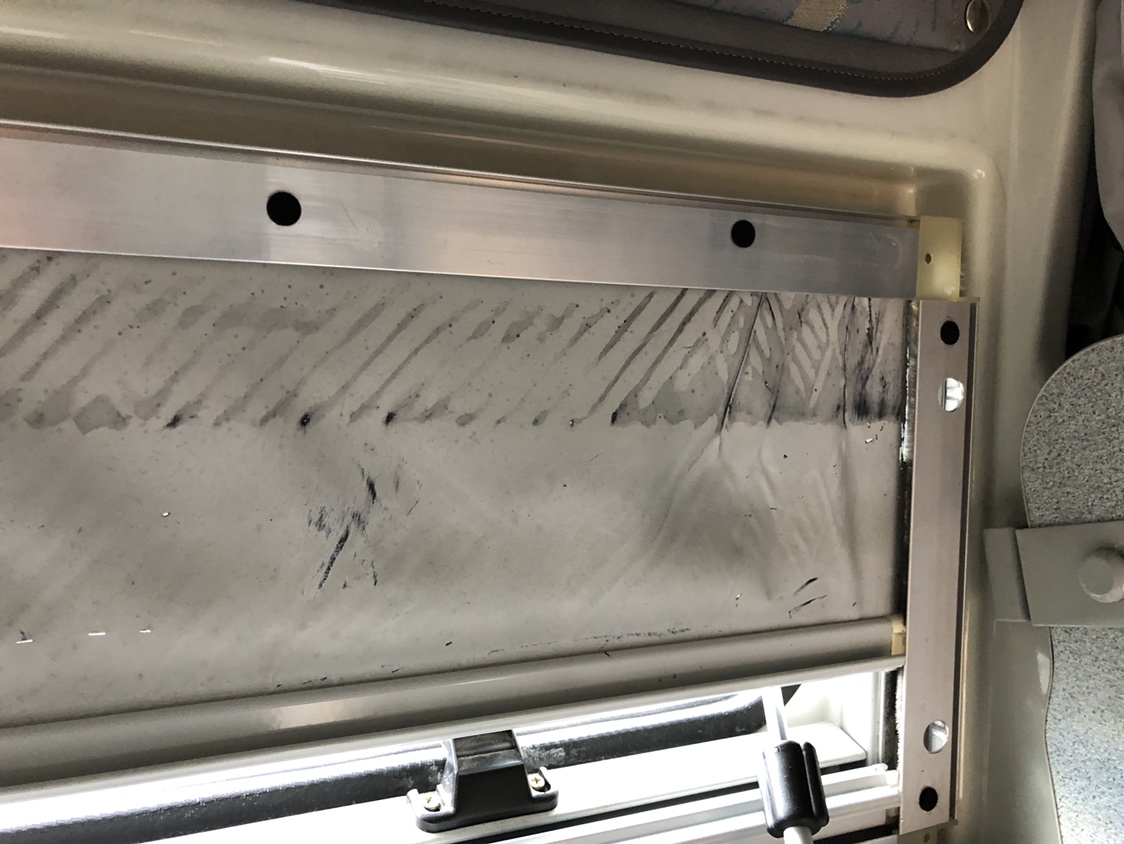
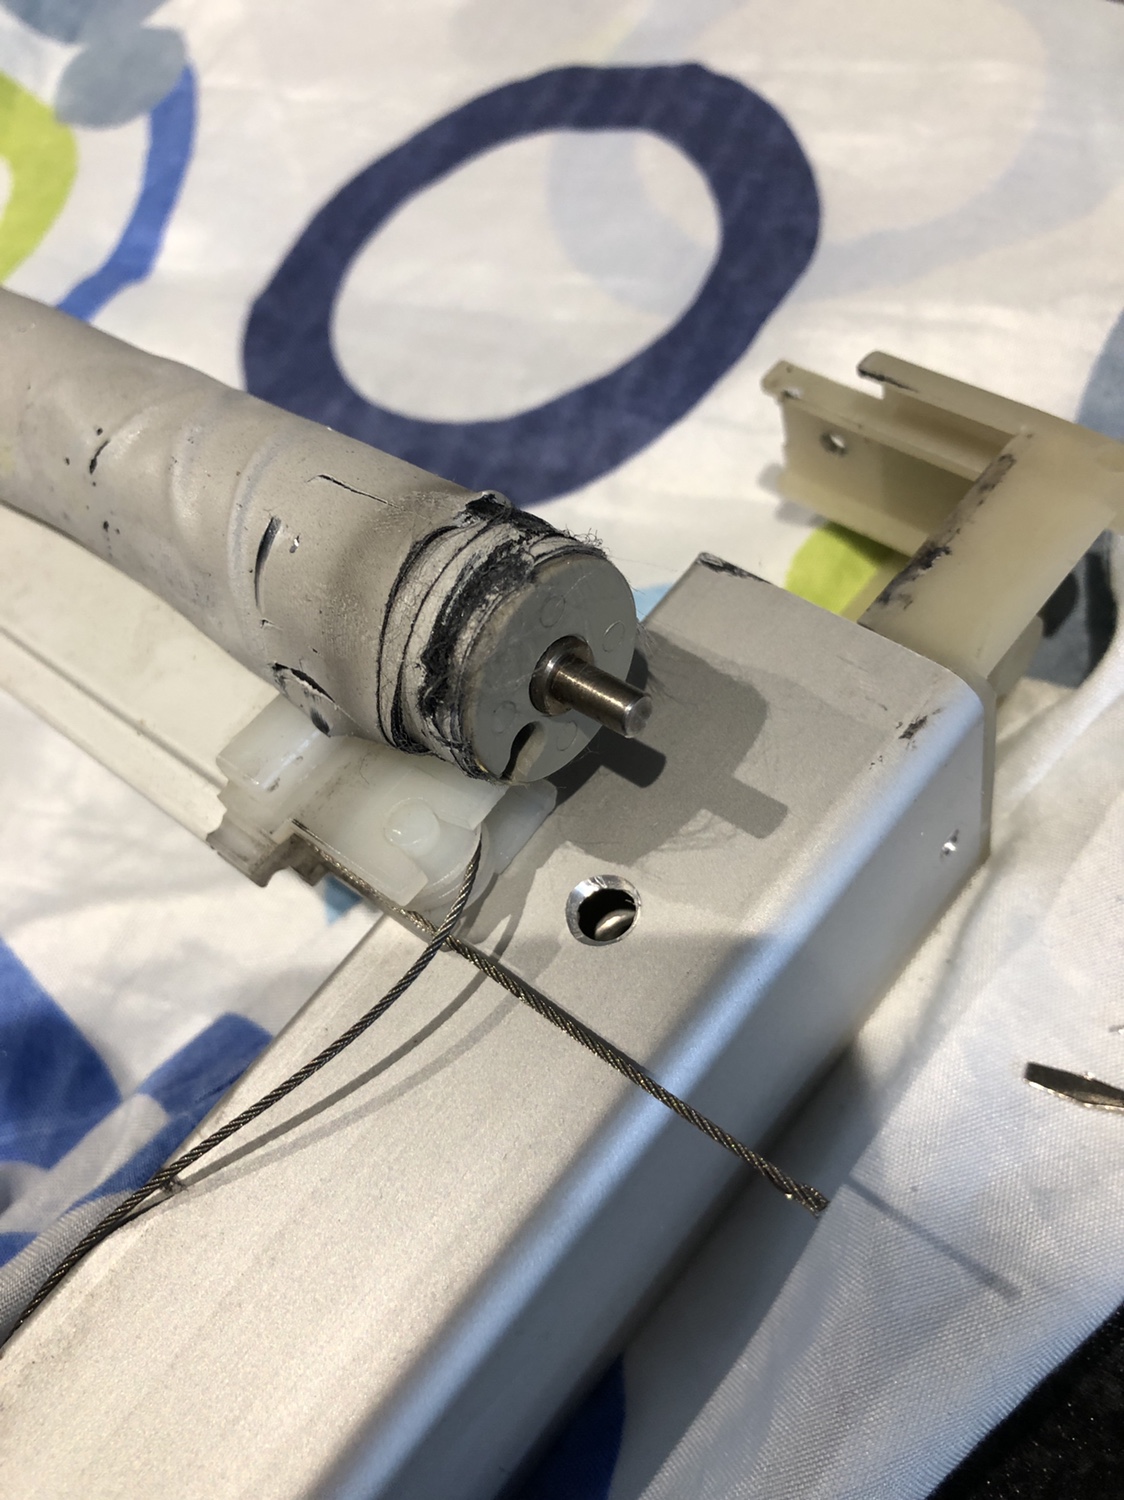
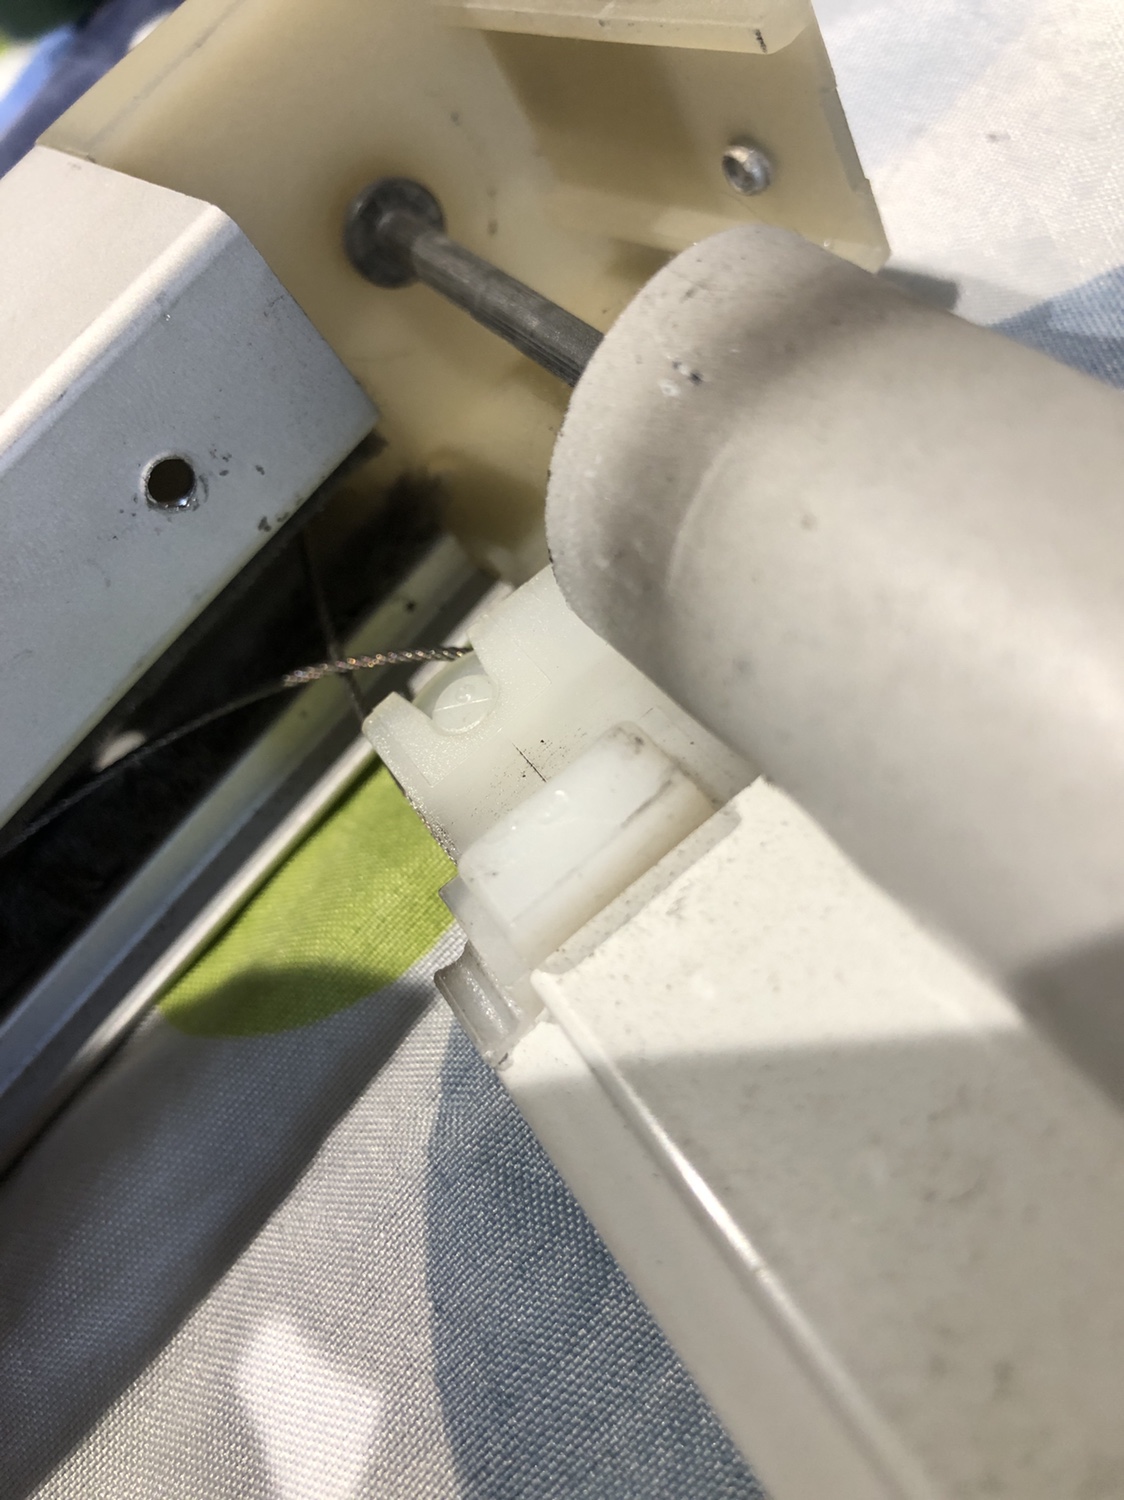
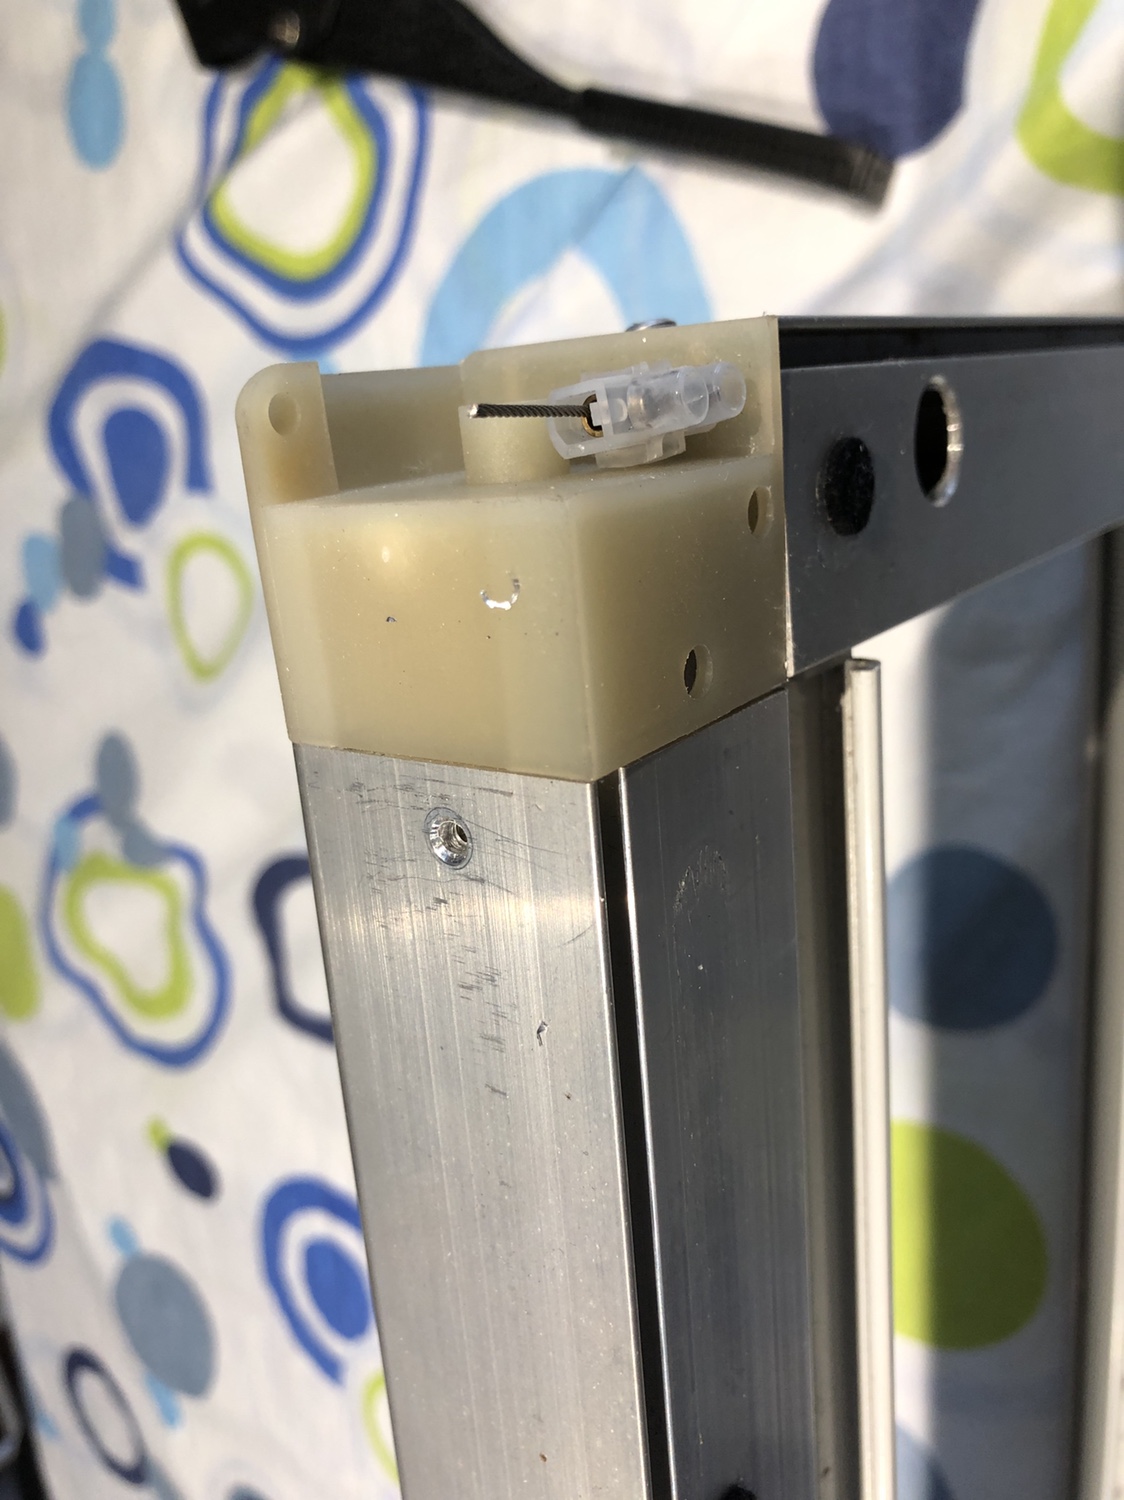
Drill out the 2 rivets on the top of the frame. This allows the top roller to be removed. There are 2 chocolate blocks holding the wire that guide the blinds and these will need to be removed too.

The roller is sprung and will unwind. (When refit, it’s about 9 full winds to regain tension. )

Slide out the lower part of the blind (metal part) that clips to the other. You may need wd40 to make it slide easier.

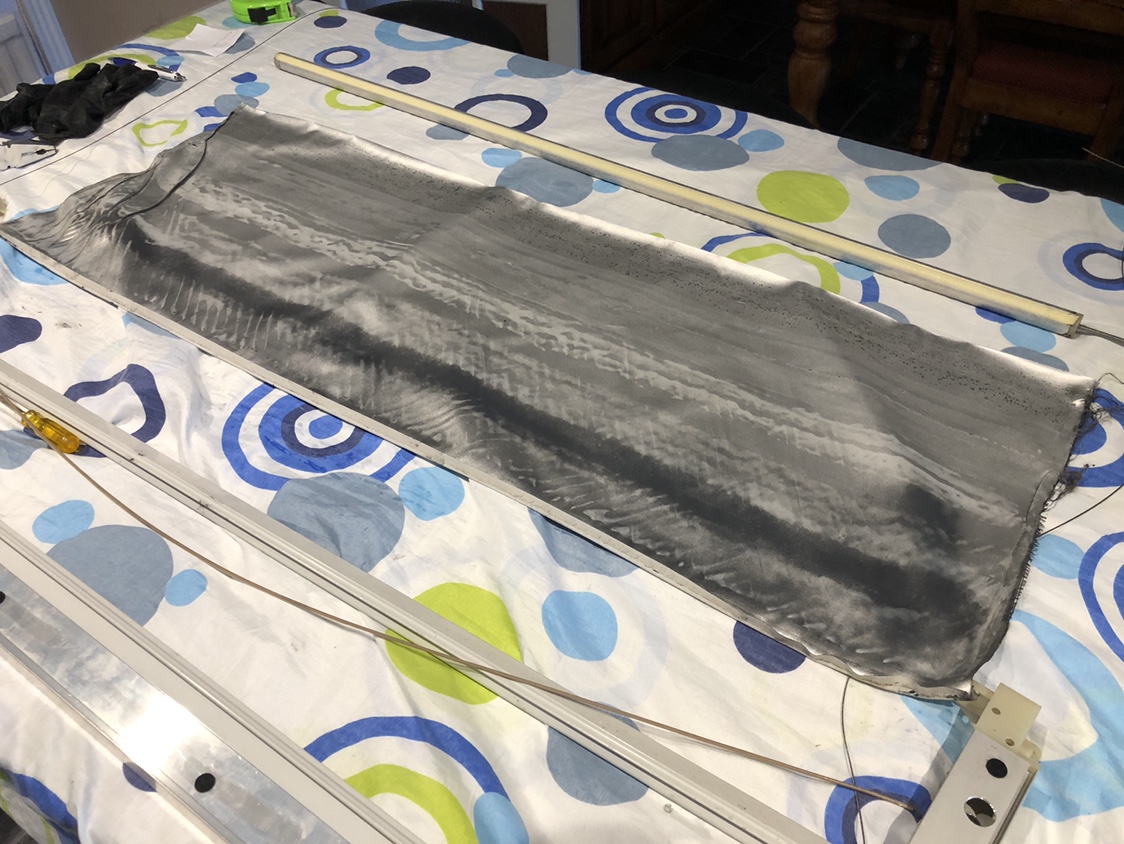
Unroll the blind completely and unstick from main roller.

I used a roller blind bought online for £10 and cut out replacement material parts for the 3 parts. (Need min 1 meter width)

Some double sided tape helps to re adhere the new material to the roller.

Use the thin piping from the old blind to fit the lower segment/component of the blind.

The threading of the wire is a bit fiddly, but a pair of needle nose pliers will help. But you can take a photo to see how it was.

I used gloves to remove old roller blind material as it was horrendous to wash of hands first time.

Tools needed.
Philips screw driver.
Small screwdriver for chocolate block.
Rivet gun & rivets.
Pliers to hold the wire.
Double sided tape.
WD 40 (maybe)

I hope this helps a few others with the same problem.


Sent from my iPhone using Tapatalk
 

Similar threads

G
Replies
5
Views
718
Gareth Cornell
G
Muchos04
Replies
6
Views
1K
WelshGas
WelshGas
Q
Replies
6
Views
2K
Tommy Gun
Tommy Gun
calikev
Replies
0
Views
1K
calikev
calikev
Back
Top