Buy all your VW California Accessories at the Club Shop Visit Shop

Solar panel (for new T6.1) advice please

Gelato

Gelato

VIP Member
Messages
229
Location
Essex
Vehicle
T6.1 Ocean 199 4Motion
We have never owned a California before (ordered and waiting for our Ocean) wondered if anyone could provide advice on a solar panel? When on longer breaks will be towing an Eriba (hopefully going away in August if T6.1 delivered), when on site will have a hock-up for the Eriba, just wondered if having folding/portable solar panel would be useful to supply a top up for the battery. This is where our inexperience shows would using the California daily help to top up the batteries, don't know how much we will be using lights etc in the evening, so don't know how long the batteries can supply power. A learning curve, just wondered if a solar panel would help, also like the idea of the odd weekend away and having solar panel (no hook up). Any advice greatly received :)
 
Same position as you, waiting for our Ocean! This caught our eye:

Recommended. If you can wire a plug then you can install this kit. It will keep Leisure Batteries fully charged and if you get the dual output controller charge the engine battery as well, but that capability not really needed if you use the vehicle regularly all year round.
 
We have a T6 Ocean. It is fitted with dual permanent solar panels from @Roger Donoghue.
We also have an Eriba with a portable "suitcase" solar panel which we use to charge the Eriba battery. It wasn’t hard to wire up - if you have installed one, you can install the other.

Consequently, we are able to use sites without hook-up - indeed sites without (m)any facilities at all. Between the two, we have more than enough power to keep everything going. With anything like moderately decent weather there are no issues with using lights, iPads, phones, cameras etc and keeping everything fully charged. And my daughter who uses the Eriba is a heavy user of gadgets!

The suitcase solar panel was just a cheap 100w unit from Amazon. After the first couple of trips, I replaced its cheap controller with a Victron MPPT controller which has significantly improved the efficiency of the panel. I used the suitcase panel on the California to begin with then transferred it to the Eriba when I bought Roger’s units.

As currently arranged, the Eriba’s fridge doesn’t run from the 12 volt supply, so we use either gas or stick solely to the California’s fridge.

Three weeks in the South of France in a field owned by a friend with no hook-up was a breeze. Similarly, a week in Cornwall in October was also no problem. And in late October we were using the lights a lot! And barely moved the California all week. Two weeks in North Wales in August when it rained very day was also no problem.

During the last 10 weeks, the California has travelled 4 miles and 3½ of those were getting back home after buying the diesel. The batteries are always fully charged – and we’ve even been using the fridge.

Driving around during the day will also help keep the California’s batteries charged.
 
Thanks for all advice, will look into a solar panel when we have our T6.1 on the drive
 
I can confirm our kits fit the 6.1 - the roof slots haven't changed.
 
Can I ask what an Eriba is. I have just got the Rogers solar panel but like the idea of the suitcase one as well, can I ask how you use it and what battery it’s connected to ? I too have the Victron
 
Can I ask what an Eriba is. I have just got the Rogers solar panel but like the idea of the suitcase one as well, can I ask how you use it and what battery it’s connected to ? I too have the Victron
The Eriba is a make of caravan, one of the smaller ones and not much wider than a California.
 
Recommended. If you can wire a plug then you can install this kit. It will keep Leisure Batteries fully charged and if you get the dual output controller charge the engine battery as well, but that capability not really needed if you use the vehicle regularly all year round.
Can you advise the procedure for making the permanent connections to the rear leisure battery and any precautions that need to be taken. Thanks.
 
Can you advise the procedure for making the permanent connections to the rear leisure battery and any precautions that need to be taken. Thanks.
Undo the flap on the L hand side in the boot, base of the rear wardrobe. Undo the battery clamp and remove clamp, located between battery and lip of opening. Pull battery out. The leads are very long so don't need to be removed. A large paint scraper or similar is useful to slide battery over lip and into the boot. Remove fuse from holder on the red lead from solar panel connector. Undo nut on red +tve post on battery. Put solar red lead ring connector on and tighten nut. Not too tight or you can damage the 50amp cube fuse. Repeat procedure on black - tve pole of battery. Insert 5 amp fuse. Return battery to Compartment. Refix clamp. Fit door. Control Panel should now show a voltage greater than 12.7 volts if panel is in daylight.
 
Undo the flap on the L hand side in the boot, base of the rear wardrobe. Undo the battery clamp and remove clamp, located between battery and lip of opening. Pull battery out. The leads are very long so don't need to be removed. A large paint scraper or similar is useful to slide battery over lip and into the boot. Remove fuse from holder on the red lead from solar panel connector. Undo nut on red +tve post on battery. Put solar red lead ring connector on and tighten nut. Not too tight or you can damage the 50amp cube fuse. Repeat procedure on black - tve pole of battery. Insert 5 amp fuse. Return battery to Compartment. Refix clamp. Fit door. Control Panel should now show a voltage greater than 12.7 volts if panel is in daylight.
Excellent, many thanks.
 
Deal breaker con for me is appearing to need screwing into the pop top.
You screw the panel it into the rails and one cable goes through the roof. Sorry install manual only in german
 

Attachments

  • Anleitung-Solar-SOLARA-feb20.pdf
    2.3 MB · Views: 39
Which is the most sustainable option in the long run.

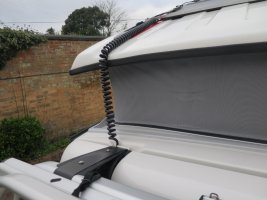
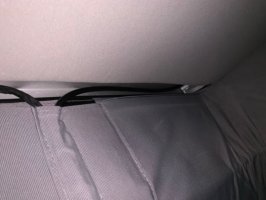
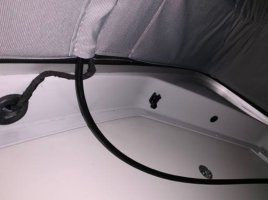
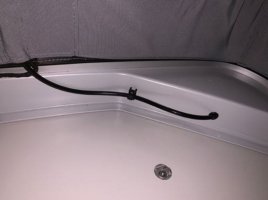
1.) To drill hole in the ceiling and mount waterproof bushing for the solarpanel. https://www.scanstrut.com/marine/power-boat/cable-seal/horizontal/ds-h10-blk

2.) Mount the surface-mounted spiral cable and clamp it in the tailgate and risk the paint being scratched in the wind
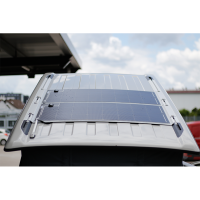
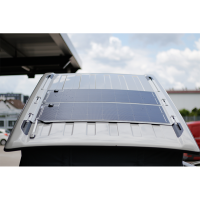
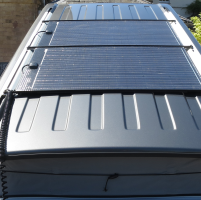
View attachment 89017View attachment 89018View attachment 89019View attachment 89020
MOVIE: SOLARA-Solarmodul S465M31 105Wp
Hi @Checker
1. is neater but the downside is drilling through the roof AND I imagine that there will be a cable on the inside of the canvas that might be vulnerable when sleeping up top?
2. I deliberated for a long time before having solar panels installed with the curly cable. I was concerned that the cable might damage the paintwork but there was no sign of any wear after 6 months. As a precaution though, I then added a piece of helicopter tape under the cable and now after another 9 months there’s no sign of wear on the tape either.
I’d therefore go for option 2.
 
A hole and 4 screws. No thanks
I've used Scanstrut products on my boat - totally waterproof and well engineered, will be using them on my pop-top too when I get round to fitting solar. Small stainless steel screws will be fine if used in conjunction with sealant and Duralac to keep moisture out and prevent corrosion.

A curly cable flapping around on the roof will do more damage in the long run than a properly fitted Scanstrut cable seal in my opinion especially when it is sliding around in the grit thrown up behind the vehicle (like a bowden cable on a bike rubs the paint off the frame). If you must use a curly cable then protect the paint with self adhesive foil - to prevent cable failure, it also needs to be long enough that it is not over-extended or stressed by use of the pop-top.

At the end of the day each person needs to be happy with their chosen solution, I prefer a Scanstrut cable seal to the curly cable.
 
P.S. ... once inside the pop-top, the cable can be run parallel to the LED roof light cables in the same space.
 
Which is the most sustainable option in the long run.

1.) To drill hole in the ceiling and mount waterproof bushing for the solarpanel. https://www.scanstrut.com/marine/power-boat/cable-seal/horizontal/ds-h10-blk

2.) Mount the surface-mounted spiral cable and clamp it in the tailgate and risk the paint being scratched in the wind
View attachment 89017View attachment 89018View attachment 89019View attachment 89020
MOVIE: SOLARA-Solarmodul S465M31 105Wp
Well it hasn’t scratched my paintwork in 7 years. You could always put some Clear Wrap or Helicopter Tape where the wire touches the bodywork.
 
Well it hasn’t scratched my paintwork in 7 years. You could always put some Clear Wrap or Helicopter Tape where the wire touches the bodywork.

I have been thinking for a long time about whether I should lead the cable through the roof or whether I should squeeze the cable in the tailgate and I have not really decided yet.
What about the risk of the cable being damaged in the tailgate when you open and close it?
 
I have been thinking for a long time about whether I should lead the cable through the roof or whether I should squeeze the cable in the tailgate and I have not really decided yet.
What about the risk of the cable being damaged in the tailgate when you open and close it?
The wire goes through the corrugated rubber cover that takes the wiring loom into the tailgate. At no point is it squeezed by the tailgate or tailgate seal.
 
I've been selling and installing the curly cables for many years now :

- I've never seen, nor had reported paint wear or damage by the (very soft) curly cables
- The curly cable does not "flap around" at all. It is installed under tension - you pull it tight when fitting - so it can't flap about. I do get asked about this a fair bit when people are making initial enquiries.

Interesting to hear that "heli" tape isn't even getting marked. Nice to know.

FYI - the EU solution is very neat but it is also around twice my price. I looked into making the flat aluminium mounting sheets they mount their solar panels on and abandonded the idea as
a) it would add far too much cost to my kits
b) I am not a fan of sticking thin panels on large flat surfaces - there is too much to go wrong - one air bubble trapped is enough to destroy a panel over time. This is why I no longer sell stick on kits for generic roofs
 
Last edited:

Similar threads

Monty-Wilf bus
Replies
10
Views
2K
Roger Donoghue
Roger Donoghue
OllieCollieCali
Replies
3
Views
374
Californication69
Californication69
S
Replies
2
Views
2K
Sean Fallon
S
JohnGuppy
Replies
34
Views
9K
Sean Gardiner
Sean Gardiner
Back
Top