Buy all your VW California Accessories at the Club Shop Visit Shop

Pushing the envelope - stretching Cali's room to te limit

Dutch cool box tuning to extend battery life


Koelkast_tuning_Marc.jpg
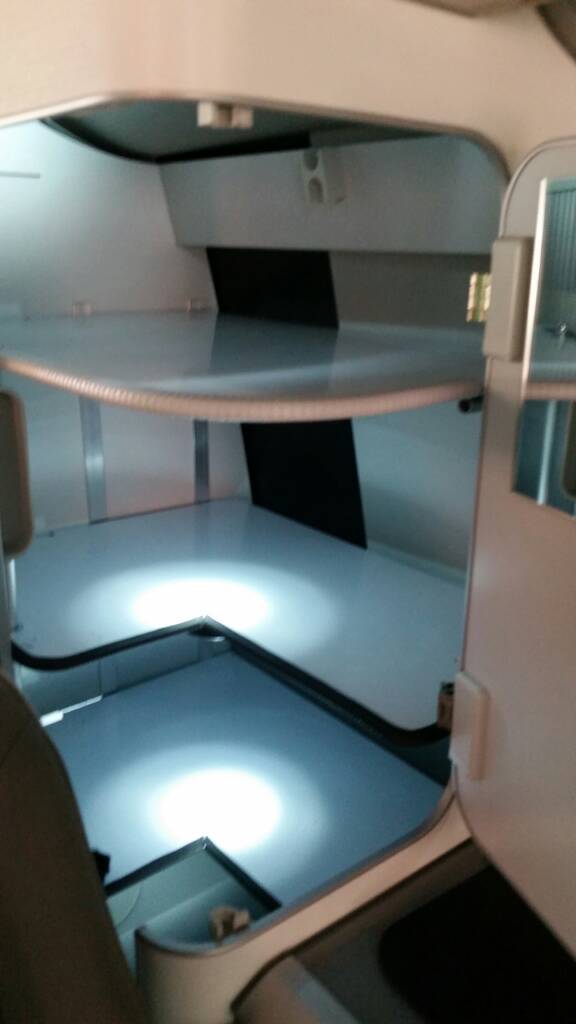
On this picture it's an optical illusion that the alu plate is skewed.

About eight years ago Peter, an engineer on the German forum Caliboard.de, invented this little aluminum helper. It encloses the temperature sensor on the right of the cool box and makes it think the temperature in the fridge is already low enough, so the compressor stops cooling.

This prevents that the fridge is cooling way too much, and ends the practice of freezing beer to ice deep in the box.

The 'miracle plate' deceives the sensor, and the effect is that this reduces the time the compressor is running. Normally the box is cooling for about 20 - 25 minutes per cycle, depending on ambient temperature and degree of loading. Now, with the plate (in a fully loaded box) the fridge is working about 15 minutes.

This not only saves energy (the fridge now uses about 1 to 2 Amps in stead of 3 Amps an hour). More important was another result way back then: the compressor didn't heat up the compartment under the fridge too much anymore. The heat there was accumulated by another source of warmth, the 230 V. Waeco battery charger, which at that time was situated in the same compartment. The Waeco cuts off above 59 Celsius, and thus stops loading the battery (and you don't notice it, untill you fish out your rotten vegetables).

Of course many Cali owners at the time all began folding their own pieces of aluminum like mad. There was a religious war of words about the question if this could work at all. The discussion ended when VW decided to move the Waeco charger to the battery compartment at the far end of the Cali. Also, the emerging solar panels made this aluminum miracle more or less obsolete.

Still, the fridges in our Cali's are of a sub optimal technique. They cool too much at the bottom and the back, and not enough at the front and top sections. And they really are isolated very bad. By optimizing the box with this alu plate, and perhaps a fan under and in the box, it is possible to gain slightly better cooling effects.

In my van a fully loaded fridge now takes almost 12,5 minutes to cool down from 10,2 Celsius to 7,2 C., at an ambient temperature inside the bus of 22 degrees and a summer sun on the fridge side. Then the compressor is silent for about 45 minutes, as I noted whith a simple thermometer in the middle of the vegetable basket, while reading a book and enjoying a fine glass of wine. Every time the compressor stopped, we poured another glass of Rioja, which might have influenced this scientific experiment.

It's very simple to fold this alu plate. It takes a leftover of 2 MM aluminum plate, a Black & Decker Workmate and some strong hands. The plate of about 10 CM height stretches to half way the back side (there is the cooling element). The alu plate brings the cold from the backside to the sensor, faster then the stationary air in the fridge could do that.

The small "house" around the sensor is closed at the top, but open at the bottom, to release possible water drops. It sticks to the wall with a non aggressive glue. First degrease the wall with alcohol.

But of course it all remains a matter of belief... (I'm a believer, but it might be the Rioja).

Regards from Amsterdam,

Marc.
 
A small step for man, a giant step for ...

This little plastic step comes in handy for several situations: getting in the van for people with difficult legs; washing the solar modules; deicing the wind screen; as a side table for drinks; comfortable seating when changing the wheels, etc.

The folded step stowes away easily wherever you want in the Cali: next to the bench, in the big drawer, behind the drivers chair or in the rear "cellar".

I found it in a local DIY shop (Gamma) for 6 euros.

Regards from Amsterdam,

Marc.

View attachment 44474

View attachment 44475
If you don’t have a porta potti (or alternative) you can turn the step Upside down and use disposable, compost able bags and use it as an emergency loo (saw that in a post on Facebook).
 
No more kinked usb cables

Cal_USB_cables_heat_shrink_tubing.jpg

USB cables like to play games with us when traveling in the Cali. The fragile connections between the cable and the mini plug always seem to develop a kink on day two of the journey, just when you're about to top up the battery of your phone.

I have strenthened the cables with heat shrink tubings. Just two seconds in the flame of the Cali gas stove, and you're done. Yellow rubber for the iPhones, red for the Androids.

But still I take loads of USB cables in the van, just in case.

Regards from Amsterdam,

Marc.
 
First impression Bugaboo GSI aluminum cook set small

Today our non-stick Bugaboo aluminum cook set from GSI, version small, arrived. Did some testing this morning, and must say: surprisingly smart. The nest of two pots and a fry pan not only has a small footprint in our Cali cupboard underneath the stove, but is really lightweight, with appr. 1 KG.

As our morning ceremony in the Cali begins with coffee and breakfast with boiled eggs, I reproduced this in our kitchen at home.

First surprise: boiling two eggs needs at least 1 liter of water in the small pot of 1,5 liter. With less water the eggs are not fully submerged. This means during cooking the water tends to boil over the edge, even on a tiny flame.

Cali_pots_8.jpg


Second surprise: after fishing the eggs from the pot, and pouring the remaining water into the coffee pot, I saw a slight hint of lime from the eggs at the non-stick coating in the cooking pot. Doing this frequently surely will calcify the inside of your pot. Better remove it directly.

Third surprise: the folding handle is brilliant. It can be inserted and removed in a split second. And moreover, during ten minutes of cooking the handle becomes slightly warm, but certainly not too hot to handle.

Fourth surprise: when pouring hot water from the pot into the coffee pot, it is nearly impossible not the spill a decent splash of water onto the table. The pot has no pouring spout, not even a small one. This is a real flaw, there's work to be done for the designers at GSI.

Fifth surprise: were do I store the ever so brilliant folding handle after use? Of course not in the pots, as that will damage the coating immediately on a bumpy road. We decided to put it in the cutlery drawer. And hoping not to forget taking it back to the Cali from the washing-up place at the camping.

Despite these surprises, the cook set has now it's place in the Cali cupboard under the stove. We threw out our existing pots and pans, as they have bulky handles, are a bit heavy (very thick bottoms) and use (slightly) more space then the new aluminum set. It's all an experiment, as we hope the considerable thinner bottoms of the alu pots will not burn our meals.

Cal-Pots_2.jpg


But we also decided to leave the small 1,5 Liter pot from GSI at home. Instead our beloved super lightweight RVS water kettle from Mountain Safety Research is now embedded in the large 2 Liter pot. Why? Because we always have used the kettle for boiling our eggs and using the same water to pour for our coffee (remember, all our gear in the Cali must at least have two functions...).


Cali_pots_7.jpg


Since our kettle is too small for the 2 Liter pot, with the risk of rattling and damaging the coating inside the pot, I stuffed the kettle into a micro fiber towel, which we already take with us, as well as with a cotton potholder. Now the kettle sits bombproof. In my opinion it's worth the sacrifice of the small 1,2 Liter pot.

Cali_pots6.jpg


We're pleased with the extra room we now have in the cupboard. The height of the GSI set is slightly less, the diameter is a bit smaller than our old frying pan. But the clunky handles are gone.

Cali_pots_3.jpg


Cali_pots_4.jpg


Now we have to wait for better days to travel...

Regards from Amsterdam,

Marc.
 
Seeking for Room for our upcoming Scotland Trip

So, here are some of my mods

Rack over Kitchen

42f84b37acbe9716105836be25916975.jpg


Speakers out of Roof Box and two deperatirs out of Dibond installed
e0b11e5513e0fabdb3bc209fd756dd1e.jpg


Little extra storage on the Seats

4da0683177f911c3e3456d9e11381a6f.jpg


Dibond Boards installed in the middle Cabinet

2141d626adfab2061882e3106bb532d8.jpg


And some white Carwrap Folia to protect the Glass
2ecf949f941871c5b23ce4a4fcbb89e6.jpg
The two black netting pockets at the rear of the front seats are they VW parts or from another supplier?They look so neat and would like to buy a pair.
 
Repairing loose isolation tube coolbox lid

As the coolbox was working longer than ever, I inspected the plastic isolation tube under the lid. There is no glue whatsoever, the hose is supposed to keep itself attached to the plastic lid. The wide openings caused a big isolation leak. Warm air could enter the coolbox freely, and the fridge had to work overtime.

Alustrip_koelkastdeksel_1.jpg


I removed the hose, and bonded the tube. You have to use plastic glue, as normal glue doesn't catch there.
As the hose felt rather flabby, I glued a small aluminum profile along the tube, to push it up a little bit. Now the hose presses firmly on the underlying cool box rim. Extra bonus: heat from the stove next to it is kept away (a little bit) from the cool box.

Alustrip_koelkastdeksel_2.jpg


Regards from Amsterdam,

Marc.
 
Hi,

As I was reorganizing our Cali today for the 8th time in eight years, I realized how many small adjustments the bus has gathered in time - call it minor repairs. Improvements in creating extra room in our little fourwheeled hotel room are by definition always minor.

I thought, maybe it's useful to show some of them.

Here's a first one: our two stores deep kitchen drawer. To be honest, I nicked the idea from a Spanish Cali-owner, who build it with wood.
My construction is simple: two crossed aluminum bars, 1.5 mm thick, 1 cm high, both cut about 4 mm in the middle.

Don't forget what you through in there. First trip we used this, I angered mss marchugo by asking her where she had left the scissors. Of course I stored them in this drawer myself.

Regards from Amsterdam,

Marc.

View attachment 14203
Better than a safe !
 
How to recognize the different poles of SAE connectors?

Cali_SAE_connector_X_and_Y_poles_1.jpg


SAE connectors are very usefull to feed in the 12 Volt power of the solarpanels into the household batteries. They store small, are flexible, and can be disconnected and connected in seconds.

The one thing you have to be vigilant with them is: too easily you connect them the wrong way, that is when accidentally you push the plus line into the negative line of the opposite connector. That will cost you a fuse (if you have fused the plus lines, otherwise it can cost you a Cali).

To prevent this, I have stickered the two different poles with labels X and Y.

X is: when the red plus cable is ending in a 'naked' metal pole.
Y is if the negative cable ends in a 'naked' pole.


Cali_SAE_connector_X_and_Y_poles_2.jpg


Usually an SAE cable coming from a power source like a battery, it ends as a Y-connector: the negative is a bare pole. The other side has 'eyes" that you attach to the battery poles.

SAE extension cables always have one X end and one Y end.

We also use an SAE cable to connect our mobile foldable solar panel to the cigar plug on the right side of the kitchen block. It is fused at 10 Amps, enough to secure the feeding cable of the 120 watt peak solar panel, that gives a current of max 6 A on a sunny day in summer.

Cali_AES_connector_solar_to_sigar_plug.jpg


Regards from Amsterdam,

Marc.


Heater sensor finally listening to our body, in stead of to it's own airflow

20160412_145210.jpg

As we were unsatisfied with the performance of the Cali parking heater (cycling from too cold to too warm), we had the temperature sensor moved from below in the heater duct, to the inside of the van, to the C-pillar, at the height of our heads when sitting in the cabin.

It's the small black plastic rectangle above the handle next to the sliding door. An extra cable runs unvisible through the pillar, to the controller of the heater under the van.

It improved a lot for us, now that the heater is adapting to our feelings, in stead of reacting to the air temperature in the suction channel below the floor.

Regards from Amsterdam,

Marc.
 
The two black netting pockets at the rear of the front seats are they VW parts or from another supplier?They look so neat and would like to buy a pair.
@Cali197: These are not pictures of our Cali, but this kind of pockets are for sale all over the net, Amazon, Ali, Ebay, for a handfull of euros/pounds.

I have made a more simple version myself:


1615888037066.png


1615888060507.png
Just a pair of elastic cords with knots at the backside of the panel.


Regards from Amsterdam,

Marc.
 
@Cali197: These are not pictures of our Cali, but this kind of pockets are for sale all over the net, Amazon, Ali, Ebay, for a handfull of euros/pounds.

I have made a more simple version myself:


View attachment 75175


View attachment 75176
Just a pair of elastic cords with knots at the backside of the panel.


Regards from Amsterdam,

Marc.
Thank you Marc, they look very smart and neat.
 
Repair temperature sensor in Cali fridge

This week the fridge in the Cali refused to start. The Control Unit showed error code 3001, which means 'input error from the Fridge Temperature Gauge Unit', which in plain English means: temp sensor died.

Yesterday a visit to the local Cali dealer. Indeed a new temperature sensor was needed. Price tag: 70 euros for the sensor, plus hundred euro labor cost.

To see these amounts into perspective, this is the sensor:

Cali_tem_sensor_fridge.jpg


Next time I'll do the repair myself, I think. Because you don't have to pull out the fridge from the kitchen block, as is often told. Just pop out the white plastic cap on the right wall inside the cooler, where the sensor lives. It is only plugged in.

Then fish out the sensor, plus some extra centimeters lenght of its two tiny cables. Cut the little cables, solder the new sensor cables onto the old ones, and you're done.
(of course isolate the cables with some rubber shrink tube, but do not heat that, so that you can easily free the cables if needed next time).


Koelkast_Marc_Verfdruiper_1.JPG

At the right: the plastic cap of the temp sensor.


Regards from Amsterdam,

Marc.
 
Repair temperature sensor in Cali fridge

This week the fridge in the Cali refused to start. The Control Unit showed error code 3001, which means 'input error from the Fridge Temperature Gauge Unit', which in plain English means: temp sensor died.

Yesterday a visit to the local Cali dealer. Indeed a new temperature sensor was needed. Price tag: 70 euros for the sensor, plus hundred euro labor cost.

To see these amounts into perspective, this is the sensor:

View attachment 76341


Next time I'll do the repair myself, I think. Because you don't have to pull out the fridge from the kitchen block, as is often told. Just pop out the white plastic cap on the right wall inside the cooler, where the sensor lives. It is only plugged in.

Then fish out the sensor, plus some extra centimeters lenght of its two tiny cables. Cut the little cables, solder the new sensor cables onto the old ones, and you're done.
(of course isolate the cables with some rubber shrink tube, but do not heat that, so that you can easily free the cables if needed next time).


View attachment 76342

At the right: the plastic cap of the temp sensor.


Regards from Amsterdam,

Marc.
Hi Marc,
Sorry to hear of fridge issue, especially the cost of repair. To me that is daylight robbery. The component mentioned cost cents. I can’t comment on labour charges, but I do have my own views.
The pictures are useful information and will help many.
Thank you for posting.

Bob
 
Error codes for the camper cabin of the VW California Control Unit

This list of error codes for the CU is useful information, when desperately looking for the cause of a non-working part in the Cali living area.
I've translated, edited and enriched an earlier version of this list, that can be found on the net, but contains some confusing terms and descriptions.
I suggest to print it out and keep it in the Cali behind the sun visor (together of course with the description of how to manually lower an electric poptop roof that refuses to come down during your holiday).

Here you go, in plain text:


Error Codes for the VW California

Test if the electronical system of the Cali camper has found an error code:
- on the Control Unit (CU) push the rotary button and the (reset)button (the rectangular button under the rotary button) at the same time for 3 seconds.
- Then choose, with the rotary button, in the display, the menu entry Diagnostics, and push.
- Then, by turning the rotary button, select the display menu entry for VW Diagnostics, and push.
- If a flashing icon appears on the CU display, this is indicating a fault in one of the seven system areas.

Note: sometimes it is enough to solve a problem by discarding the failure message: just reset the CU by pushing the reset button (under the rotary rotary button) for 5 seconds. However, error messages will only disappear when the problem has really been solved, otherwise they stay visible.

The error code is a four digit number. The first digit indicates the area of the error:

1 = Pop-up Roof
2 = Heater
3 = Coolbox
4 = Wastewater
5 = Fresh water
6 = Outside temperature
7 = Battery

Ground = Earth
Fuse = blown fuse OR broken cable OR cable not connected
Short-circuit = a loose or broken plus(+) cable is making electrical contact with a ground cable or with the car body mass.

Error Code | Fault description

Roof:
1000 Short-circuit to ground Roof
1001 Fuse/short-circuit to plus+ Roof
1010 Short-circuit to ground Roof
1011 Fuse/short circuit to plus+ Roof
1100 Short-circuit output Roof "opened"
1101 Fuse output Roof "closed"
1110 Short-circuit output Roof "closed"
1111 Fuse output Roof "closed"

Heater:
2100 Short-circuit output heating on/off
2101 Fuse output heating on/off
2001 Fuse input heating 30 - only with heater

Coolbox:
3100 Short-circuit output coolbox
3101 Fuse output coolbox
3001 Input error coolbox -J698- input "Active"
(J698 = Fridge Temperature Gauge Unit = temp sensor/control unit of the fridge, sits under the fridge)
3010 Short-circuit input coolbox "actual temperature"
3011 Fuse input coolbox "actual temperature"

Wastewater:
4000 Short-circuit to ground wastewater level sensor (G126)
4001 Fuse/short-circuit to plus+ wastewater level sensor (G126)

Fresh water:
5000 Short-circuit to ground fresh water level sensor (G120)
5001 Fuse/short-circuit to plus+ fresh water level sensor (G120)

Temperature outside:
6000 Short-circuit to ground temperature sensor #2 for outside temperature
(sensor #2 = G249 = next to left front wheel; outside temp sensor #1 = under the car bottom before rear wheels)
6001 Fuse/short-circuit to plus+ temperature sensor #2 for outside temperature

Battery:
7001 Fuse input D+ (D+ = Generator On = Motor running)

@marchugo
Excellent - thank you. Great explanation.
 
Installation of a fast USB socket on the right hand chair

Cali_USB_6.jpg


Today I cut a hole in the plastic trim of the storage compartment at the right side of the passenger chair (it's a Continental T5 Cali). Now the hole contains an ultra fast extra USB socket for loading all sorts of electronic gear like handies, just like the T6 Calis can do.

The dual USB ports are of the QC 3.0 (Quick Charge) type, which means they can load a modern phone up to about 80 percent within half an hour. However, the phone and the adapter must be able to 'talk' to each other. So older phones just ignore this feature, and only load at slow speed, which is better for their health.

The adapter can be switched off with a touch key, which saves battery life. Although it only eats a few milli amperes per hour, if left alone for some weeks, this could suck empty your household battery.

As the adapter shows the voltage of the battery it is connected to, so I can read the voltage of my new LiFePo4 batt under the seat.

The plastic storage compartments at the sides of the Cali seats can be removed by pulling sidewards with force at the underside of the compartment, and only then slide it up. So do not slide it up first, this will ruin the plastic clips at the top.

The compartment is hold in place at the underside with three metal clips.

At the bottom of the compartment there's a small recess, just big enough to let you pass the cables through to the battery.


Regards from Amsterdam,

Marc.


Cali_USB_4.jpg
Switched off the adapter doesn't emty the battery.


Cali_USB_5.jpg
A fully loaded LiFePo4 batt shows a voltage of 13,3V.
At the left you can just see one of the grey plastic clips at the upper side of the compartment.


Cali_USB_2.jpg
 
Making room for real relax armchairs in the tail gate

Being literally tired of the VW camping chairs, I made room in the tail gate for two alternative lazy armchairs, model Crespo Compact II from Spain, which we found in the German webshop of Fritz Berger for 2 x 99,95 euro. Weight only 2 x 3,5 kilo.

1628090226043.png
The alternative armchairs in the tailgate.

The packing size per chair is folded up 91 x 64 x 5 CM, so it's clear two chairs are too thick to fit in the chair pocket in the rear. So the inner VW chair mounts had to be removed. The dismantling and assembly was done in 15 minutes:

- Take out the original chairs.

- Dismantle the loop handle (2 x Torx screws). The handle stays off, we hardly used it anyway.

- The chair pocket stays.

- Now remove the two foam chair mounts: by pressing down the top with both hands, 2 x 2 plastic stopping plugs (left and right) spring free; of course they tend to disappear in the grass. Then pull the foam mounts out, forcefully.

- Now dismantle the plastic center holder (2 x Torx screws). This cannot be done without destroying the plastic eye below (cut through with pliers). Without destroying it is also possible, but that is a major operation (the entire chair pocket then has to be dismantled). Wasn't important to me, the holder can still be placed back later.

- Slide the stacked armchairs in the box. Unfortunately, this is a little laborious, but it fits exactly to the millimeter! Push it back and forth a little more, after some wiggling the zipper closes effortlessly. The chairs don't rattle while driving, they sit tight:


1628090687887.png
The stacked alternative armchairs.

Some more pictures with details:

1628090954359.png
Permanently removed from the Cali: the foam mounts, the handle and the center holder. I'm still looking for the screws...

1628091143905.png

The plastic center holder, with the cut eye downside right.


1628091236854.png

The chairs are secured by winding a piece of velcro around the plastic rod in the top, and pulling them up. This prevents them from sinking down due to their weight and damaging the zipper. Of course you can also use the holder of the removed handle for winding the velcro.

Finally i protected the now exposed wiper motor with a thick piece of styrofoam.

A warning though: as i can easily lift the two stacked chairs into the compartment, Mrs. marchugo wasn't amused. She's the smaller of us, and couldn't push them in. And of course when unloading, she was attacked by two falling chairs.

The chair has a sliding headrest and the backrest can be changed in seven positions. We were very pleased with them during a week long trip in Holland.
Like the VW chairs, they don't have a nasty aluminum bar directly under your thighs, which adds to their comfort.


1628091858398.png


Regards from Amsterdam,

Marc.
 
Making room for real relax armchairs in the tail gate

Being literally tired of the VW camping chairs, I made room in the tail gate for two alternative lazy armchairs, model Crespo Compact II from Spain, which we found in the German webshop of Fritz Berger for 2 x 99,95 euro. Weight only 2 x 3,5 kilo.

View attachment 82570
The alternative armchairs in the tailgate.

The packing size per chair is folded up 91 x 64 x 5 CM, so it's clear two chairs are too thick to fit in the chair pocket in the rear. So the inner VW chair mounts had to be removed. The dismantling and assembly was done in 15 minutes:

- Take out the original chairs.

- Dismantle the loop handle (2 x Torx screws). The handle stays off, we hardly used it anyway.

- The chair pocket stays.

- Now remove the two foam chair mounts: by pressing down the top with both hands, 2 x 2 plastic stopping plugs (left and right) spring free; of course they tend to disappear in the grass. Then pull the foam mounts out, forcefully.

- Now dismantle the plastic center holder (2 x Torx screws). This cannot be done without destroying the plastic eye below (cut through with pliers). Without destroying it is also possible, but that is a major operation (the entire chair pocket then has to be dismantled). Wasn't important to me, the holder can still be placed back later.

- Slide the stacked armchairs in the box. Unfortunately, this is a little laborious, but it fits exactly to the millimeter! Push it back and forth a little more, after some wiggling the zipper closes effortlessly. The chairs don't rattle while driving, they sit tight:


View attachment 82571
The stacked alternative armchairs.

Some more pictures with details:

View attachment 82572
Permanently removed from the Cali: the foam mounts, the handle and the center holder. I'm still looking for the screws...

View attachment 82573

The plastic center holder, with the cut eye downside right.


View attachment 82574

The chairs are secured by winding a piece of velcro around the plastic rod in the top, and pulling them up. This prevents them from sinking down due to their weight and damaging the zipper. Of course you can also use the holder of the removed handle for winding the velcro.

Finally i protected the now exposed wiper motor with a thick piece of styrofoam.

A warning though: as i can easily lift the two stacked chairs into the compartment, Mrs. marchugo wasn't amused. She's the smaller of us, and couldn't push them in. And of course when unloading, she was attacked by two falling chairs.

The chair has a sliding headrest and the backrest can be changed in seven positions. We were very pleased with them during a week long trip in Holland.
Like the VW chairs, they don't have a nasty aluminum bar directly under your thighs, which adds to their comfort.


View attachment 82575


Regards from Amsterdam,

Marc.
Very very nice indeed. Thank you for sharing with detailed steps. :thumb
 
Installation of a fast USB socket on the right hand chair

View attachment 77945


Today I cut a hole in the plastic trim of the storage compartment at the right side of the passenger chair (it's a Continental T5 Cali). Now the hole contains an ultra fast extra USB socket for loading all sorts of electronic gear like handies, just like the T6 Calis can do.

The dual USB ports are of the QC 3.0 (Quick Charge) type, which means they can load a modern phone up to about 80 percent within half an hour. However, the phone and the adapter must be able to 'talk' to each other. So older phones just ignore this feature, and only load at slow speed, which is better for their health.

The adapter can be switched off with a touch key, which saves battery life. Although it only eats a few milli amperes per hour, if left alone for some weeks, this could suck empty your household battery.

As the adapter shows the voltage of the battery it is connected to, so I can read the voltage of my new LiFePo4 batt under the seat.

The plastic storage compartments at the sides of the Cali seats can be removed by pulling sidewards with force at the underside of the compartment, and only then slide it up. So do not slide it up first, this will ruin the plastic clips at the top.

The compartment is hold in place at the underside with three metal clips.

At the bottom of the compartment there's a small recess, just big enough to let you pass the cables through to the battery.


Regards from Amsterdam,

Marc.


View attachment 77946
Switched off the adapter doesn't emty the battery.


A fully loaded LiFePo4 batt shows a voltage of 13,3V.
At the left you can just see one of the grey plastic clips at the upper side of the compartment.

1635437454723.png
WARNING: Sometimes a summer solution is not well thought out for winter times, as we found out during our last trip. The USB socket I constructed in the side compartment of the right hand chair, is exactly in the very hot air stream of the heater in the B-pillar.

We had a narrow escape for the iPhone of my wife, that was happily lurking 12 Volt from the USB socket, during a cold evening with the heater full blown with a felt airstream of about 80 degrees Celsius. Not a temperature that Steve Jobs would advice for his cell phone.

On the other hand, the USB socket itself and the iPhone cable survived this heat wave...

Regards from Amsterdam,

Marc.
 
Stuck in the mud and how to get out

Our brand new all year Michelin rough-terrain tyres, model Agilis Cross Climate, weren't very helpfull in the mud of the Greek rain-plagued camping this fall:

20211017_104440.jpg

In a spilt second the rubber tyre profile, though rather deep, was filled up with mud, Our front-drive wheels buried themselves more than twenty centimeters deep in the ground.
Only the tractor of the camping boss could pull us out of this situation, which occurred three hours before we had to be at the ferry in Patras.

To avoid this mess in the future (apart from not driving in soaked mud, of course) I bought some huge sand boards in the German webshop of Sandbleche.de:

sandbleche.de.jpg

The sheets are 118 CM long, 30 CM wide and 7 MM thick, and made of GFK. The astonishing flexible boards don't break, like the cheaper yellow versions of Fiamma that we had. You can use them too as a spade to shuffle away sand and mud around the wheels. With a tiny, tiny, tiny bit of gas at your feet, you climb very slowly but steadily out of the mud.

The surface is sanded with very mean sharp granite-like gravel. You need gloves to use them or you will scratch your fingers.

The boards stow away fine at the floor of the luggage department in the back of our Cali. With their 118 CM they slide neatly under the back seat. I wrapped them in strong plastic, to avoid scratching the floor.

Their weight is not small, not only in kilos (3.2 KG for one), financially too: 224 euro a pair. But a neighbour at that same Greek camping had to be towed out of the mud by a local tow company, and he was immediately 150 euros lighter. So after two times stuck in the mud I will have this investment out...

Muddy regards from Amsterdam,

Marc.
 

Sleep like a marmot in the Cali attic​

T5 pop top bed with Squergo disc springs.

1652621359418.png


I finally found some time to write a PDF description on how to install the Squergo disc springs in the sleeping attic of the Cali.

The box from Squergo in Germany arrived in Holland just four days after the order was placed. The package cost us 330 euros plus 10 euros shipping to Amsterdam. No import duties overhere. We chose the reinforced version because we sleep on the side.

The content looks high quality. The plate mechanism is simply ingenious. The springs are pre-assembled. They snap on and off with a twist, literally in one snap. You can alternate between hard and soft springs, for example in the lordosis area.

Something about the kilograms: the reinforced version of the roof bed slat base, with four crossbars and 64 pop rivets, weighs 7.9 kilograms. The 19 cleared wooden slats weigh, with rubber end caps, 7.8 kilograms. Conclusion: the Squergo suspension works without a significant increase in weight. I myself lost at least a kilo during the construction.

Overall conclusion: after two months of traveling in Greece this year, sleeping upstairs is now incredibly comfortable. No pressure points in the hips, no wobbling when one of us turns around. Intuitively, the lying surface is "wider", which is of course pure psychology.

Regards from Amsterdam,

Marc.

Attached is the PDF file with the description:
 

Attachments

  • Squergo Poptop bed with springs.pdf
    1.2 MB · Views: 40

Sleep like a marmot in the Cali attic​

T5 pop top bed with Squergo disc springs.

View attachment 93092


I finally found some time to write a PDF description on how to install the Squergo disc springs in the sleeping attic of the Cali.

The box from Squergo in Germany arrived in Holland just four days after the order was placed. The package cost us 330 euros plus 10 euros shipping to Amsterdam. No import duties overhere. We chose the reinforced version because we sleep on the side.

The content looks high quality. The plate mechanism is simply ingenious. The springs are pre-assembled. They snap on and off with a twist, literally in one snap. You can alternate between hard and soft springs, for example in the lordosis area.

Something about the kilograms: the reinforced version of the roof bed slat base, with four crossbars and 64 pop rivets, weighs 7.9 kilograms. The 19 cleared wooden slats weigh, with rubber end caps, 7.8 kilograms. Conclusion: the Squergo suspension works without a significant increase in weight. I myself lost at least a kilo during the construction.

Overall conclusion: after two months of traveling in Greece this year, sleeping upstairs is now incredibly comfortable. No pressure points in the hips, no wobbling when one of us turns around. Intuitively, the lying surface is "wider", which is of course pure psychology.

Regards from Amsterdam,

Marc.

Attached is the PDF file with the description:
Thanks for that Marc. Did you keep the original VW mattress or did you change that too?
 
Elly,
We changed the horrible T5 mattress for a much thicker foam one from the German site VWCamper.de. Worlds of difference. Combined with Belladonna sheets, prices are not low, but we sleep almost better than at home...

Regards from Amsterdam,

Marc.
 
Back
Top