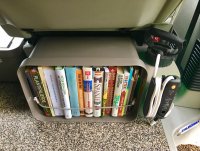
All geared up: my all-seasons all-purpose T6 Ocean interior & organisation :

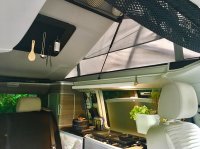
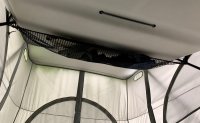
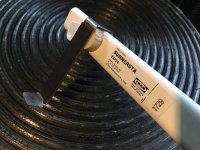
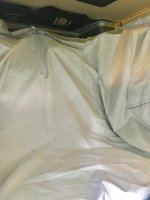
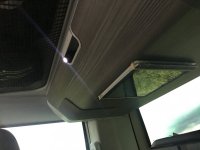
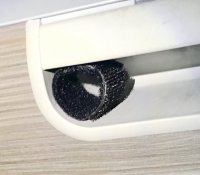
The storage of the sliding window security air vent kept disturbing me. It's a fragile thing, and I noticed that when you squeeze it by accident, or you put something on top, the curve of it (fitting the curve of the car) flattens, and so makes it more difficult to fit.
So I drilled 4 holes through the ceiling and fixed 2 elastics through them, starting from the hollow ceiling part.
No more rattling, no more special protection needed. And right at hand.

View attachment 37616 View attachment 37617
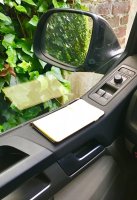
I have the same window grille and slide it between the drivers (RHS) seat and door whilst travelling or on the parcel shelf. I admire your ideas but not this one I'm afraid, doesn't look very nice to me imo.
 
I have the same window grille and slide it between the drivers (RHS) seat and door whilst travelling or on the parcel shelf. I admire your ideas but not this one I'm afraid, doesn't look very nice to me imo.

Thx Larry. About the looks I don't discuss. 'De Gustibus et Coloribus,...' you know. The beauty to me is in the handiness. Like the rest of my ceiling storage. It's just a surface in the van which I like to use as an extra.
I wouldn't see myself driving with that thing besides the door. Each time you get out you move it? Also, I store quite some things in the door that I need around me while driving.
I used to have it on the parcel shelf. I just had to move it too much from there. Therefore.
 
I wouldn't see myself driving with that thing besides the door. Each time you get out you move it?
to be honest we only use it when it is hot, used it in Germany this summer and it was convenient to pop it next to my seat whilst driving for the day, 200-400kms. We have driven with it fitted but not on the autoroutes. If it works for you that's all that matters. :thumb
 
I have the same, its always the last thing that goes in somewhere
at the back.
I know what you´re saying about the curved shape.

I ´m still trying to get my head around how i´m gonna do that
rear table extension from the bed board.
You´re going at to fast Auberg-ine.:thumb
 
I have the same, its always the last thing that goes in somewhere
at the back.
I know what you´re saying about the curved shape.

I ´m still trying to get my head around how i´m gonna do that
rear table extension from the bed board.
You´re going at to fast Auberg-ine.:thumb

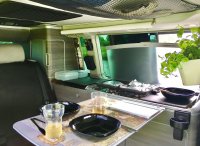
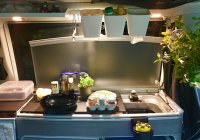
The double use of the grill, when cooking:
IMG_E2914.jpg unnamed-3.jpg
(Notice also my new Muji 'travel kit' for the Soja, Balsamic Vinegar, Spicy oil,... between the pots&kettle set and the RidgeMonkey)

Concerning the bbq table: just an 8mm MDF board resting on the metal shelf, in which I drilled some holes. Four to keep my tools, and two for the rope towards both roof rail screws (to adapt the angle of the table). You can put quite some weight on it. if the panel bends too much, just put a plastic container or towels or so between the rope and the table to create a central support.
 
Last edited:
"The proof of the 'fitting' is in the eating".
A big part of the fun of this car is puzzling how to optimize its potential, looking for the best fitting equipment.
When it comes then to the testing, and it all flows fluently, it's double joy.
Today's challenge: making a two-person three-course menu in a 'stealth' position, so without raising the roof, or opening the doors, and without losing the peace of the moment into chaos and stress.
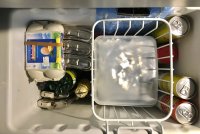
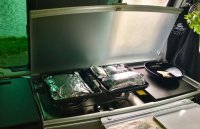
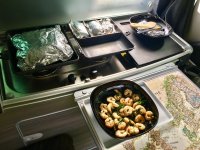
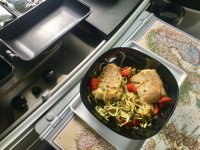
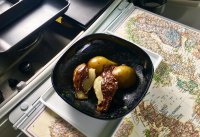
The trick here was the making of 5 aluminum foil envelopes, just fitting my RidgeMonkey (which when opened just fits the two burners). This morning I prepared 1 pocket of prawns with sea bananas, 1 with sea bass, zucchini, mustard, tomatoes and white beer; 2 with pear and amaretto; 1 with chocolate, butter and milk (*). Checked for leaks and then put them in my plastic containers (just fitting in the fridge basket). At lunchtime I only had to put the 'papillottes' onto the pans (so without oil or water). Which left me time to prepare some Mojito's (fresh mint from my herbs garden, ice cubes from the bags behind the fridge basket, rum from the hipflasks set,...). Using my kitchen workspace extension (#67) kept the lunch table 'peaceful'. The pockets steamed up like balloons, while the interior of the van remained dry and clean. Even the pans stayed clean. Heavenly...:happy

IMG_E2929.jpg IMG_E2979.jpg IMG_E2984.jpg
IMG_E2988.jpg IMG_E2991.jpg IMG_E2992.jpg

(*) An alternative menu (my first try-out on the RidgeMonkey, live recorded by MattBW :Nailbiting) will shortly be posted on our beloved "Camper Van Cookout" channel. :thumb
 
Last edited:
"The proof of the 'fitting' is in the eating".
A big part of the fun of this car is puzzling how to optimize its potential, looking for the best fitting equipment.
When it comes then to the testing, and it all flows fluently, it's double joy.
Today's challenge: making a two-person three-course menu in a 'stealth' position, so without raising the roof, or opening the doors, and without losing the peace of the moment into chaos and stress.
The trick here was the making of 5 aluminum foil envelopes, just fitting my RidgeMonkey (which when opened just fits the two burners). This morning I prepared 1 pocket of prawns with sea bananas, 1 with sea bass, zucchini, mustard, tomatoes and white beer; 2 with pear and amaretto; 1 with chocolate, butter and milk (*). Checked for leaks and then put them in my plastic containers (just fitting in the fridge basket). At lunchtime I only had to put the 'papillottes' onto the pans (so without oil or water). Which left me time to prepare some Mojito's (fresh mint from my herbs garden, ice cubes from the bags behind the fridge basket, rum from the hipflasks set,...). Using my kitchen workspace extension (#67) kept the lunch table 'peaceful'. The pockets steamed up like balloons, while the interior of the van remained dry and clean. Even the pans stayed clean. Heavenly...:happy

View attachment 37670 View attachment 37671 View attachment 37672
View attachment 37673 View attachment 37674 View attachment 37675

(*) An alternative menu (my first try-out on the RidgeMonkey, live recorded by MattBW :Nailbiting) will shortly be posted on our beloved "Camper Van Cookout" Youtube channel. :thumb
I´ll have the prawns with some bread whilst i drink
your fridge dry. Lol.

Great food you got there Auberg-ine.
 
OMG....can I book you for next weekend you can cook whatever you like :)

Haha, well the trick I described was for lazy dummies without time. Must fit most of us, no?;)
Just give it a try! Put it all on the pan at once, straight from the fridge, then put the fire on. The cooking itself took 6 min for the prawns, then 10min later you can eat the sea bass, and then after again another 10 the pears. So perfectly synchronized. And it simply sizzles to tell you when you have to stop cocktailing. Stressless! (Just put the heat underneath the right pan at minimum after removing the prawns).
Strong aluminum foil and triple folding the borders of the envelopes, as to prevent leaking, is the key. And don't be shy with the beer (or wine) in and out of the envelopes! :thumb

But in fact, this post is more about the fitting equipment, so let's all go to CamperVan Cookout to go cooking the car! :thumb
 
Last edited:
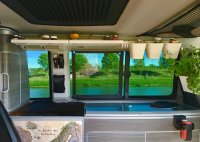
I enlarged my office/kitchen installation with some, yes, Ikea! :embarrased
Reused my favorite Lillången hooks, opened again a bottle for its plastic cork, and spent another smashing...8€! (Sunnersta series).

IMG_3013.jpg Ikea shelf.jpg
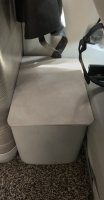
It takes some 30 seconds to mount/dismount and store it all in the small bench drawer.
 
Last edited:
The storage of the sliding window security air vent kept disturbing me. It's a fragile thing, and I noticed that when you squeeze it by accident, or you put something on top, the curve of it (fitting the curve of the car) flattens, and so makes it more difficult to fit.
So I drilled 4 holes through the ceiling and fixed 2 elastics through them, starting from the hollow ceiling part.
No more rattling, no more special protection needed. And right at hand.

View attachment 37616 View attachment 37617
I have not got my Cali yet but could it have gone in a pocket under the bed slats?
 
Under the upper bed slats is not working.
I tried for a while in between the mattress topper of the bench-bed, but the buttons leave marks, and again, the curved shape gets flattened. You could of course hang it in a pocket right underneath the frame, but mostly that area is quite packed,so...
 
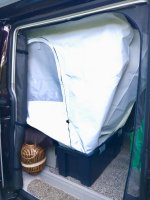
Even while living a nice Indian Summer here these days, I already started preparing for winter. That period when you don't feel like hanging out the tailgate tent to shower :Nailbiting
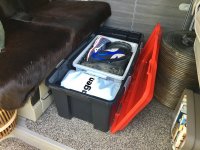
And so my new rails and hooks, and storage box come in very handy again. The existing velcro loops and eyelets of the tent are just fitting to hang the whole thing on the rails and the grip of the roof cabinet.
I also bought a new pressure sprayer, which I can fill with hot water and use as a shower nozzle.
This way you can even take a shower in 'stealth' mode without having to raise the roof, so while sitting on the bench.
Afterwards I just need to simply push the whole thing back into the box, clip the lid back on, and done.
Oh, and yes, it's fitting for 2 persons.:talktothehand

IMG_E3092.jpg IMG_E3098.jpg IMG_E3100.jpg
IMG_E3134kopie.jpg IMG_E3130kopie.jpg
 
Last edited:
Even while living a nice Indian Summer here these days, I already started preparing for winter. That period when you don't feel like hanging out the tailgate tent to shower :Nailbiting
And so my new rails and hooks, and storage box come in very handy again. The existing velcro loops and eyelets of the tent are just fitting to hang the whole thing on the rails and the grip of the roof cabinet.
I also bought a new pressure sprayer, which I can fill with hot water and use as a shower nozzle.
This way you can even take a shower in 'stealth' mode without having to raise the roof, so while sitting on the bench.
Afterwards I just need to simply push the whole thing back into the box, clip the lid back on, and done.
Oh, and yes, it's fitting for 2 persons.:talktothehand

View attachment 38088 View attachment 38089 View attachment 38090 View attachment 38093 View attachment 38097 View attachment 38094
Where do you go from here, can I suggest fitting an extra side awning to make some kind of jet-wash powered flying California??
 
Where do you go from here, can I suggest fitting an extra side awning to make some kind of jet-wash powered flying California??

Just when I was running out of ideas! Thx! :D
In fact, my biggest joy is to find the low-tech, five dime solution, made out of stuff that lingers in the house, and which makes our Cali's really all-seasons/purpose and ourselves free as a bird.
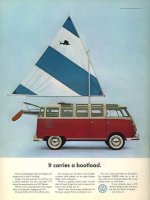
Also, for the sailing Cali I'm already way too late! :

4f2897b37367642869aae4c13eca8fa5.jpg :Grin
 
Just when I was running out of ideas! Thx! :D
In fact, my biggest joy is to find the low-tech, five dime solution, made out of stuff that lingers in the house, and which makes our Cali's really all-seasons/purpose and ourselves free as a bird.
Also, for the sailing Cali I'm already way too late! :

View attachment 38099 :Grin
Ha ha
 
Well, it's not a jet-wash powered invention this weekend, but some mini improvements I wanted to do already for a while.
I tend to use quite often those wet hygienic tissues, avoiding to open the kitchen, look for soap,.... I just found it a bit contradictory to get them out of the drawer with sticky hands. So I cut a slot out of one of the Sunnersta containers to make a dispenser. The plastic lip which closes the original tissue pack can be reused to stick beside the slot to keep it humid.
Further in the picture: I store my mini pots of mayo, ketchup, mustard,etc in an egg box in the fridge. The spicy oil, soya sauce, balsamic vinegar,... in the travel beauty kit.
IMG_E3183kopie.jpg

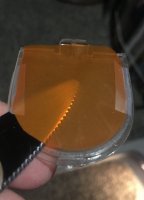
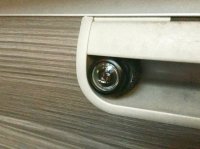
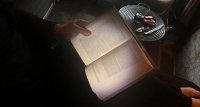
These bright led-lights are very good for cooking, but not for after dinner. Therefore I have orange filters behind the plastic covers of the 4 small spots. It makes a cozy ambiance. But then if I wanted to read I had to use my headlamp. Today I made a simple small shell that I stuck in the corner of the grip of the roof cabinet. Just big enough to hold the small led spot which is charged in the cigaret lighter at the dash. Nicely concentrated light at the right position.
IMG_E3424.jpg IMG_E3158.jpg IMG_E3186.jpg IMG_E3161.jpg IMG_E3193.jpg
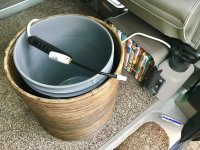
A lid for the Campershop Multibox/dustbin, made from the cover of a wine crate:
IMG-2331.jpg

Last DIY : a post-it notepad made out of an old phone protection case, a piece of black tape for the pencil holder and some thick double tape to fix it.
I know, I shouldn't. There's just too much to remember. :Nailbiting
IMG_E3227.jpg
 
Last edited:
Aubergine.
I love some of your ideas and posts.
Any chance you can take some better quality pictures...?
:thumb
 
Aubergine.
I love some of your ideas and posts.
Any chance you can take some better quality pictures...?
:thumb

I'll ask @MattBW to come back for next session ;)
Which pictures you want me to redo? Sorry, I just have my iPhone for it. I suppose you know you can enlarge them all by just clicking on them, no? I must say that the original photo's here are much sharper. Seems there's a quality reduction after uploading.
 
I did try, but they seem to blurr.
Are you uploading the pics via the forum or a picture hosting site...?
 
Are you uploading as a thumbnail...?
Might be better as full image.

Keep up the good work Aubergine :thumb
 
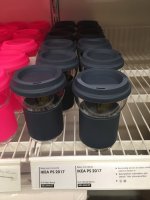
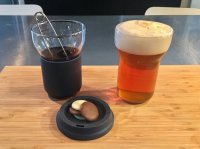
Those glasses, with the rubber sleeves, where are they from? I checked IKEA online but could not see them..

Cheers
Lars

Sent from my SM-G960F using Tapatalk

Hi Lars, I found them again! Even in nuclear pink :(:
IMG_3196.jpg IMG_E3199.jpg
 
Last edited:
Back
Top