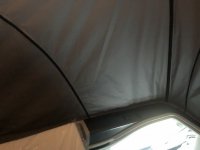
t6.1
Thanks to everyone who has already posted regarding earlier versions of the ISO-TOP:
@MattBW Video of a Beach:
Installed Brandrup ISO-TOP IV:

 vwcaliforniaclub.com
And thanks to @LunaLovegood for some VI tips:

 vwcaliforniaclub.com
Instructions from Brandrup (probably best to avoid altogether!):
I put up another post specifically regarding issues I had with the ISO-TOP VI install here:

 vwcaliforniaclub.com
Here are my 'Quick' Tips Instructions:
1) First part of the install is straight forward:
- Get the instructions and either throw them in the bin, shred them or set them on fire.

- Clean the metal with the wipe provided.
- Wait 15 minutes.
- Use the sponge provided, do fairly quick as it tends to fall apart.
- Wait 15 minutes.
- Apply the bottom velcro all around on the metal and cut where required.
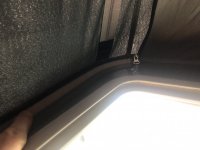
- Apply the back top velcro, it should be cut to measure, but I found it was too long so I cut it down.
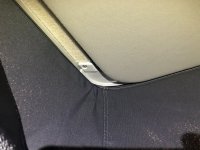
2) Wait 48 Hours. Some members have reported they didn't do this and it's been fine - I'll leave that one up to you to decide! - I opted to leave it for the 48 hours and keep the roof up, but I'm not sure if that's required either.
3) The main bit of the install:
- !! Don't try and install the main ISO-TOP liner like I did !!
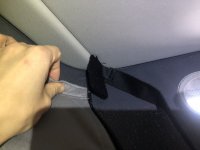
- Get the 5 smallish tabs of velcro. Lots of people report how difficult this bit is. It's incredibly difficult if you try to insert them where I first did! (near where my hand is right at the back) Don't do that! Instead put them in the section slightly in front (as shown in the photo).
-- I had no trouble pushing them in just using my hands, others have mentioned credit cards, or the new £10 help if you're struggling.
-- Start with the middle, then the ends, then I eyeballed the other 2 and it was fine. If you're more cautious than me you may want to measure it up
- Get the 6 strips of velcro. Here's the naming convention I used:
-- Velcro 1: The one with the grey transparent tab.
-- Velcro 2: The one with the 2 smaller ends.
-- Velcro 3: The one with 1 smaller end, and 1 larger end.
--- You'll repeat the following steps on each side of the van.
---- Velcro 1:
----- Start at the top back, and put the grey transparent tab in.
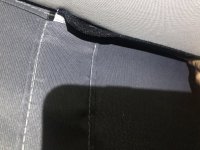
----- Take the other end and put through the eyelet and fasten back on to itself:
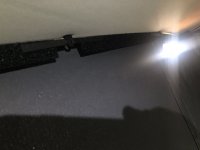
---- Velcro 2:
----- Put in the same eyelet as just used with 'Velcro 1' and fold back on itself. Then put in the next eyelet (the one used for the child safety net) and fold back on itself.
---- Velcro 3:
----- Put in the same eyelet as just used with 'Velcro 2' and fold back on itself. Then attach to the velcro tab at the front.
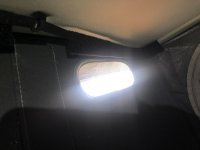
4) ISO-TOP fabric install:
- Now, with the all tabs and velcro installed, it's time to install the main fabric.
-- The black side should be to the pop top canvas, the grey felt like material towards the inside of the van.
-- I started at the top of the back:
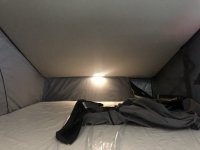
-- The top back corners slide in and around and look something like this:

-- I then attached the top around the sides:
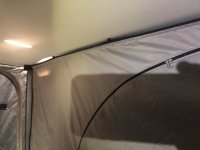
!! Capped at 10 images a post, so continuing on next post !!
@MattBW Video of a Beach:
Installed Brandrup ISO-TOP IV:

Installed Brandrup Iso-Top IV
Thanks to everyone who commented on this. I gave fitting mine a go today and it was successful thanks to all the comments and help.
And thanks to @LunaLovegood for some VI tips:

Isotop Fitting - Your tips and experiences please
I spent the weekend fitting the ISOTOP IV to my Beach, filming everything for a club video. The instructions were the most difficult part of the whole process in my mind, at least the English ones, it felt like they had been translated from German then to French, then to Spanish and finally to...
Instructions from Brandrup (probably best to avoid altogether!):
I put up another post specifically regarding issues I had with the ISO-TOP VI install here:

BRANDRUP ISO-TOP VI INSTALLATION - Questions!
I recently did an install and wrote up some instructions: https://vwcaliforniaclub.com/threads/brandrup-iso-top-vi-installation.38190/ Here's some things I'm not sure about: 1) It's mentioned that to close the roof, the front needs to be open. Does this mean take the whole thing off, or…...
Here are my 'Quick' Tips Instructions:
1) First part of the install is straight forward:
- Get the instructions and either throw them in the bin, shred them or set them on fire.

- Clean the metal with the wipe provided.
- Wait 15 minutes.
- Use the sponge provided, do fairly quick as it tends to fall apart.
- Wait 15 minutes.
- Apply the bottom velcro all around on the metal and cut where required.

- Apply the back top velcro, it should be cut to measure, but I found it was too long so I cut it down.

2) Wait 48 Hours. Some members have reported they didn't do this and it's been fine - I'll leave that one up to you to decide! - I opted to leave it for the 48 hours and keep the roof up, but I'm not sure if that's required either.
3) The main bit of the install:
- !! Don't try and install the main ISO-TOP liner like I did !!
- Get the 5 smallish tabs of velcro. Lots of people report how difficult this bit is. It's incredibly difficult if you try to insert them where I first did! (near where my hand is right at the back) Don't do that! Instead put them in the section slightly in front (as shown in the photo).
-- I had no trouble pushing them in just using my hands, others have mentioned credit cards, or the new £10 help if you're struggling.
-- Start with the middle, then the ends, then I eyeballed the other 2 and it was fine. If you're more cautious than me you may want to measure it up

- Get the 6 strips of velcro. Here's the naming convention I used:
-- Velcro 1: The one with the grey transparent tab.
-- Velcro 2: The one with the 2 smaller ends.
-- Velcro 3: The one with 1 smaller end, and 1 larger end.
--- You'll repeat the following steps on each side of the van.
---- Velcro 1:
----- Start at the top back, and put the grey transparent tab in.

----- Take the other end and put through the eyelet and fasten back on to itself:

---- Velcro 2:
----- Put in the same eyelet as just used with 'Velcro 1' and fold back on itself. Then put in the next eyelet (the one used for the child safety net) and fold back on itself.
---- Velcro 3:
----- Put in the same eyelet as just used with 'Velcro 2' and fold back on itself. Then attach to the velcro tab at the front.

4) ISO-TOP fabric install:
- Now, with the all tabs and velcro installed, it's time to install the main fabric.
-- The black side should be to the pop top canvas, the grey felt like material towards the inside of the van.
-- I started at the top of the back:

-- The top back corners slide in and around and look something like this:

-- I then attached the top around the sides:

!! Capped at 10 images a post, so continuing on next post !!
Last edited:


