Building a kitchen pod for the Beach

Max-Felix

Max-Felix

VIP Member
Messages
1,481
Location
Sussex
Vehicle
T5 SE 140
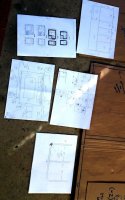
Hopefully it might be of interest to others but I will start work on this this week and will document the build here.
I pick up the Beach in a few days but nearly bought one a year ago and always planned a kitchen unit so have the plan ready. It will be removable but would mostly be designed to stay in situ so the Beach is always 'ready to go'. Over the time I have gathered a ridiculous amount of pictures, plans, links, suppliers, pieces of info etc, many from here of course and special thanks to Owen for his help with sharing plans and info.

Time is short as I only have two weeks or so to finish this alongside normal work. As I say countless hours of research and planning comes down to a simple plan and relatively simple unit but it still has to look 'professional' and work well. We lived in a simple T25 VW for 6 months as twenty-somethings and that taught us a lot too about what is really needed in a camper.

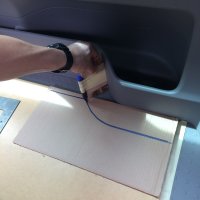
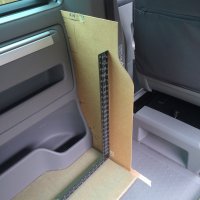
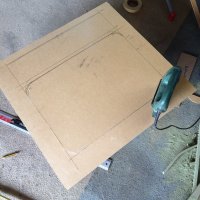
I'm not going to cut any wood until I have the Beach here to double check measurements but a cardboard full size mock up is the first real start, see below.

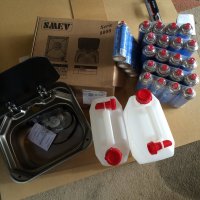
Unit will be 800mm wide to include two halves as such. I'm not installing a built in hob as we envisage cooking outside the majority of the time and to install a Smev hob (properly/safely) you then need a sealed gas compartment, drop out hole through the floor etc. No time, space or inclination to drill the floor but the option remains for the future to add this. So there will be two gas cartridge stoves - been a big fan of these for years, they work well, are powerful, almost disposable (£10 each) when they get too grotty and if you buy in bulk the cartridges can actually work out cheaper than 907's.

We will have a small SMEV sink built in (8005 to allows space on the left for a future hob or cartridge stove) as we like running water in the 'van. Two 10 litre containers for fresh/waste. Ideally I would just drain to the outside/bucket to save waste space and hassle but again cannot bring myself to drill the mint Beach floor!

Two drawers as always useful and below there general cupboard space.

Anyway, pics and more text will hopefully show the ideas more.
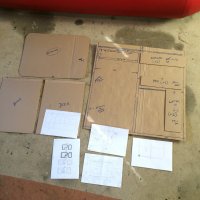
IMG_3324 (1).JPG

IMG_3324.JPG
 
Good shout Max - will be interested to see how it turns out.
 
Cheers!

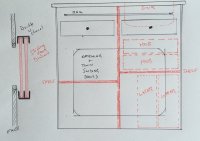
Please forgive the very long rambling post but wanted to get all the info/links in here as it may help others considering such a build. Below is a very rough sketch showing the layout. The opening in the front panel will be larger but I will leave this until later to finalise. The RH drawer/sink thing may look odd but a lower rear lip on the drawer shaped to the sink is all that is needed and it will be ideal for the cutlery tray and keep the symmetry

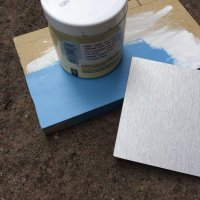
As to main material it would be ideal to use the proper Vohringer 15mm ply that is so popular but I simply don't have the time to source/collect (no suppliers anywhere near me) this and do it justice in terms of routing etc plus it is horribly expensive and mistakes will always be made. So, using 15mm MDF - issue here is weight and quality but I have a very good specialist woodyard down the road so I can get it cut perfectly and will be using the much superior mositure resistant type. As the main unit is pretty small and the front will lose so much material I am not overly concerned with weight, estimate for final unit is around 35kg less contents so easy enough to fit/remove. Another reason to use MDF is we really want to get a bit of colour into the interior, OK it's never going to be a Splitty or Bay but it needs jazzing up to match the Sunny Yellow exterior. We found the perfect 'cornflower' type blue we wanted custom mixed at B&Q. This should sit well with the silver doors, corner pieces and natural reclaimed wood top we have planned. For the doors originally I planned a Tambour door but these are rather tricky to find in big sizes and not very space efficient so going with sliders. These will be mounted in double U channel...

http://www.ebay.co.uk/itm/161941053436?_trksid=p2055119.m1438.l2649&ssPageName=STRK:MEBIDX:IT

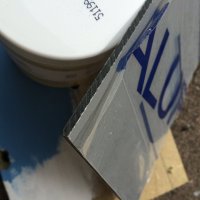
...affixed to the inner face of the front panel. Making these from a truly fantastic material - Diabond or 'aluminium composite sheet', not sure but I suspect this is what the Cali SE uses for shelves etc - incredibly light, strong and available in many finishes at little cost. I just got a sample today in brushed silver finish, it is feather light and so stiff.

https://www.simplyplastics.com/cata...red-aluminium-composite-sheet/c-24/c-87/p-251

For the drawers I had planned to use Ikea drawer units but they are crazy heavy (3kg each!) so will make them from 6mm ply and these simple units:

http://www.ebay.co.uk/itm/251477022490?_trksid=p2055119.m1438.l2649&var=550583777441&ssPageName=STRK:MEBIDX:IT

IMG_3329.JPG
 
Continued...there will be a separate rail on the top/front for a new smaller table for use inside leaving the door mounted one for outside, usual Reimo type system with a funky small custom table I have planned, leg/rail as here.

http://www.ebay.co.uk/itm/VW-T5-CAM...G-TABLE-LEG-/262090624731?hash=item3d05d18edb

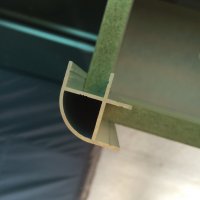
For the main unit the front to sides connection will be made with corner section, small profile alu like this:

http://www.ebay.co.uk/itm/800mm-Alu...van-Plywood-/272289773771?hash=item3f65bc38cb

Really neat as it hides the cut edges and get rid of any easily damaged sharp corners on the unit. I am not using glue/dowells just mechanical fixings as I want to be able to take it apart for modification etc if necessary and as I am using 15mm MDF the option remains to always fit 15mm Vohringer ply in the future.

The cut outs for the drawers and sliders will be finished with the usual T trim:

http://www.ebay.co.uk/itm/5-METERS-...RINGER-TRIM-/251729861741?hash=item3a9c44dc6d
 
Looks like a plan :thumb
I take it that the bits marked 'water' and 'hob' are the space allocated rather than the size of the hob/ water tanks. If not you are going to struggle to get them through the opening.
Also allow a bit of space on the base for the fittings to attach the unit to the floor rails.
It will all become clearer when you have the van to try it out with.
Have fun :happy
 
Cheers Owen, yes - the opening will need to be larger (those are the actual sizes) but as you say until built (will cut the opening at the end) and physically tried I cannot be sure. Want it as small as practicaly possible.

Good point too re' the fittings, I will remember to not place one where the jerry can goes. IIRC you mentioned the support battens under the unit (ie each side of the rail) need to be 10-11mm deep? Did you re-use the ones from the std Beach storage box?
 
As the std Beach pod has both a front and back they (VW) get the clearance by fixing the pod floor 11mm above the side/back sheets. A sort of H arrangement (with a very low horizontal line) if looked at along the length of the van. With my design I dont have a back and only partial front so had to raise the floor another way. I went for a plinth simply made from fixing some strips of 10mm thick wood + 1mm felt tape onto the base plate.
With your design you could copy the VW method as you have a front (and back?).
 
Nice, I am planning to use Diabond for a shelf over the sink, you mention using mdf but have you considered grey hexagrip which is a resin bonded ply with a nice finish, it s very strong and already has a great finish?
 
Nice, I am planning to use Diabond for a shelf over the sink, you mention using mdf but have you considered grey hexagrip which is a resin bonded ply with a nice finish, it s very strong and already has a great finish?

Not heard of that but will investigate for future use. :) Will stick to the MR MDF for this as I'm *really* up against time issues and it's so convenient and relatively easy to work with.
 
Be good to see how it turns out, yes that is aluminium composite which is what the se is built from. I've been trying / thinking about building a unit for my beach from aluminium composite for a while as its lighter and stronger than the ply, but tricky to get the edges neat etc so it's a bigger project for a later day!

I'm still using the ikea Alex pod which is ok, matches well and looks pretty decent, but it is heavy and a pain to get in and out when loaded, hence a lighter aluminium composite one would be ideal. My master plan though as you said would be to drill a few holes in the floor and mount the water tanks etc under the van along with a gas tank, then run the pipes up to the internal pod. Have some sort of quick release water and gas clips and would keep a lot of weight out of the pod, and extra space as well in the pod. Not seen anyone do this in a Cali, but would be a pretty neat solution to create something between a beach and an ocean with a permanent ish kitchen.
 
Having seen the slim reimo sink I considered a very small pod to keep in place but still waiting patiently for slidepods to build their inside pod before I commit to something. Like the idea of aluminium board possibly with an aluminium frame of square section to hold it all in place. Plenty of ideas but poor fabrication skills.
 
Well, finally collected the Beach yesterday and therefore able to make a proper start.

Just to digress first on Diabond - one of my favourite new materials, spoke to the guy who cuts and sells it and it is remarkably cheap to get custom done - http://stores.ebay.co.uk/Sign-Displ...42219819&_sid=305836829&_trksid=p4634.c0.m322

I'll be using it for the drawers and shelves. Too thin for the carcass without some lateral thinking.

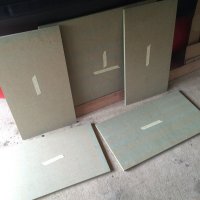
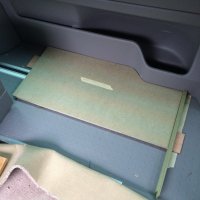
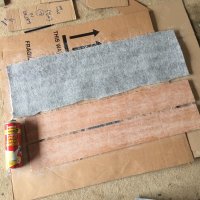
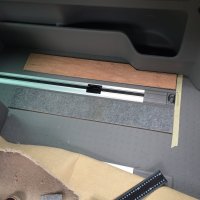
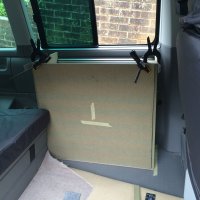
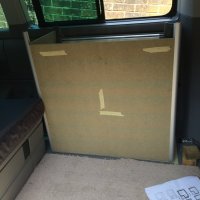
Anyway, lucky to have a very OCD cutter at our local specialist wood suppliers, top notch material too. Picked up the 15mm MR MDF today. Other stuff arriving all the time too as per pics. Tricky and essential first piece to scribe into the vehicle is the base. The gird on the rubber floor and the rails come in very handy for positioing. So, cardboard template first, then hardboard then the MDF itself. It won't be touching the trim or it could be 'squeak city' but will have a single layer of lining felt/material as a buffer.

IMG_3362.JPG

IMG_3363.JPG

IMG_3361.JPG

IMG_3365.JPG
 
You seem to have the job well in hand, and was wondering how you intend to fix the MDF together?
 
Hi Keith, I don't plan to fix it permantly, ie dowels & glue etc as I simply don't have the time and I want to be able to dismantle easily in case of mods or one day replacing the 15mm MDF with 15mm Vohringher. So mechanical fittings and the corner profile will do a neat job of holding the front and sides together mostly.
 
What starts out as an interim quick fix often ends up a really great job that you keep forever. So I would treat the construction as permanent and don't think about modifying it in the future. Should you find its not quite right you would probably be better off making another from scratch anyway. With that in mind I would fix the panels together as well as you can. If you have corner profiles these make a very strong fixing, but I would still put a couple of spots of mastic in to ensure it stays rattle free. Screw fixings are prone to fail in MDF, although there are screws specifically designed for MDF which are a bit better. Dowels don't work too well unless you use Miller Dowels which are brilliant but expensive for a one off. Powerdrive screws are good but, especially with 15mm, you need to pre-drill a pilot hole, as the MDF is desperate to delaminate as soon as you put a fixing in.
 
Have a look at this design, thought he had it well done and located in the right spot given he had no pop top.
 
Interesting idea, not seen one like that.

One thing i would recommend is don't go to town on your first one, build something quick and cheap, as however much research you do and plan it out, once you start using it you'll probably want to change it.

I was convinced I want an inside sink and cooker etc, but the safety problems having portable gas inside the van pretty much rule this out, so I have to make my tea outside, then I only use the sink for the kids washing hands etc when we have a picnic etc, so for this the slidepods design in the boot would work fine, leaving more space in the van for general living. You don't really know till you try it what works, and even then it's difficult to know!
 
Yes, good points. As noted, we spent 6 months continously living in a T25 and that taught us exactly what we needed. Which is pretty much exactly what we are re-creating here, basically a daytime/Westfalia double cabinet but with removable hobs/cartridge gas as we cook outside mostly and did not want to drill floor for 907 etc..
 
Never underestimate the time it takes to make a custom fit item like this. And this is why the converters want so much money for a one-off custom build, even for one small unit. Did nine hours total yesterday and four alone just to get the two sides fitting to a standard I was happy with.

Below scribing one side. Battens to supports unit to clear rail (one shown lining carpet up for illustration). Calculated for minimal clearance for seat. Making template for routing opening in front panel.

sun11 (1).JPG

sun11 .jpg

sun11 (2).JPG

sun11 (3).JPG

sun11 (4).JPG
 
Probably a bit late now as you look to have got most of it scribed but an easy way to scribe an edge is to put a washer on the surface to be scribed, put a pencil in the hole and run it against the edge you want to scribe to. This should give you a perfect scribed edge every time.
 
Yep, I don't use a washer as due to the shape and access here various 'spacers' are needed (and as per pic half way down first page a washer is not large enough to take up the variance in the van trim) but you can never get it right first time, takes me about 20 fit/adjust/trim procedures until my OCD accepts it. And that's just for the template! ;)
 
You just need a bigger washer;)

If we have a big gap to scribe we scribe using a big washer (we have a specialist tool for this but you can use a piece of card if you scribe a circle with a compass). The line can then be cut roughly with a jigsaw. The panel can then be offered up and scribed again with the small washer, cut carefully this should be good enough for your OCD, it's normally good enough for mine:).
 
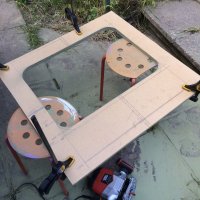
OK, quick update - got the corner profile today (small radius from Clearcut Conversions) so really able to crack on. This is brilliant stuff - perfectly fitting and really gives a clean professional finish. Also in these pics you can see the routing out of the front panel (yes, I did jigsaw a lump off the Ikea stool) - huge difference in weight now!

IMG_3416.JPG

IMG_3417.JPG

IMG_3420.JPG

IMG_3421.JPG
 
Last edited:
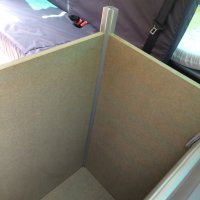
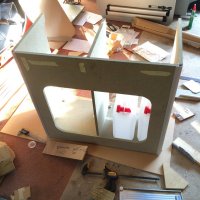
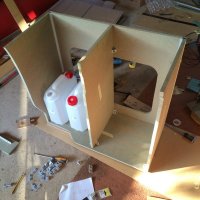
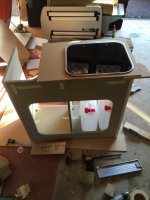
And below a further update. Divider fitted and Smev sink sitting on top with MDF template I made ready for routing out the proper worktop. Minimal connectors (obtained from Mega Van Mats) used and positioned so most are hidden from view. Amazing how suddenly it becomes a very solid unit indeed. As Keith noted earlier screws are not always so happy in MDF but I've found the trick is to use high quality specialist screws designed for MDF and fit with the drill/driver on very low torque before finishing by hand - you can really feel them bite much better and judge when they are just so. Next job is to cut the recess in the divider for the sliding doors. Decided to just go with one drawer on the LH side as the RH one would have been pretty useless.

IMG_3423.JPG

IMG_3424.JPG

IMG_3425.JPG
 
Back
Top