A
akprincehbd
I use 8x EVE Lifepo4 cell 314AH purchased at 59.99 GBP per cell. Inverter is a China bought 2000W industral cost around 80GBP (not the cheap small one)
First you need to have some knowledge about assembling the battery pack, each battery pack you need:
4x EVE 314AH cells
Victron 300A shunt
Victron battery sense
Jikong BMS 200A
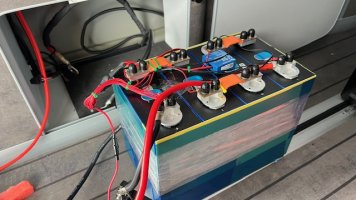
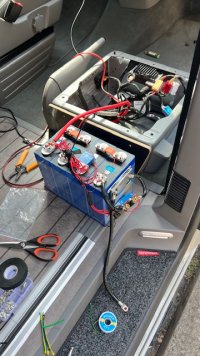
And you make 2 of these. each pack is around 4.5 kwh (a grade)
Note that I try to make these modular, so that they look like a preassembled battery. stick the BSM onto the body of the cell and tie all the balance wires together and make them as low profile as possible. The battery cable for each one should be at least 4AWG.
Install Rear battery
Put an hard foam of underlay below the battery. use some rubble trim wrap around the bracket that was holding the origianl AGM, and lift the angle with applier so that you have more room for new litium.
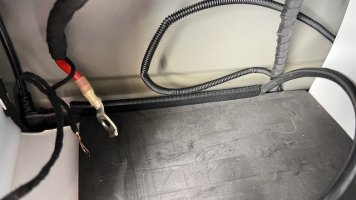
When you make the battery make sure you use strong fibre tape first to wrap the body of cell so they dont expend, and for the rear battery as it's a tight fit you need to wrap a soft take around loose, so you can use it as a handle to pull batt out for service.
I also installed a XT60 socket at the door so I can make use of it as a modular port (I love xt60 it's lowprofile and high current)
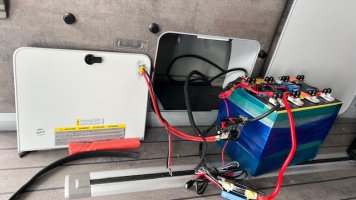
Note that both soar and xt60 socket's negative should be connected to the compartment door screw under it, so that you dont bypass the shunt.
Note that with the original AGM battery , for t6.1 model the negative port has the BMS thing that monitor the battery send to central control panel, I just cut them down completely, no use anymore just use victron app much better.
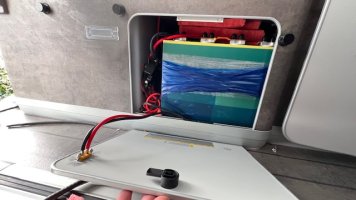
after you slide in the battery just slide it into right side, so when braking it get wall support. left part fit you can put the shunt , also padding with foam on left and top so it's not moving and close the door.
Install Front battery
I ran a 2 AWG positive wire between the 2 seats under the carpet. you dont need to remove the seatbase to run the wire through, just use the 2awg wire push through the center hole of the seatbase along to the other seat's direction it will make it's way out there. I suggest doing it from the left seats to right as there are more cable in left so if you do it from left it will very easy make out from right side.
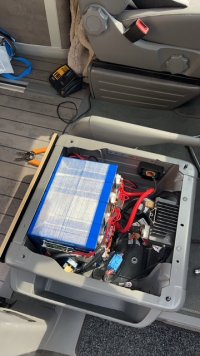
because the rear battery 's positive wire is already there so you can not change it, it's around 6awg , too thin, so for the front battery I choose 2 awg run it into the inverter, when doing heavy load the front battery will give more power as it's closer also less resitence of wire, but dont worry both battery will balance out eventually. they are very good battery so the 6awg wiring for rear batt is not a big issue.
Then install the inverter, also make the wire as short as possible , 6 awg + going to where the 2 battery + join, 6awg - going to the seat base screw.
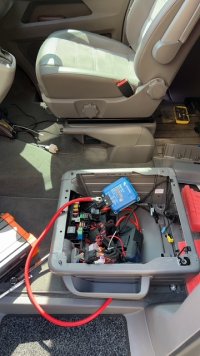
I also completely removed original wire box on the battery + terminal, I bought a 6 way hub. join the 2 battery's positive + victron alternater charger XS + inverter positive. This inverter has a wireed remote control panel I will install it on back of passenger seat base cover.
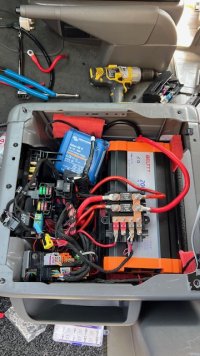
socket will be installed on the driver side , also the 220ac wire is running under the carpet. putting it on the driver side because with 9kwh batt you want to output your AC to other cars , so it's more easy access from the driver side seat base: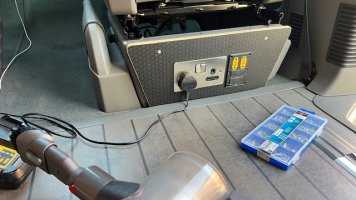
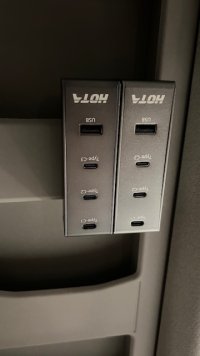
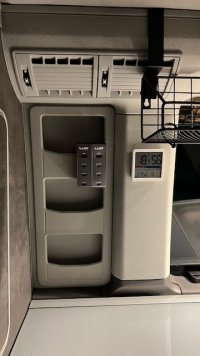
same, I made 3d printed 2x xt60 and 2x xt90 modular port incase I need 12v high current use.
First you need to have some knowledge about assembling the battery pack, each battery pack you need:
4x EVE 314AH cells
Victron 300A shunt
Victron battery sense
Jikong BMS 200A


And you make 2 of these. each pack is around 4.5 kwh (a grade)
Note that I try to make these modular, so that they look like a preassembled battery. stick the BSM onto the body of the cell and tie all the balance wires together and make them as low profile as possible. The battery cable for each one should be at least 4AWG.
Install Rear battery
Put an hard foam of underlay below the battery. use some rubble trim wrap around the bracket that was holding the origianl AGM, and lift the angle with applier so that you have more room for new litium.

When you make the battery make sure you use strong fibre tape first to wrap the body of cell so they dont expend, and for the rear battery as it's a tight fit you need to wrap a soft take around loose, so you can use it as a handle to pull batt out for service.
I also installed a XT60 socket at the door so I can make use of it as a modular port (I love xt60 it's lowprofile and high current)

Note that both soar and xt60 socket's negative should be connected to the compartment door screw under it, so that you dont bypass the shunt.
Note that with the original AGM battery , for t6.1 model the negative port has the BMS thing that monitor the battery send to central control panel, I just cut them down completely, no use anymore just use victron app much better.

after you slide in the battery just slide it into right side, so when braking it get wall support. left part fit you can put the shunt , also padding with foam on left and top so it's not moving and close the door.
Install Front battery
I ran a 2 AWG positive wire between the 2 seats under the carpet. you dont need to remove the seatbase to run the wire through, just use the 2awg wire push through the center hole of the seatbase along to the other seat's direction it will make it's way out there. I suggest doing it from the left seats to right as there are more cable in left so if you do it from left it will very easy make out from right side.

because the rear battery 's positive wire is already there so you can not change it, it's around 6awg , too thin, so for the front battery I choose 2 awg run it into the inverter, when doing heavy load the front battery will give more power as it's closer also less resitence of wire, but dont worry both battery will balance out eventually. they are very good battery so the 6awg wiring for rear batt is not a big issue.
Then install the inverter, also make the wire as short as possible , 6 awg + going to where the 2 battery + join, 6awg - going to the seat base screw.

I also completely removed original wire box on the battery + terminal, I bought a 6 way hub. join the 2 battery's positive + victron alternater charger XS + inverter positive. This inverter has a wireed remote control panel I will install it on back of passenger seat base cover.

socket will be installed on the driver side , also the 220ac wire is running under the carpet. putting it on the driver side because with 9kwh batt you want to output your AC to other cars , so it's more easy access from the driver side seat base:

same, I made 3d printed 2x xt60 and 2x xt90 modular port incase I need 12v high current use.


 ️
️


