Fresh water tank drain - motorised valve

sidepod

sidepod

Super Poster
Lifetime VIP Member
Messages
6,320
Vehicle
T4 PopTop
So finally I found time to do this little project. It’s based on my late 4 but the principle is the same for a 5, possibly a 6 also.

On the 4 it’s a bit of a pain to access the tank drain valve. It’s buried inside the rear cupboard beneath a metal flap. Not ideal.

I never leave water in the tank so it’s on of the things I do when returning from a mission. If I could do this in flight it would be that much easier.

Strap in.

So here’s the existing drain valve, handraulic.
It’s the small blue thing, red handle just behind.
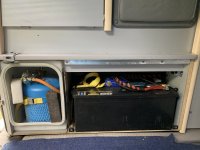
82F08FCD-7CF5-479F-B8B9-FDD97D259E5D.jpeg

83086752-3F7D-40D3-B7A4-F7CA8AD4A2EF.jpeg

So the plan is to install a motorised ball valve in line with the existing hand valve. The hand valve can then remain open and the emptying duty controlled by the motorised valve.

Obvs this needs to open and close on demand. The valve I used is powered open and powered closed.

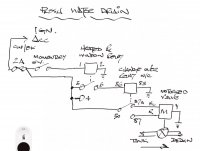
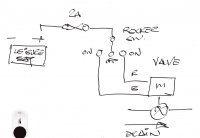
I’ve used a timer relay (rear screen de mist relay, 10 mins) triggered by a momentary switch. Once triggered the relay will reset after 10 mins or, if the momentary switch is pressed again, it with reset.

The timed signal from the relay drives another change over relay which switches a power supply to the valve, either open or close.

When the tank needs draining, push the momentary switch, this fires the timer relay and then opens the change over relay which powers up the valve to open.
After the timed period the change over relay closes agin and powers the valve shut.

10 mins is more than adequate to empty the tank.

The whole system is powered via the ignition ACC so can only be operated whilst the ignition is on, saves emptying the tank when you’re pitched up and rummaging around in the van.

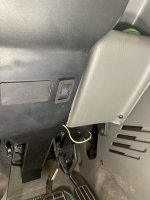
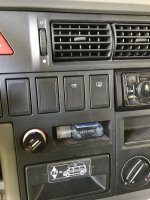
I’ve yet to locate a correct switch so I’ve fitted a temporary one down in the steering colum cowl. It’s a window switch. Once I find the correct dash switch I can move it.

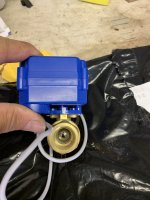
The valve.
B7898CFF-6026-4534-B9F1-A0DEA4FF7449.jpeg

It is full bore when open.

1B9880C4-5B87-4FE5-97F8-F55B33119D76.jpeg

Fit one of these in each end, standard plumbing male coupling.

4CA1250D-4552-4B3A-886A-2839D2A92A4E.jpeg


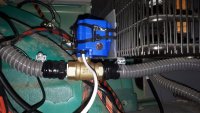
Valve it situ. Drain pipe is easy to cut, male fittings are a nice neat fit. I had to resort to jubilee clips as I didn’t have the correct Oteker clips to hand.

0FB48225-2F0E-42B2-9DF5-750FF39194BC.jpeg

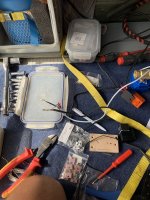
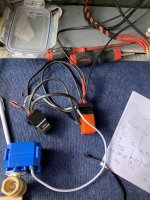
Relays wired.....

62097DC3-F2F7-4656-81E5-230A23470D05.jpeg

F670038C-1B4F-48BD-9EE7-AB331B47AA14.jpeg


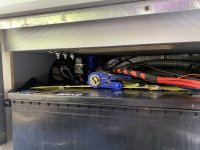
Lashed in place. I made up a bracket to hold it all in place. It’s not perfect , I’ll probably move the valve further down stream, under the fridge.

4F725948-ECD1-4F88-A192-F96A1E1A7C2A.jpeg

Battery back in place.

41C9D2ED-B2D9-42FC-AF13-6C25847B8A00.jpeg

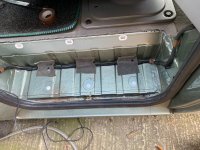
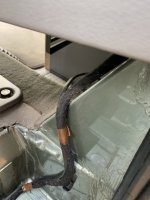
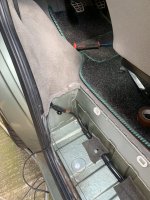
So cabling was routed behind the kitchen units, down via drivers footstep and up past the fuse box to the dash/steering column.

TBC.
 
Cable route


72A7F382-00B4-4366-ABA3-C56E185B0963.jpeg16023483-ED98-4D18-9EF2-BC3B4505F308.jpegC154EAB4-9B72-41F6-A69E-862C0548C82D.jpeg

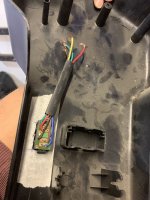
Temporary switch in steering colum cowl

9370E54F-3043-487F-AD27-0747FAB05518.jpegB5185CAD-4387-486E-B5D6-58E60376CC6C.jpeg

And the wiring scheme.

F99668B5-8D5E-4557-81C0-921042DDE362.jpeg


Perhaps not for the faint hearted but deffo worth the agro , it works a peach.
I’d give this one a 7 on the “dicking about“ scale.

Pod.
 
Last edited:
Good job :thumb

I don’t understand the use of the heated window relay or the difference between the 2 inputs to your solenoid valve.

Grey water tank next?
 
Heated window relay is just a cheap simple form of timer relay. Other adjustable relays are available but they’re expensive and unnecessary. It has a simple 10 min cycle that does the job..

The difference between the solenoid inputs is , red wire, power on to drive valve open, blue power on to drive valve shut. The valve stays where it was powered to last and switches itself off.
Yellow wire is earth.

Don’t think I’ll bother with the grey tank as I rarely use it. Past experience has taught me it causes smells if left too long. I just leave the drain valve open permanently. It’s only ever clean water that goes done the plug hole. I don’t wash up in the sink.
 
Oh Mr Pod, now that's a really great little idea, but you do realise how many domestic disputes this could cause while the rest of us spend another day with the van in bits trying to do something similar (that none of us had thought of until now!)... :talktothehand

That said, the position of that valve is ridiculous, by the time you get somewhere to be able to drain the tank suitably, its not possible to reach it as the van's packed and getting there is just a right royal PITA...

Any reason why you couldn't simply wire this to be a simply on off switch without the need for all the relays?
Don't get me wrong, impressed with the way you've done this (and indeed its the most comprehensive setup), just wondering how to simplify it...

Can you post links to the parts used?
Cheers :thumb

ps. we were at the dutch coast last week and ended up dropping by PopTop, couldn't help stocking up on a few bits and bobs - including a second 'original' 230v socket - going to mount it above the fridge... Not quite as much stock as Just Kampers, but still enough to worry your bank card! Nice little company they've got there...
 
Indeed, could do a simpler on/off version but I wanted a one touch forget application ready to refill next time out.

I’ll post a shopping list later.
P
 
Ok so here’s a simple version.

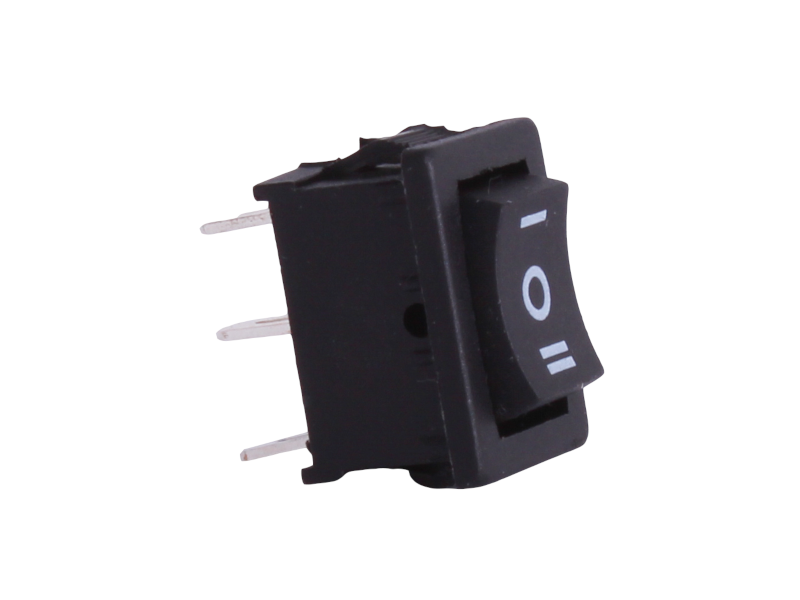
Powered from leisure battery, rocker switch somewhere in rear cupboard.

Push one way to open, push other way to close.

Switch

Valve
51C58E19-BA0C-4C17-AB79-3E56BB72C7F0.png


68895307-70D9-4163-9EC3-1339FAEB7F4C.jpeg

P
 
Nice Job, I have one of those dash switches if you want it. Its second hand but might clean up okay. I can dig it out and send it in the post to you.
Regards Padraic.
 
Ah good man. Thank you.

I’ll PM address :cheers
 
Good stuff. Game changer.
 
Nice work guys, this would be nice to have on both tanks. Might have a look at it if I get time.
 
I don't think it's necessary on both tanks, it's more because of the difficulty to reach the fresh water tank valve, especially when you're all packed up... I actually put the switch next to the grey tank drain tap so they're both together...
I think I bought it on Amazon, will try to find the link and post it here.
 
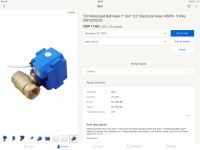
The screen grab above is from eBay so just type in the description and you should find it.
 
1/2” dns15.

Out of stock on The Bay.
 
BXL, how did you seal the pipes? Looks like you’ve used some kind of black heat shrink?
 
Wow, great minds think a like!

I did something similar this year. I added the same valve to my grey water tank. I wasn't a huge fan of getting on my knees and reaching under my CE to open the valve. Then, getting back down there with everything wet to close it.

I did do one thing different. For the switch I used a VW defrost switch with the timer. A took the face from the interior light button and switched it over. That way it looks like water spraying. Now I can hit the switch when I want to dump and forget about it, after 10 min the valve closes.

If anyone wants to use the same switch, you must add an inline resistor on the power going to the pump so the switch thinks there is a similar load to the rear window defrost. It works without but the switch lights will light up incorrectly (yellow - off, Bright yellow - on instead of correctly: red - off, bright yellow - on).

IMG_8446.JPG

IMG_8447.JPG
 
So finally I found time to do this little project. It’s based on my late 4 but the principle is the same for a 5, possibly a 6 also.

On the 4 it’s a bit of a pain to access the tank drain valve. It’s buried inside the rear cupboard beneath a metal flap. Not ideal.

I never leave water in the tank so it’s on of the things I do when returning from a mission. If I could do this in flight it would be that much easier.

Strap in.

So here’s the existing drain valve, handraulic.
It’s the small blue thing, red handle just behind.
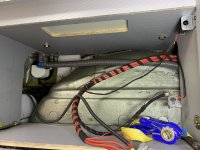
View attachment 49317

View attachment 49318

So the plan is to install a motorised ball valve in line with the existing hand valve. The hand valve can then remain open and the emptying duty controlled by the motorised valve.

Obvs this needs to open and close on demand. The valve I used is powered open and powered closed.

I’ve used a timer relay (rear screen de mist relay, 10 mins) triggered by a momentary switch. Once triggered the relay will reset after 10 mins or, if the momentary switch is pressed again, it with reset.

The timed signal from the relay drives another change over relay which switches a power supply to the valve, either open or close.

When the tank needs draining, push the momentary switch, this fires the timer relay and then opens the change over relay which powers up the valve to open.
After the timed period the change over relay closes agin and powers the valve shut.

10 mins is more than adequate to empty the tank.

The whole system is powered via the ignition ACC so can only be operated whilst the ignition is on, saves emptying the tank when you’re pitched up and rummaging around in the van.

I’ve yet to locate a correct switch so I’ve fitted a temporary one down in the steering colum cowl. It’s a window switch. Once I find the correct dash switch I can move it.

The valve.
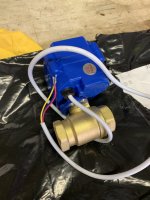
View attachment 49319

It is full bore when open.

View attachment 49320

Fit one of these in each end, standard plumbing male coupling.
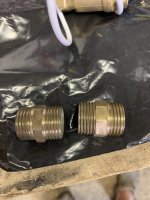
View attachment 49321


Valve it situ. Drain pipe is easy to cut, male fittings are a nice neat fit. I had to resort to jubilee clips as I didn’t have the correct Oteker clips to hand.
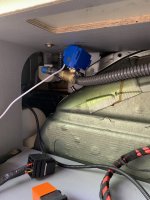
View attachment 49322

Relays wired.....

View attachment 49323

View attachment 49324


Lashed in place. I made up a bracket to hold it all in place. It’s not perfect , I’ll probably move the valve further down stream, under the fridge.
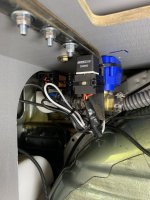
View attachment 49325

Battery back in place.

View attachment 49326

So cabling was routed behind the kitchen units, down via drivers footstep and up past the fuse box to the dash/steering column.

TBC.
just wondered if you could use double ear O clips instead of oteker clips, I presume so, I've used O clips for the gas pipe.
 
BXL, how did you seal the pipes? Looks like you’ve used some kind of black heat shrink?
Funny story... I received an Amazon parcel at home that wasn't for me, I contacted Amazon to return it and they said no bother, just keep it. In the pack were several packs of this:
https://www.amazon.de/dp/B071VZMRF9/
"Self-Welding Silicone Tape" - didn't think twice about it until i came to do this job, but this stuff is great!
If you stretch it as you wind it around it just sticks like buggery and, well, does what it says on the tin, self-welds to itself - supposed to be water-proof, airtight and insulating. Works a treat and was the perfect finish for this job (where you don't want any drips into the electrics or puddles in a part of the van you can't see!).
Anyway, accidentally acquired it on this occasion, but will be buying more in the future!

Incidentally for double leak resistance the fittings were also siliconed into place...
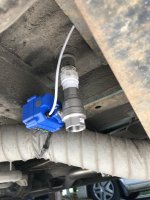
In hindsight the positioning is slightly dodgy - right over the charging unit! :oops: I think where you put yours is the better bet - or external in the post above... Having this thing spring a leak where all the electrics are could be a costly affair! :Nailbiting
 
Ah yes. Been using self amalgamating tape for decades which is a similar thing. I’ll order some.

I’m not sure the valve is IP rated for external use? Anyway, good work.
 
Back
Top