Isotop Fitting - Your tips and experiences please

MattBW

MattBW

Here to help
Super Poster
Lifetime VIP Member
Messages
6,017
Location
Bedworth, United Kingdom
Vehicle
T5 Beach
I spent the weekend fitting the ISOTOP IV to my Beach, filming everything for a club video.

The instructions were the most difficult part of the whole process in my mind, at least the English ones, it felt like they had been translated from German then to French, then to Spanish and finally to English. They barely make sense in places we were laughing and frustrated in equal measure. Combined with tiny tiny pictures, it was a challenge but in practice surprisingly straight forward.

That was part of the reason for the installation video, to show the finished article and provide a best practice way to install. That is the reason for this post, despite taking lots of advice, reading many threads on here and pre-reading the instructions we still found parts we did wrong. All good learning so that others don't need to make those mistakes.

The end result though looks great and fits beautifully, great product, terrible instructions. So if you have installed one I would love to hear your tips and experiences below so I can incorporate those comments into the video commentary where possible. I appreciate there are lots of threads but I wanted a specific tips and tricks thread I can refer to for my commentary. We can also perhaps create a better instruction sheet for future users to use.

Thanks, Matt.
 
Last edited:
I don't have the same as you so I can't help you with that. But my Thaissl topper came without instructions, but is oh so easy to install.
 
I spent the weekend fitting the ISOTOP IV to my Beach, filming everything for a club video.

The instructions were the most difficult part of the whole process in my mind, at least the English ones, it felt like they had been translated from German then to French, then to Spanish and finally to English. They barely make sense in places we were laughing and frustrated in equal measure. Combined with tiny tiny pictures, it was a challenge but in practice surprisingly straight forward.

That was part of the reason for the installation video, to show the finished article and provide a best practice way to install. That is the reason for this post, despite taking lots of advice, reading many threads on here and pre-reading the instructions we still found parts we did wrong. All good learning so that others don't need to make those mistakes.

The end result though looks great and fits beautifully, great product, terrible instructions. So if you have installed one I would love to hear your tips and experiences below so I can incorporate those comments into the video commentary where possible. I appreciate there are lots of threads but I wanted a specific tips and tricks thread I can refer to for my commentary. We can also perhaps create a better instruction sheet for future users to use.

Thanks, Matt.
Matt,
Is your video available yet?
 
I found that using a Trim Removal Tool Kit made life simple when trying to push the Velcro pads in plus getting them located correctly if slightly wrong first attempt. Not seen your video at this point in time.
 
How hard was it to fit
The instructions look awful

It was not bad at all.
The instructions are indeed teribble, and i expected it to be a nightmare, but it was pretty easy actually.
If you look up some video’s, and think it through before you start, it will be ok.

The end result is brilliant though !
Well worth the trouble (and the expense).
Just came back from two nights of cold and wet camping, and the van was nice ad warm, dry and cosy.
 
I just fitted the IsoTop to my new T6, and followed the instructions given on video in relation to laminated business card use. It worked a dream!!
I would like to thank MattBW for his excellent video where this tip is given!!
 
Just to say thanks Mattbw for the video above. I have just fitted the new isotop VI on my Ocean. The video enabled me to more or less ignore the provided instructions and prevented unnecessary shortening of my life expectancy!

There are a couple of differences for the mark VI:

There are no round bits of velcro at the back and no velcro tag to force in behind the lining at the back. Instead, the thick velcro strip just goes across the aluminium at the back of the roof up to but not around the corner, as in the video posted above by Ch1pbutty (thanks), and the isotop has elasticated corners like a fitted sheet which fit over the trim. This makes this part a bit easier.

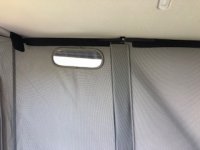
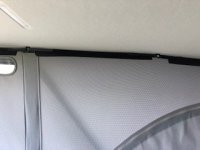
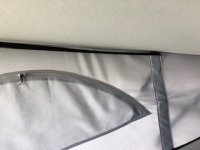
For the sides at the top you create a taught line of velcro to hang the top of the isotop from using, each side, three pieces of ready made velcro which fasten: photo 1) from the back of the outside front tag to the first eye loop for the child safety net; photo 2) between the two safety net eyes; and photo 3) from the rear eye to the rear batten where a plastic tag slots in.

I may have made this seem ore complicated than it is. Hopefully the photos help.

I used the two tenner tip for the front upper inserts which worked well once I realised they fit in the trim gap which runs across a couple of inches back from the canvas attachment, rather than the very front trim gap (doh!!).

The main message from me to Isotop VI fitters out there is still to follow Matt's video which makes the whole task simple, the new modifications just make it even more straightforward.
IMG_0588.jpg
IMG_0589.jpgIMG_0590.jpg
 
@MattBW I used your video which is great. Brandrup should replace their sheet with a link to that video. For the Beach install, you might want to add using a 2mm bit to (carefully) create pilot holes for the self tappers. I was about to throw it in the bin as the self tappers wouldn’t bite. Putting in a pilot hole meant It was super easy to use a screwdriver to hand-tighten.
 
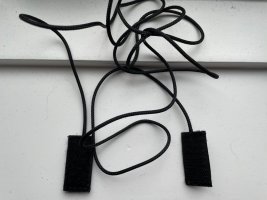
I am trying to install a brand new isotop, but I was wondering where this part is for. Where do I have to put this? I can not figure it out in the instruction manual or from this forum... Hope somebody can help?
 

Attachments

  • IMG_0370.jpeg
    IMG_0370.jpeg
    99.4 KB · Views: 19
When the velcro tape has been applied and is left to set for 48hours can you lower the roof whilst waiting ? or does the pop top roof have to stay up for that period . Thanks
 
When the velcro tape has been applied and is left to set for 48hours can you lower the roof whilst waiting ? or does the pop top roof have to stay up for that period . Thanks
You can lower the roof. The time is to allow the adhesive in the Velcro to bond so just don’t attach anything to the Velcro for 48 hours.
 
Back
Top