Buy all your VW California Accessories at the Club Shop Visit Shop

Isotop Mk V

Neilos

Neilos

Messages
287
Location
Cambridge UK
Vehicle
T6 Beach 150
Hi folks. Well I’ve finally ordered an Isotop for our Beach. I’m slightly scared about the fitting. I hope I can follow the posts on this form in and with caution can do it!

I wonder if you people could answer me a couple of questions? To help with the post purchase anxiety!

1) it looks the the MkV isotop has a zip window at the front despite our pop top not having one. Does this mean we have to unzip and roll that when we fold the roof?

2) the screwed in Velcro tabs which look scary. Has anyone removed these after fitting? I’m imagining a gaping hole where the screws were? How bad is it? Hopefully it’s fit and forget but you never know.

3) we had a bit of water blown or forced in this summer whilst camping. Are there any issues with that water trapped? Where does it go? Does it seep in past the Velcro? It was a small amount but enough to make me want to mop it up, and might have been condensation on the aluminium frame. Hard to tell sometimes.

Thanks all, hoping I’ve done the right thing. My finger was hovering over that £500 buy button for a while I won’t lie!

Neilos.


Sent from my iPhone using Tapatalk

1. You just undo the two vertical front zips when you close the roof, it just allows the roof to fold properly & stops the Iso fabric getting trapped when you close the roller cover.

2. The tabs stay connected so there is no need to remove them. You would be left with small holes from self tapping screws if you removed the tabs so not really an issue. The plastic across this part of the roof thicker is thicker so you are not screwing into the alloy roof.

3. We have never had seepage, you can just dry the roof when you get home. If you are worried its easy to check as the bottom of the isotop is velcro'd on, so you can easily lift it to check.

The water on the aluminium was probably condensation (from breathing, cooking, heating etc) , so always good to air the van when you get a chance. We have to wind deflectors on the front windows, so tend to leave the window open slightly to get some fresh air in.

You just fit it the ISOTOP once and forget about it. Stops water getting in, provides some insulation, blacks the roof bed out (so great for getting kids to sleep) & allows you to close the roof after a downpour if you need to take the van out for the day without the mattress getting damp.

The kids to bed thing sounds good. You know when it’s 9:30pm. Kids still running around the campsite and your 4 years old is crying because they’re so tired and it’s still basically light in the roof bed!


Sent from my iPhone using Tapatalk
 
Hi folks. Well I’ve finally ordered an Isotop for our Beach. I’m slightly scared about the fitting. I hope I can follow the posts on this form in and with caution can do it!

I wonder if you people could answer me a couple of questions? To help with the post purchase anxiety!

1) it looks the the MkV isotop has a zip window at the front despite our pop top not having one. Does this mean we have to unzip and roll that when we fold the roof?

2) the screwed in Velcro tabs which look scary. Has anyone removed these after fitting? I’m imagining a gaping hole where the screws were? How bad is it? Hopefully it’s fit and forget but you never know.

3) we had a bit of water blown or forced in this summer whilst camping. Are there any issues with that water trapped? Where does it go? Does it seep in past the Velcro? It was a small amount but enough to make me want to mop it up, and might have been condensation on the aluminium frame. Hard to tell sometimes.

Thanks all, hoping I’ve done the right thing. My finger was hovering over that £500 buy button for a while I won’t lie!

Neilos.


Sent from my iPhone using Tapatalk

I am sure you would have watched this video a hundred times by now :D -
- but it still looks scary.

I fitted one last week and it needs time, and for some sections at the rear, you need to be a bit of a contortionist (not too bad though).

In addition to what ch1pbutty has said:
1. Don't be in a hurry.
2. The alcohol wipes - use them quickly before they dry.
3. Use a heat gun if required, just to warm the aluminium strip around the sides. They do recommend 15-18 degrees as the ideal temp to install.
4. The adhesive promoter - wash your hands immediately after. It will be perfectly fine (or wear gloves).
5. The adhesive promoter - it is a small item so again, use it gently and not so quickly as the alcohol wipe, but relatively quickly, as that too dries off.
6. Don't be in a hurry :D
7. Cut the velcro into smaller sections. Usually only required around/behind the gas struts.
8. You will enjoy it.
9. Do it all in one go. Plan for about 2 hours.

All the best!
 
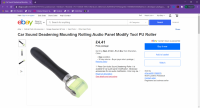
Its worth getting one of these for applying the self adhesive velcro backing ( helps get rid of any air bubbles).

Think I also slid the roof mattress out as made it a bit easier to access the aluminium strips:

1601548480196.png
 
Thanks all!! Def not a job to do with kids around. I just need to find two hours on my own now...


Sent from my iPhone using Tapatalk
 
I've fitted two of these into our current and previous Beach and there's nothing to get worked up over. I even fitted one to our first SE. I have little to add to what's already been said except:

1. I never touch the zips. Despite what the instructions say there has never been any issues with closing the roof with the zips still done up.

2. If you have a diesel parking heater, run it on continuous for an hour before you attached the tape. It should bring the autumn temperature inside the van and the aluminium mating surfaces up to something close to what it's supposed to be for fittment.

3. The cleaning and adhesive sachets are far too small and become spent far too quickly. So don't be too thorough. Use both in turn according to the instructions but do it quickly to cover all areas as fast as you can. Given the cost of an IsoTop it wouldn't have bankrupted them to have included two sachets of each!

4. Instead of following their instructions, on the first two Calis I started applying the tape in the middle at the front above the rear view mirror. When I have fitted these liners I merely remove the next 300mm of backing strip from the velcro tape before accurately pressing firmly into position. Then reposition yourself and repeat with the next 300mm. On the first two vans I applied the tape in one continuous run whilst on our current Beach I cut it at each corner as instructed. Frankly it doesn't seem to make any difference how you do it. I have never had any issues either way as a result. Once fitted leave to cure for 48hours before fitting the liner. If it's coldish weather then run the heater for a couple of hours after fitment to help the adhesive cure or if you don't have one use a small convector heater from the mains supply.

5. Don't get hung up over the fitting of the tabs. There is nothing complicated or difficult about it. Just follow the Brandrup fitting instructions to the letter and make sure you position them on the bevelled transversal strip in the ceiling. Do this precisely according to their measurements. Use a soft pencil to mark the correct position of each of the three tabs on the ceiling. Then double check you have got it right. Then mark the screw holes in the velcro tabs by shoving a pencil through them to mark the ceiling. Once satisfied, use an appropriate close fitting tool to screw the self cutting screws into the ceiling on the marks made. From memory you'll need a suitable torqs head bit on a screwdriver. You will need to apply a reasonable pressure and it is tough going at first but it will eventually start to cut its way through. Once it has begun to cut a thread stop and repeat on the other hole. Leave the final cutting and tightening until you fit the tab. Don't over tighten as the ceiling is only plastic. Before final fitting wipe off the pencil marks. Once the tabs are fitted there is no reason to ever remove them.

6. The IsoTop is a great addition to the Cali. It keeps the upper deck darker, quieter, draught free and dry. If it rains hard and you have to leave the camp site with a wet external canvas then always make sure you pop the roof up at the first opportunity to dry it out thoroughly. It doesn't take long and running the parking heater also helps.

7. Be careful when securing the roof closed. The overcenter catches that secure the roof can damage both the external canvas and the IsoTop if you are not careful. If the material of either is trapped in the catch then it will punch two small holes through it. This is easily avoided by looking at each catch before snapping shut. If you can see the black painted claw that the catch tightens down on then there isn't a problem. You can also easily feel to see if it's clear. There is a stiff tab sticking up behind each catch. It feels like seat belt webbing. Make sure that you push all material behind this tab.

8. Fitting the liner is straight forward. Just follow the instructions.

If you have any questions then send me a PM and I'll give you my telephone number.

Thanks Borris, appreciate your detailed reply! I shall follow and hopefully it will all go well. Looking forward to trying it out in October half term hopefully!


Cheers

N.


Sent from my iPhone using Tapatalk
 
Update on this both good and bad! I really spent my time fitting it. I did it over 2 or 3 days. Allowed the glue to go off etc. It took me a couple of attempts to get the liner to hang right and I’m still not sure I’ve got it perfect but I lost interest in the end.

The self tappers went in first time with little effort and feel secure.

Then, I went and damaged it.

Went for a walk and tea stop yesterday. Popped the roof. We all agreed it felt cosier, darker which is not so good in the day, but it’s definitely less draughty and warmer. It was maybe 9 or 10 degrees yesterday and still, but we felt the benefit. Used the rest function on the climate control and we had to open the window as we were getting too warm.

Anyway the damage, I was enjoying my tea and then casually glanced up. To my horror, snake bites in the liner. I must have pinched it in the clamp for the roof. I was initially really quite annoyed with myself at this.

I was and always am I think really careful when lowering the roof. But with the isotop liner it’s very tight on our beach. You have to blindly stuff what feels like yards of fabric into a tiny space, then pull down on the handle to get the clamps engaged.

Now I’m not even sure how to avoid it happening again. I’ve ordered some tear aid from the club shop to patch it up, we’ve not even camped with it yet and I’ve damaged it on the drive with all the time in the world to fold it, so it’s doesn’t bode well for future years of use!

Picture below. Not end of the world but irritating.

Any tips on folding the beach roof?! At least it was me who did it and no one else. I’ve only got myself to blame!


Sent from my iPhone using Tapatalk
 
I'm sorry to hear that. However, there should be no need to clamp the roof shut blindly as you can easily see and feel that the liner is clear of the overlock catches before clamping shut.

I believe that @flying banana once wrote that these catches can be adjusted if too tight.
 
I'm sorry to hear that. However, there should be no need to clamp the roof shut blindly as you can easily see and feel that the liner is clear of the overlock catches before clamping shut.

I believe that @flying banana once wrote that these catches can be adjusted if too tight.
Yes you can . The clamps are held with 2screws that are through elongated slots so you can loosen the screws and adjust the tightness of the manual clamps. Be careful not to make them too slack as it won't pull the roof down tight enough to give a good seal on the front rubber
 
Thanks both, I shall have a look at that as mine one clamp is definitely tighter than the other.


Sent from my iPhone using Tapatalk
 
Back
Top