Buy all your VW California Accessories at the Club Shop Visit Shop

Shunt fix

C

camper-x

Messages
162
Location
Wakefield
Vehicle
T5 SE 174
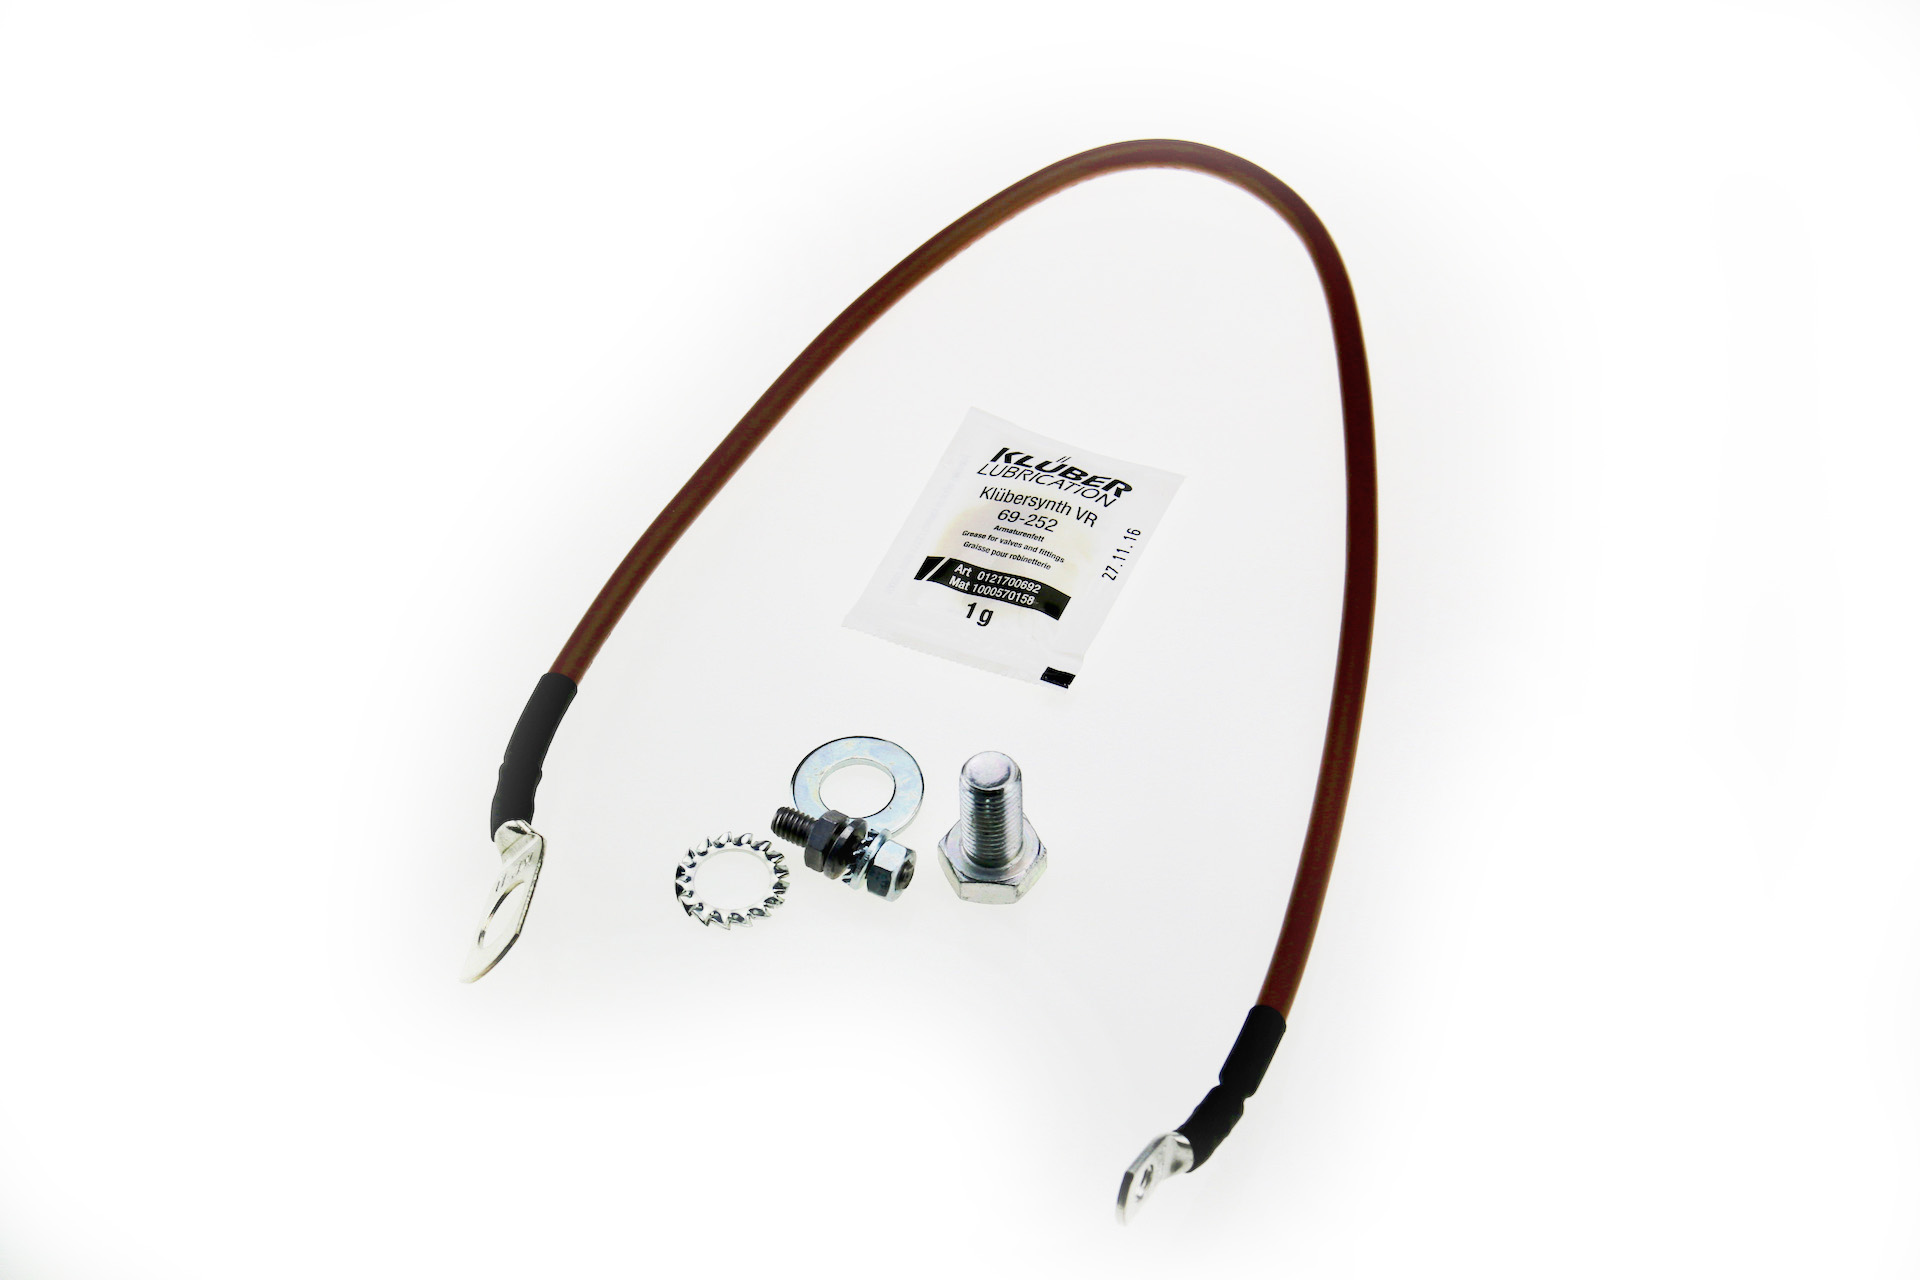
Hi all. I’ve followed the VIP directions to fix the shunt and got the fridge out, now ready to do the repair. Seems I need to fit a new earth strap from shunt to the unused large diameter thread beside the wheel arch. My local dealer don’t know about this. They can sell me a shunt, but not the new earth strap and fixings I need. I can’t find this on the parts fische. Does anyone have the part number or contact details for a VW Dealer who knows about this? Cheers.


Sent from my iPhone using Tapatalk
 
As I understand it, it's something few of the dealers are aware of. It's not a VW earth strap, but I expect one you could ask an auto electrician to make up or a standard off the shelf piece.

I need to do ours soon...
 
When i did mine and did the write up for the downloads section, i used some strands of 1.5 mm twin and earth cable and made a cable.
 
You don't necessarily need a new shunt, you need a better ground cable to connect the shunt to the van's bodywork. You can get a complete set (cable, connectors, nuts, instruction) from the german Caliboard shop, they call it the Caliground. Follow the link.

IMG_0925-258331df32d8a5.jpg


At the bottom of that shop page there is an instruction for VW dealers on how to order it.

Basically, you need to connect the ground of the shunt (point 2, see the lousy original cable) with the bolt hole in the body (3) with this cable, and your shunt problems are gone!

Messshunt von oben.jpg

We used that set ourselves, it did what it is supposed to do for us!
 
Last edited:
please excuse my ignorance but why does this cable need replacing and is it a special cable or can it be any copper cable of suitable cross section?
 
It's not a replacement cable, it's a cable that needs adding...
 
please excuse my ignorance but why does this cable need replacing and is it a special cable or can it be any copper cable of suitable cross section?
This is a problem Pre 2010 MY.
The Factory Earth for the Leisure Circuit was inadequate.
 
Thanks to you all for the quick replies. I think post 3 would work if you had a bolt to fit the spare chassis mount point but I went with post 5. I’ll measure the bolt and post back here in case someone wants to go the budget route. It’s just an extra earth strap and mounting bolt after all. Cheers folks.


Sent from my iPhone using Tapatalk
 
Bolt looks to be 9mm diameter, 20mm length. The kit comes with earth strap, washers and a replacement stud for one side of the shunt. It took a week to arrive from Germany. Worth the money if it solves the problem first time I’d say.


Sent from my iPhone using Tapatalk
 
  • Like
Reactions: Sad
Bolt looks to be 9mm diameter, 20mm length. The kit comes with earth strap, washers and a replacement stud for one side of the shunt. It took a week to arrive from Germany. Worth the money if it solves the problem first time I’d say.


Sent from my iPhone using Tapatalk

Just encouraged me to order one too... :thumb
 
Just encouraged me to order one too... :thumb
Nice one. There's no communication from the seller. Paypal funds transferred at point of ordering. A week later the kit arrived. Two of us tackled the fridge removal for ease. Mine has the three bolts to the side so OK. I used a sink plunger to make the initial lift - just high enough to get hands on and withdraw it. Not refitted mine yet but will post the result.
 
Nice one. There's no communication from the seller. Paypal funds transferred at point of ordering. A week later the kit arrived. Two of us tackled the fridge removal for ease. Mine has the three bolts to the side so OK. I used a sink plunger to make the initial lift - just high enough to get hands on and withdraw it. Not refitted mine yet but will post the result.

As a previous poster said - we’re using the redundant seat belt fixing point behind the fridge.


Sent from my iPhone using Tapatalk
 
As a previous poster said - we’re using the redundant seat belt fixing point behind the fridge.


Sent from my iPhone using Tapatalk

Done and tested. All good. Refitting the fridge is a bit tricky - take care lining up the bolts. Try refitting the middle bolts first and nudge either front or back into position. Heater and fridge run sweet, no light flicker. Worth buying the kit. You wouldn’t want to have to do this twice!


Sent from my iPhone using Tapatalk
Sounds like a mare to do your self, I took mine to the local garage where the lad loves working on the Cali's. I told him the problem with the heater not working and what I thought the problem was after reading abt it on this site, he put a new earth cable from leisure battery under the wardrobe to hole on the wheel arch. There was no need to remove the fridge, it's been working great ever since. He did say the one that was on was not fit for purpose. Cost £50 including vat. So glad you got yours sorted.
 
he put a new earth cable from leisure battery under the wardrobe to hole on the wheel arch.
Hi BBman. Do you know if your mechanic went direct from negative battery terminal to the wheel arch, or from the shunt to the wheel arch?
 
Hi BBman. Do you know if your mechanic went direct from negative battery terminal to the wheel arch, or from the shunt to the wheel arch?
If he connected the negative battery directly to the car body/the wheel arch, you have better grounding, but it doesn't fix the shunt issue... That will still give wrong measurements, perhaps even more wrong now it is bridged...

Connecting the battery to the body is a good trick to see if you have the shunt issue, or as a temporary work around (all documented on the german forum). If your problems then are gone (flickering light when heater starts, other strange electrical behaviour), then yes, you could do with a better shunt ground. But a direct ground from the battery, bridging the shunt, is not a remedy. Giving the shunt a better grounding is what is really needed, so that your CU gets sent the right measurements.
 
Hi BBman. Do you know if your mechanic went direct from negative battery terminal to the wheel arch, or from the shunt to the wheel arch?
Sorry but I have no idea, I'm not very mechanical, all I know is I've had no issues since.
 
Hi.
Thanks to the forum I finally got around to the shunt fix, this has been a problem since we bought our van. I didn't fancy removing the fridge et al, so I followed the suggestion of another member and went through the panel in the leisure battery compartment with a 41/2" holesaw and used a soil pipe socket plug to close off. Heater now works off batteries for first time - Result!
earth shunt.jpgearth shunt 1.jpg

earth shunt.jpg
 
You don't necessarily need a new shunt, you need a better ground cable to connect the shunt to the van's bodywork. You can get a complete set (cable, connectors, nuts, instruction) from the german Caliboard shop, they call it the Caliground. Follow the link.

IMG_0925-258331df32d8a5.jpg


At the bottom of that shop page there is an instruction for VW dealers on how to order it.

Basically, you need to connect the ground of the shunt (point 2, see the lousy original cable) with the bolt hole in the body (3) with this cable, and your shunt problems are gone!

View attachment 29565

We used that set ourselves, it did what it is supposed to do for us!
Hi there, hope you're well and Happy new year. Im a brit writing from Austria, I came across your post today while in the middle of checking out the shunt cable problem, and for the first time read that its not that you need to change the brown cable from rear battery to point under fridge, but an additional one over to the unused thread close to arch.

I almost managed this today with the fridge still in believe it or not, I cut a small window in wall of battery compartment and could just about get a screw in that hole although much blood lost from hands...

My question is to you, can the additional cable jump from 1 in your picture over to 3 ?
or must it be from 2 over to 3 ?

Hope not to bother you too much with my request.

Kind regards.
Carl.
It must go from 2 to 3 otherwise the information from the Earth Shunt , used by the Control Panel, will be inaccurate.
 
It must go from 2 to 3 otherwise the information from the Earth Shunt , used by the Control Panel, will be inaccurate.
Perfect Thanks a lot, I was heading in the wrong direction with the other bolt but couldn't Finnish last night and started some more research, so you have saved me a lot of time in the future.
Kind regards. Carl.
 
Just tried attempting this fix without removing the fridge in my 2007 Cali, I cut a hole behind the battery as others have and can now access the shunt, but for the life of me I can’t find the unused hole on the wheel arch, I assume it’s behind the fridge and I’ll have to remove/lift it, which I was really hoping to avoid! Has anyone actually done this with the fridge in place?
 

Similar threads

C
Replies
3
Views
1K
Carter3
C
B
Replies
17
Views
4K
camper-x
C
K
Replies
6
Views
2K
Andresz
Andresz
Back
Top