Buy all your VW California Accessories at the Club Shop Visit Shop

To those who have fitted LED ribbon lighting under the awning...

Max-Felix

Max-Felix

Messages
1,467
Location
Sussex
Vehicle
T5 SE 140
Planning this at present but having read quite a few topics that show this fitted, can those who have done it please help with the following:

Most seem to stick the ribbon to the inner (van side) casing of the awning and continue round to the inside of the awning arms - can you describe a little more how this works out - ie allowing excess for the bend of the awning support arm hinges? How durable the adhesive backing is? If repeated flexing at the awning arm elbows etc causes any issues?

Is there decent clearance (any?? - looks to me like it would be crushed?) when the awning is fully closed between the case/arms/led ribbon?

I've got a 5m ribbon on the way and plan is to run say 3.5m of this with the terminal end at the LH end of the casing (ie by the tailgate top corner) along the inner casing and inside the RH arm (around the elbow) and then run the remaining 1.5m in a separate piece from the same LH point all along and inside the LH arm. Both connections then doubling up in one termination. Any thoughts? I've no issues with the power supply and routing but more concerned with the ribbon part.
 
Last edited:
I´ve fitted an LED strip inside the awning casing, i was gonna try and do
the arms and the front side like you plan.
I´ve got a small connector at the end of the LED strip and fag lighter
plug in with a long wire so i must connect it each time its used, no big deal though.

We don´t use it that often, it attracts loads of flying insects and when you keep opening
the sliding door they´re in, hiding in the top corners of the roof, a big daddy long legs
waiting to dance on yer face whilst you sleep.

So we just use different LED lights dotted around the awning area.
A fully lit up awning does look cool but for us would only be used
in winter.
 
I don't run my LED strips along the arms. One strip runs along the van side casing, the other on the outermost inside edge. I run a connecting cable along the back arm. I would have thought that the ribbon bent around the arm joint would suffer damage.

DSCF3984.jpg
 
I want to do this, but I was think of using four strips, one on each part of the two awning arms, the strips connected around the hinges.
 
I fitted a strip under the casing on the outside so it is possible to use even when the awning is not extracted. The wire and controller is inside the casing and the wire is connected to the solar panel controller. Works nicely and so far it sticks after driving around europe.
 
Just a tip, apparently the warm yellowy white Led attracts less insects than the cold bright white led lights.
 
I´ve fitted an LED strip inside the awning casing, i was gonna try and do
the arms and the front side like you plan.
I´ve got a small connector at the end of the LED strip and fag lighter
plug in with a long wire so i must connect it each time its used, no big deal though.

We don´t use it that often, it attracts loads of flying insects and when you keep opening
the sliding door they´re in, hiding in the top corners of the roof, a big daddy long legs
waiting to dance on yer face whilst you sleep.

So we just use different LED lights dotted around the awning area.
A fully lit up awning does look cool but for us would only be used
in winter.
Thanks for sharing the reality. I love fairy lights but I can't be doing with bugs in Starlight!
 
I want to do this, but I was think of using four strips, one on each part of the two awning arms, the strips connected around the hinges.

Cheers Tom - this idea crossing my mind too - it would be a bit more of a faff but would alleviate any issues there I'm sure. It would be best to do it with the arm to van casing spot too so five separate strips all joined. I think the ribbon is quite strong though so it might work leaving enough slack to give a curve.

I did some 'technical' (!) experimenting today - blobs of Blu Tack stuck to the inner and outer casing and arms to judge the void for running ribbon in. Good result though - when the awning is fully tightened there was a good 10mm of 'squish' left in the space between the van side awning inner casing and inner arms and about 8mm between the outer arms and the outer casing flap.

Seeing as this stuff below is .3mm thick then installing a run on the inner casing and inner arms together should fit nicely.

https://www.ebay.co.uk/itm/New-5M-3...6-Colours-Flexi/290846448862?var=590099141699
 
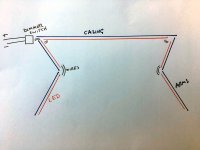
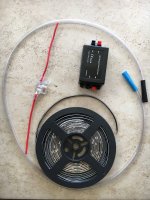
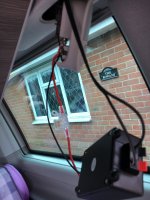
A pic to illustrate - the dimmer/switch is not to scale (!) and would be inside the awning casing too of course. Not sure of the best way to connect to the supply as there is no exit hole in the casing so either a Deutsch type plug: https://www.ebay.co.uk/itm/Deutsch-...-Pin-8-Pin-Pins/272249826496?var=571146839458 that would sit in the casing (male) and to the left of the awning end cap in the rail (female) that you'd connect each time or better maybe a grommet in the rear of the casing so it could be in one run and would not need connecting/disconnecting.

IMG_7313 - Copy (2).JPG
 
A pic to illustrate - the dimmer/switch is not to scale (!) and would be inside the awning casing too of course. Not sure of the best way to connect to the supply as there is no exit hole in the casing so either a Deutsch type plug: https://www.ebay.co.uk/itm/Deutsch-...-Pin-8-Pin-Pins/272249826496?var=571146839458 that would sit in the casing (male) and to the left of the awning end cap in the rail (female) that you'd connect each time or better maybe a grommet in the rear of the casing so it could be in one run and would not need connecting/disconnecting.
Our current set up is with the Vango Sunbeam system:
media.nl

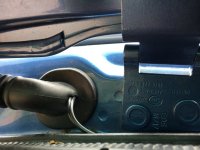
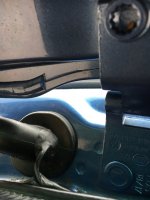
We use the rear 12v socket, the cable goes under the trim, then out through the tailgate hinge. Externally, the cable is switched, and capped with a waterproof cap. Each of the four strips has the loop velcro, and the hook velcro is at various places internal and external on the awning - and also in the driveaway awning.

On setting up camp, the waterproof end cap is removed and one or more strips attached to light the inside of the awning, an external area or the driveaway awning. It is a very flexible system, which allows for fully alfresco cooking or dining. The downside is that it needs setting up each time and the light is very cold.

Now we are not travelling, we are less likely to want the driveaway awning, using instead the superb Thule G3 Residence Room, and a more permanent fixture seems appropriate.

Your plan is broadly similar to that which I had been thinking about, but I still think I want an option for to light an area external to the awning. This was particularly nice when we were in southern Spain and Portugal last autumn: dark but warm evenings.
 
I stuck a run of LEDs along either side of the our roof rafter. Found it gave a more even spread of light than just having them on the casing. Wired a small switch from the the rear light so they can be turned on/off from inside the van.
 
Yes, prior to this I have used an assortment of 12v extension leads, clip on LEDs, doublers etc - drives me nuts with trailing wires everywhere and shouts of '"MIND THE *$?£ING CABLE!?!" every time someone opens or closes the side door...

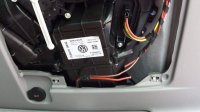
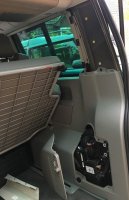
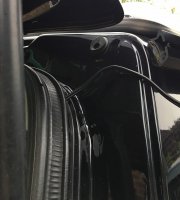
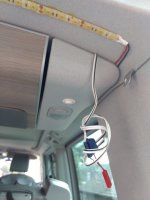
So next time it has to be permanent and the ribbon stuff is so cheap the whole thing with wire and connectors etc will be around £10 so worth a punt. I've got a neat route planned for the supply behind and up the rear trim tapping into the 12v supply behind and up and out via the tailgate to leave an absolute minimum of cable showing just where it exits under the seal next to the awning cap/rail. See bottom pic - similar to this.


20150517_143801_zpsgufgyhjs.jpg IMG_7291.JPG

IMG_7295.JPG
 
We use one of these:
43359_1_popup.jpg


Fiamma LED awning rafter £45 , provides additional support to the fabric in the middle of the awning. Takes 30 seconds to fit , plugged into 12v socket in boot.

When we tried LEDs on the awning arms we found if you were sitting round a table the light was always behind you putting the table in shade. Using this rafter the light is in the middle of the awning & over the table.

The lead on it is also long enough to use it in the driveway awning if needed.
 
This our feed. The small white switch is wired into the feed to the rear light switch. The wire to the rafter LEDs then plugs into the small plug.IMG_20180913_134519308_HDR.jpg
 
I thought about fitting LEDs after I saw them in the Fiamma brochure, but it’s all a faff & thinking about it we prefer either a candle (Davy lamp thing) or lamp on the table. I also have a string of Biolite USB lights for when we’re setting up for two nights or more.

One of those passing thoughts that’s probably much more trouble than it’s worth for us - YMMV of course.
 
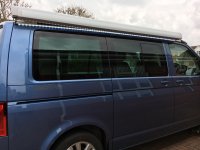
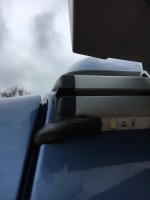
LED waterproof strip attached to metal rail under wind out awning, (so can use with wind out or drive-away awnings) cable fed back along tailgate to loom (hole sealed with Sugru) then under upper trim to rear inner light. In line fuse to protect main electrics and allows lights to work independently. Operated with remote control.0260B61C-C59D-4E5B-8FAD-738E7B784ABF.jpeg865AF611-3EE9-41C3-9687-0C0A9E061F99.jpeg E8D009DE-2C26-4D05-98D1-89F2F15ACEC8.jpegA1D07FCD-5107-4D89-B900-8CBD13E5A993.jpeg0260B61C-C59D-4E5B-8FAD-738E7B784ABF.jpeg53283C63-ADEF-4D9B-ADC2-573826BD42A8.jpeg49D0D208-A83E-4830-91FA-8D61B68911B6.jpeg
 
Cheers Docsu - what led spec strip did you buy - I got the 3528 and it's tiny! I think I need 5050 strip.
 
Cheers Docsu - what led spec strip did you buy - I got the 3528 and it's tiny! I think I need 5050 strip.
I think it was the 5050 strip I bought and it is super bright, rarely used at full brightness.
Now thinking about a colour change addition for inside to gently light up the roof void for dark winter evenings. Plotting the least obtrusive and most cable efficient routes at present!
 
It's a good point about the stickiness. 3m.tape won't last forever then it will peel off in the wind?
 
Back
Top