Buy all your VW California Accessories at the Club Shop Visit Shop

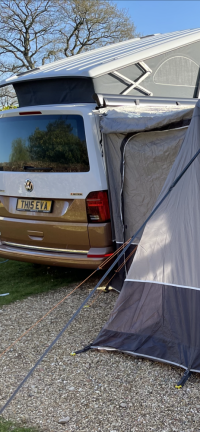
Vango Galli Low - Drive away awning. Anyone got one?

Brilliant advise and food for thought guys.... we’ve decided to give ours another go and we’ll ensure to use storm straps over porch area connected to canopy and other helpful tips

As ever your help, advise and support to resolve issues is amazing ! Thank you
 
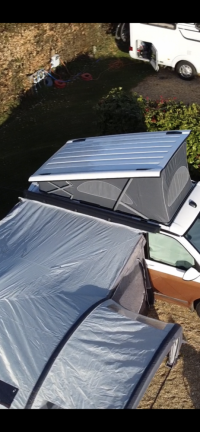
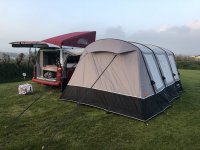
Put mine up yesterday. Not as tricky as I thought. The wind got up so I detached it from the van an the loose bits on the porch flap loudly.
It suggests that you peg it out first before inflation but I disagree. First attatch to van, then pump up, adjust to suit then peg out. Worked a treat

96B8A11F-5A7C-4865-8A8C-1A9F2FA5DE69.jpeg

68EF41A1-FFD4-4AD3-B211-C2006053C3E6.jpeg
 
We have just had a Galli 2 delivered, since we have now become ‘#coolparents’ and my 22 and 18 year old children now wish to holiday with us once more. We are yet to try it out.

I still haven’t seen anyone actually detach it from the van to drive away and vice versa.

Is it much of a faff?
 
Good question.
Driving away should be OK and I'm assuming to re attach, that the 2 key factors are, using a 'figure of 8' and Kador joining strip and getting your wheels back in the same place.
Has anyone found an easy way of finding your previous parking position with the necessary degree of accuracy? Or is it easy enough without marking?
 
Has anyone found an easy way of finding your previous parking position with the necessary degree of accuracy? Or is it easy enough without marking?
Yes. We have a 2.5m steel core cable used to lock bikes together and to the bike rack. We peg this parallel to and alongside the centres of the wheels and, on return, reverse parallel park alongside the cable, looking out of the front window to get the centre of the front wheel to line up precisely with the peg.


Follow my blog: www.au-revoir.eu
 
Last edited:
Trick is to wind the side awning out a foot, re attatch it and wind it back in to suit to take the slack. I left my levelling blocks where the wheels stood and it was easy to re align.
 
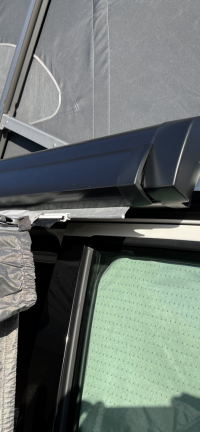
We put metal poll through loops in the awning porch, pull the poll over the back of the wind out awning and fix with adjustable straps either end. If the rain is heavy I have one of those extendable window scrapers with the brush on I put the brush side into the awning and the other end onto the top of the roll awning out awning this seems to encourage water to run off the tunnel.
 
Hi Dave and Deb... a few more trips and the VW resilience kicks in and we began to use our noggins! We now contradict the awning ‘stand alone’ rather than attached to the van as the u tube video suggests. We found we got it taught in all the right places and then we drive the van ‘On to ‘ the awning. Once done, we use someone to prop up the Hall way attachment bit and make a tee pee of sorts. This alongside a storm straps perfect remedy.

Our vans taights is to find solutions and be resilient to adversity !


We met a family who simply use a surf board to make a high point For rain run off....

Thanks for brilliant advice on how you solved it, one for the memory bank indeed x
 
I was asked about tips on setting up the galli ||| rsv awning on the ocean. I Agee using the tunnel does cause problems. My solution after one use is recorded here. Am open to improvements.

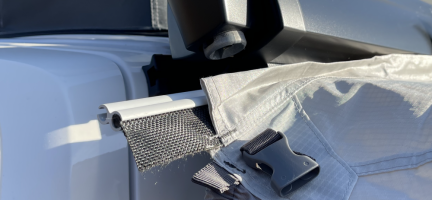
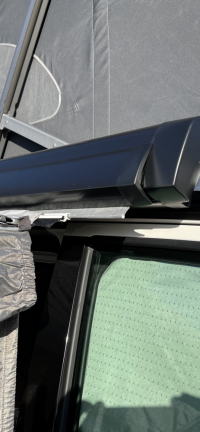
1 I wanted to be able to use wind out awning to tension tunnel roof to minimise water pooling. So cut the 6 mm to 6 mm kaydor strip to the size of the awning slot so that it allowed the awing to be fully closed then to act as a guide cut the figure of 8 hard plastic bars to be equal to the full length of the tunnel ( right to the end of the black webbing front and back )

2 wind out awning 30cms to allow tension to be created when wound back in once main tent is up

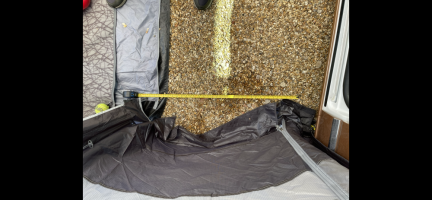
3 drivers door is not used when awning is connected so tunnel is fixed to aline with door edge Pegged to ground and the tent beam 92 cms out from edge of van. Note if you have the protective ground sheet this point is used as the starting point of placing it in position. A peg in base of galli at this point useful

4 fit kador then connect the figure of 8 to kador and galli 6mm piping.

5 I would start to inflate rear beam then support with storm straps loosely working from rear inflate beams eusuring they are on their Velcro spots. Go inside to reposition and get things like ground sheet taut.

6 the tunnel should line up with the rear of the van but still allow easy opening of tailgate.

7 the rest is up to you. Note my van is lowered 30 mm. Unless the tunnel roof is tensioned the hard plastic figure of 8 catches on the top of the van sliding door as it opens.
Hope this and the pictures help Galli ||| rsv owners.

regards Marcus 9FB388E5-08BD-400D-B754-DB36B46B051B.png
A6B6E1B1-A14B-4AA7-857B-E29D72A3B649.png

98C92D6D-379C-44D7-8291-F25E6899C2DB.png

9FAED897-DAC1-4BF5-BF58-F4BD6EA5EE79.png

D8105283-4046-48F8-A616-0ACF8F54FA7B.png

ED268E30-7354-4C23-8C72-F6C42E716B88.png
 
Back
Top