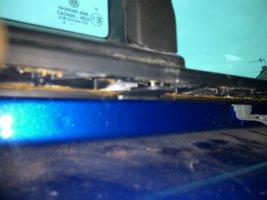
How to replace the sliding window on the kitchen side

TripleBee

TripleBee

Messages
3,158
Location
.
Vehicle
T5 SE 140
Maybe time for a new thread in the how to section without video.

Are you also tired of having water in your van, behind the kitchen? Does it come from the sliding window? In my van, I couldn't stand it anymore and decided to bite the bullet and bought a new sliding window. It changed a few times over the years, so it should be the best window up to now. And with the T6.1 with the new type of sliding windows, it will probably the last update of the old type of sliding window.

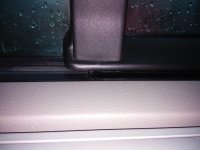
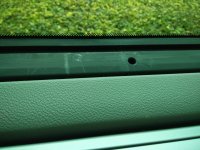
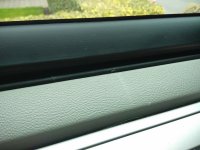
It all started with too much water coming in through the slding window, and clogged drains. The front drain is easy accessible, but for reaching the rear drain, the sliding window has to be lift out of the bottom slider. After a few squirts of water and some compressed air, I managed to clear the drains. This helped a lot, but there was still too much water coming in due to the old seal that didn't press enough against the window, leaving a gap between the seal and the window, making the water come in too easy:
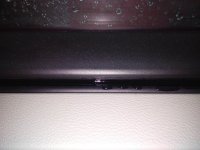
IMG_20201028_124136.jpg
IMG_20201028_124229.jpg

Time for ordering a new sliding window:
IMG_20201029_120525.jpg
It comes with metal front pins, instead of plastic. The plastic ones can wear our, making too much play, making water ingress much easier. The plastic pins on the old window were still in good shape, so it all comes down to a worn seal (you can't order separately).
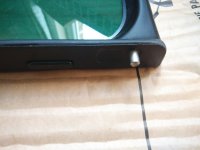
IMG_20201031_120833.jpg

Old window (with the plastic pins and worn seal):
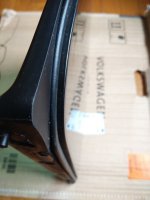
IMG_20201031_143846.jpg

First you have to open the sliding window less than half, and not in one of the fixed positions, otherwise the locking pins at the back will obstruct the disassambly of the window. Then you have to pry out the front bottom pin by lifting the window up at the front (don't use a screwdriver, but some hard nylon pryer). Then you will have to pry out the rear hinge at the back, and that is a whole different story. I used some screwdrivers, and the result is not that nice. The back hinges (top and bottom) pivot and have 2 pins. The other pin is the locking pin.
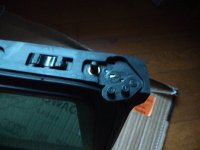
IMG_20201031_162725.jpg

Then I cleared the drains again, but they were still clear.
Front drain hole, accessible when opening the sliding window:
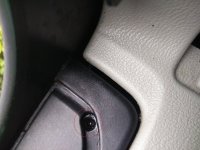
IMG_20201031_124524.jpg

Rear drain hole, only accessible by taking out the window, or at least prying the bottom of the window out of the slider. And here you can see where the two pins from the pivoting hinge takes a turn, pressing the sliding window to the fixed window part.
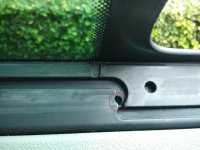
IMG_20201031_124519.jpg

Only do this in dry weather!
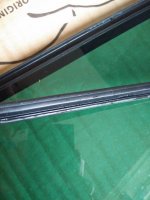
IMG_20201031_123726.jpg
 
After cleaning the touching surface and the sliders, time for installing the new window.
First you will have to align the pivoting hinge at the back with the slider at the top. Gently place the hinge and the front pin in the slider. Cover your kitchen worktop.
Then comes the hardest part, and that is to lift the window as high as possible while prying the lower hinge in the slider. It took me a couple of minutes with some helping hands and some firm taps with a screwdriver against the pins on the pivoting hinge (not nice, but I remind you, all the trims and kitchen were still in place).
Suddenly the pins popped in place, and then you just have to pry in the front guiding pin and it's done.

Time for killing my OCD:
IMG_20201031_131156.jpg
IMG_20201031_131202.jpg
But it was the little damage, or having to take out the kitchen unit. The grey trim behind it, the B and C pillar trims, the roller blind, ........

Now I notice that the rubber is a lot thicker, and presses firmly against the fixed window.
Now I should have a lot less water ingress (or none).

Some differences:
Old window handle (yes, I took a universal ruler):
IMG_20201031_143754.jpg
The handle was indeed a bit small to take, and very stiff to operate.

New window:
IMG_20201031_120924.jpg

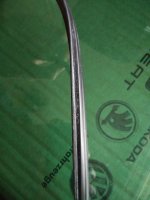
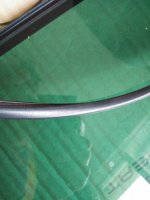
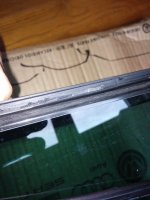
If anyone can help me find a fitting seal like this:
IMG_20201031_144000.jpg
IMG_20201031_144100.jpg
IMG_20201031_144110.jpg
to fit this:
IMG_20201031_144128.jpg

Would I advise anyone to do it themselves? Not really, unless you have the skills and guts to do it, and don't mind eventual damage. I damaged a bit of the aluminium strip of the glass worktop near the window. And I hate damage.
 
Brilliant, hope it keeps the rain out. I think I’ll have another go taking my window out before committing to a buying a new one though.
 
Brilliant, hope it keeps the rain out. I think I’ll have another go taking my window out before committing to a buying a new one though.
If you can find yourself a new rubber seal, or put something inside the seal to give it a little more shape again, you might be good for another few years.

I had been thinking of fitting a Z-shaped rubber seal to glue on the fixed window. When you close the sliding window, the Z seal closes the gap between the sliding window and the fixed window. But I don't like the shape of the Z seal. It's not what I am looking for. It should have this shape:
dichting.jpg
 
Good idea. Mine just about keeps water out if I keep the seal clean but the trim underneath the handle keeps falling off which really bugs me. Can’t seem to find a glue that will hold it and the repair kit is no good because the problem is the on the window frame.
 
The under trim of the old window was about half loose to the sliding window. I can see the spring, but it never fell off.
I find it hard to get rid of the old window without finding a decent solution for the seal.
If anyone knows a brand of seal makers, let me know. But I doubt there will be an aftermarket seal that fits the window. It will be specially made for this VW window.
 
Great work! I envy you. I’m having a take with my own Cali. The previous owner got tired of the leaks and glued the window with silicone not to be opened again. Phase 1 is trying to open it. Not easy. Can’t understand why it’s still stuck because I can move it a little bit.
 
Great work! I envy you. I’m having a take with my own Cali. The previous owner got tired of the leaks and glued the window with silicone not to be opened again. Phase 1 is trying to open it. Not easy. Can’t understand why it’s still stuck because I can move it a little bit.
Check the runner (rear) has no silicone in it even a small amount will prevent it opening
u can get silicon remover, paint it on liberally and the silicon will soften substantially
 
Thanks I finally managed to open it anyway. The seal seem to have glued on to the window not been opened for a very long time. Now I need a new rubber seal and locking mechanism. The locking mechanism feels really like a quick fix. Do you know where to buy the seal? Does the seal fitt to the frame or to the sliding window?
 
Update; The window is off and a D-shape seal is on it’s way together with new locking mechanism. Will a D-seal do the job or should I combine with floating rubber seal on tube?
Since it’s the window over the sink it’s “impossible” to inspect if the drainers under the trim is ok.
 
Update; The window is off and a D-shape seal is on it’s way together with new locking mechanism. Will a D-seal do the job or should I combine with floating rubber seal on tube?
Since it’s the window over the sink it’s “impossible” to inspect if the drainers under the trim is ok.
You can Clean & check the drains are working, they drain to the outside of the vehicle :

Spay some silicone spray etc into the holes, use the type of spray with a small straw, point it directly into the holes and squirt, you should see the “dirty fluid” appear on the outside of the van (draining below the window).
repeat until you see the fluid on the outside of the van (wipe away the excess)
Thanks
 
Problem! Did the syringe test and none of the drain holes lead the water out of the cabin. All ends up behind the cupboard/sink. Need to remove the trim to reach, or even even worse first remove the sink and cupboard. Not doable I guess. Will a complete replacement of the whole window frame solve the problem? A new window with the sliding blade is about €900 plus work.
 
Problem! Did the syringe test and none of the drain holes lead the water out of the cabin. All ends up behind the cupboard/sink. Need to remove the trim to reach, or even even worse first remove the sink and cupboard. Not doable I guess. Will a complete replacement of the whole window frame solve the problem? A new window with the sliding blade is about €900 plus work.
If you dig through the many posts on the subject of leaking windows, the conclusion is that there is a design/manufacturing fault with the window drains. VWs fix for mine (warranty job) was replacement of the whole side window. The cost of fitting shouldn’t be too much as it’s no more complicated than a windscreen fit. If you do get a new one check that the drains are ok before it’s fitted as I wouldn’t be confident that VW have fixed the problem.
Sealing the window might be a better solution!
 
Problem! Did the syringe test and none of the drain holes lead the water out of the cabin. All ends up behind the cupboard/sink. Need to remove the trim to reach, or even even worse first remove the sink and cupboard. Not doable I guess. Will a complete replacement of the whole window frame solve the problem? A new window with the sliding blade is about €900 plus work.
The drain has may be clogged, try spraying WD40 down the drain holes and then spray with a can of compressed air with the air tube pointing towards the exterior drain direction NOT downwards. If that doesn't work then you may need to replace the window as the lower glued/sealed cap of the drain channel, which leaks into the cabin, cannot be accessed in the California without removing the window.
 
There are actually 2 pairs of drains. The 2 big ones in the channels (one is hidden under the sliding window) plus they are each paired with an outer tiny drain hole in what looks like the bond between the glass and the frame. Cut a sliver of a milk carton and check they are clear…the hidden one can be done with the window open and an L shaped sliver. An issue with the windows is that the hidden gutters connecting the holes of each pair to the outside drains can come off. An idiot could redesign those windows so they don’t leak, so god knows why VW persist with them as they are.
 
Great suggestions. Would a combined holiday/work-shop trip to Holland, UK be worthwhile? Any recommended VW specialist to ask for a quote Ona window replacement? I don’t trust VW Sweden with a used Cali.
 
Great suggestions. Would a combined holiday/work-shop trip to Holland, UK be worthwhile? Any recommended VW specialist to ask for a quote Ona window replacement? I don’t trust VW Sweden with a used Cali.
These are experts.

Volkswagen Campercentrum Nederland B.V.
Basicweg 5a-c
3821 BR Amersfoort

Tel: 0031 (0)33 4530882
Fax: 0031 (0)33 4947567
Email: info@vwcampers.nl
Internet: www.volkswagencampers.nl
 
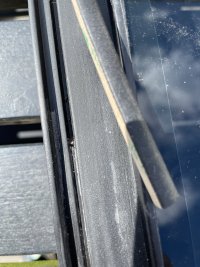
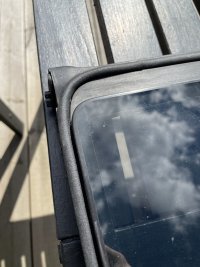
Update! Window back in its frame with a new D-shape rubber sealing. That was the easy part. Still has no solution for the drain holes other than replacing the whole frame. For anyone considering renovating the sliding window here comes a couple of pics. But as mentioned I have no idea yet if the water will pour in. My hope is as long as it is closed (it seem to tighten against the frame) no water will ingress. Maybe naive. I am waiting also for a new mechanism. Also an easy work to fix. Replacement parts are cheap. 29B8FF04-FB20-4054-86C8-7C107EF3242A.jpeg5AE70355-6F90-4DAC-AD10-72AC4E7B3E74.jpeg
 
Good job with the new seal - where did you get it from?

With regards to the water leaking in from the drain holes, the system seems to be a truly awful design. I have some pictures somewhere but the hole goes down to a little plastic tray that then directs the water outside, and this tray is sealed with some gunge. If the seal is not good then it leaks inside.

Replacement windows probably won't fix it, but redoing the gunge may - which of course you cannot get to due to the kitchen. Of course if you replaced the window they probably would remove the kitchen and hence get to the gunge...
 
IMG_20210507_193416590-1.jpg

Truly awful picture but in the middle you can see the plastic tray that should have gunge to prevent it overflowing into the sliding door. The tray collects the water and channels it to the outside. I assume the kitchen is identical, just less accessible. The tray gets bent downwards and the gunge separates, leaving a gap for water to flow into the door or kitchen.

I have tried to think of a worse design but I can't.
 
View attachment 92275

Truly awful picture but in the middle you can see the plastic tray that should have gunge to prevent it overflowing into the sliding door. The tray collects the water and channels it to the outside. I assume the kitchen is identical, just less accessible. The tray gets bent downwards and the gunge separates, leaving a gap for water to flow into the door or kitchen.

I have tried to think of a worse design but I can't.
I think the window undertray is sealed in the metal body bulge on the California (unlike the basic van) so you can't get to it even if you remove the kitchen. The window comes out without needing to removing the kitchen.
 
Back
Top