Installed Brandrup Iso-Top IV

Hi,
Thank you for all the great advice about installing the Iso-top. I also took the plunge a few weeks ago and decided the internal option of insulation would be the best. After a week in Cornwall for 1/2 term, I am absolutely convinced it was the right decision. Increased warmth and reduced light are great but, without a doubt, the ability to just raise and lower the roof without any additional work has been worth the extra cost.

FITTING -
I could not have managed this without the fab advice - but just a few, hopefully, helpful extras....
it is the thicker part of the tabs that need to be inserted and as there is not much leaverage space I found the smooth, handle ends of my teaspoons worked well to leaver open a gap. I placed one on either side of the tab (having first loosened the gap with a cake slice (well, I didn't have a BBQ spatula - could be a girl thing). I could then angle the spoons so that I could put pressure on them both with one hand while using the other to work the tab in.
Yes, it was a tough but it worked. Not a bad workout for my arms either! The tip about keeping the roof lower and standing on the seats, really helped.

Really pleased with the result and it looks just like a second skin - no sagging or ripples.
Thank you all.
 
I fitted ours yesterday. This thread was very helpful.

Only bits i’ll add are :

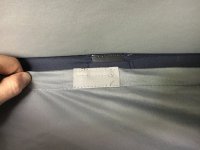
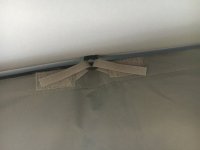
The pictures in the instructions are unclear, the Brandrup website ones are better to show where the eight circular sticky Velcro tabs go.

I layed the Velcro over the wires to the upstairs lights, hopefully that will not be a problem and works fine. Alternative is to cut to fit either side.

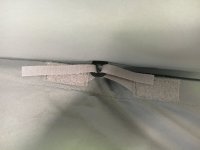
Spatulas are definitely helpful to get the bigger Velcro tabs in the top front, but brute force on the stiffer part to get them in works once they are in a bit, there’s nothing to break which is helpful compared to most car trim which is fragile.

All in all very expensive, tricky to fit as it cleverly avoids any drilling etc, but an excellent product once in and really should be a VW factory option I reckon.
 
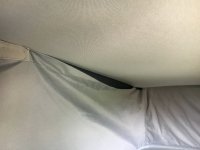
I finally got around to getting mine fitted this weekend. Thanks to the many helpful posts here on the forum, it went in painlessly. Though for the money, I'm not so impressed with the fit. The RH batten fixing point appears to be stitched on ~1.5cm too far forward. This results in shoddy looking sag aft of the RH batten and a very tight front RH corner. All corner seems line up nicely otherwise.

Sag when completely installed.
IMG_1215.JPG

Just held up snug by hand, the plastic tang is not in the batten pocket.
IMG_1214.JPG

I didn't take a pick of the LH baton attach, point but it lined up just a mm or so aft of the pocket giving just a nice bit of tension.

Aft safety net loops, RH then LH
IMG_1216.JPG IMG_1218.JPG

Fwd safety net loops, RH then LH
IMG_1217.JPG IMG_1220.JPG

I'm not sure if this is the normal fit, but if so, the brochure photos don't reflect it. Am I missing something or are they all a bit wonky?

Roughly 1% of the price of the vehicle for a bit of backed fabric with some velcro and zips should come with spot on quality control.
 
It’s been stitched in the wrong position it’s bbee stitched on the wrong side of the line I had exactly the same
 
Thanks for the info. I contacted Brandrup so let's see what they come up with.

If you look closely you can see a couple of nicks in the fabric where it’s supposed to be sewn they will have sewn it to the wrong side When it’s done properly it fits perfectly We are very happy with ours


Sent from my iPhone using Tapatalk
 
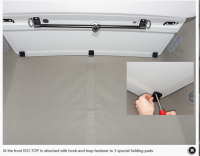
This is all great information,. we have a T6 beach - I see images of screwing 3 holding pads to the part of the roof where the push up bar is - is this ok? Anyone concerned about screwing into their lovely van?

Also can you use the safety net with this ISO Top in situ bearing in mind both use the safety tabs.

upload_2018-7-25_10-56-27.png
 
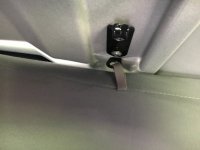
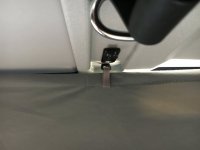
I have this but didn’t have to screw anything into the van, the Velcro tabs slide (with help) into the gaps in the roof lining. But yes the safety net still clips into the rings.
 
I have this but didn’t have to screw anything into the van, the Velcro tabs slide (with help) into the gaps in the roof lining. But yes the safety net still clips into the rings.

Do you think the T6 version has changed and now you need to screw?
Or is yours the same as this but you have slid the squares into the roof lining?
 
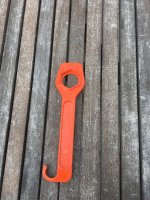
Mine is the T6 Ocean version but yes I used a plastic tool to wedge the Velcro tabs into the gaps. It did still make me a bit nervous as pushing the tool into the gaps with force it did hit the roof ... but no damage thankfully. It could be different for the Beach roof though.
 
Mine is the T6 Ocean version but yes I used a plastic tool to wedge the Velcro tabs into the gaps. It did still make me a bit nervous as pushing the tool into the gaps with force it did hit the roof ... but no damage thankfully. It could be different for the Beach roof though.

Ah yes I think there is a different version for electric roof and manual roof !
 
Just fitted a Mk IV into our T6 Ocean. I couldn't follow the instructions easily, so I rehashed them with larger photos; hopefully this will be useful for anyone else doing this job.
 

Attachments

  • Fitting Instructions for Mk IV Iso-Top Roof Liner.pdf
    479.8 KB · Views: 250
When fitting the velcro, it advises that the internal temp be above 18 deg, how long should you keep the van above 18 deg too ensure the velcro has time to secure
 
Great tip I was told, use a hair dryer to warm up the areas in question, Im not aware that it needs to be at 18c for prelonged periods. I will do some research for our install video we are working on.
 
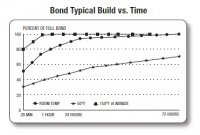
From a 3M VHB tape install guide:

"After application, the bond strength will increase as the adhesive flows onto the surface. At room temperature, approximately 50% of the ultimate strength will be achieved after 20 minutes, 90% after 24 hours and 100% after 72 hours. Handling Strength is typically achieved immediately after application of pressure to the bonded components. In some cases, bond strength can be increased and ultimate bond strength can be achieved more quickly by exposure of the bond to elevated temperatures (e.g. 150 °F (66 °C) for 1 hour)."

The adhesive on the hook&loop tape supplied with Isotop is also an acrylic from 3M so it would probably be reasonable to follow this as a guideline. The graph below is from the same manual:

TempTime.jpg
 
From a 3M VHB tape install guide:

"After application, the bond strength will increase as the adhesive flows onto the surface. At room temperature, approximately 50% of the ultimate strength will be achieved after 20 minutes, 90% after 24 hours and 100% after 72 hours. Handling Strength is typically achieved immediately after application of pressure to the bonded components. In some cases, bond strength can be increased and ultimate bond strength can be achieved more quickly by exposure of the bond to elevated temperatures (e.g. 150 °F (66 °C) for 1 hour)."

The adhesive on the hook&loop tape supplied with Isotop is also an acrylic from 3M so it would probably be reasonable to follow this as a guideline. The graph below is from the same manual:

View attachment 41256
Thanks
 
There’s little pressure on the Velcro and I did it well under 18 degrees and it’s fine. If that always any concerns.
 
Back
Top