Overhead Storage Bin Repair

MickyTwoPints

MickyTwoPints

VIP Member
Messages
164
Location
Chandlers Ford
Vehicle
T7 California Ocean 4 Motion
Hi

I've had a broken hinge on the overhead storage locker for a while and have finally got around to fixing it. I've replaced the broken cog but I'm stuck on one final bit. There's a large{ish) round wheel part that holds the bin in place while it's opened and closed and I've identified where it goes but I just can figure out how to fix it in place.

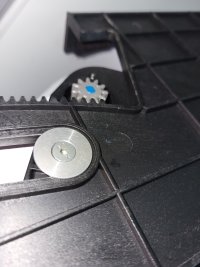
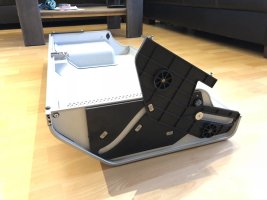
I've attached a couple of photos. The first shows the side of the bin with the new cog in place and a hole and runner for the wheel bit to sit in.

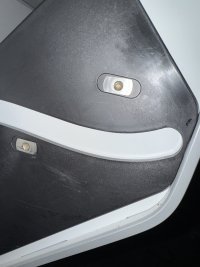
The second photo shows what I think it should look like but I don't know how to fix it in place. The hole in the first picture has smooth edges so I can't screw it into that but I'm sure that's the bit it has to attach to. Have I got a part missing somewhere?

Can anyone help with some advice on how I can attach this?

Many thanks

Mike
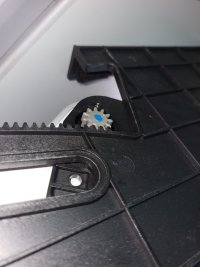
The place that the wheel goes.jpg

What I imagine it should look like.jpg
 
I have had a look at our van, but the bit you have a picture of isn’t visible as far I as I can make out. There is a cap head bolt that is inside our locker at about the location you are showing, it is possible that hole aligns with a hole in the locker and the metal roller is secured through the cabinet via the cap head. My guess is an M6.

I might be completely wrong!!!
 
Hi

Thanks so much for looking at this but thats not it I'm afraid. The black plate where the hole is is attached to the side of the cabinet and there's no hole through to the inside.

I guess I could drill a small hole through to the inside of the cabinet and attach it that way but id rather try and figure out how it should go.

I've searched around for diagrams of the fixings but the ones I've found haven't been for this specific cabinet.

Thanks again for your reply.

Best wishes

Mike
 
I think it should have one of these on the back. This picture is of the ones that hold the drawer to the black plate but I can just about see one on the back of the silver wheel as well.

IMG_6180.jpeg
 
Thanks Louis Ii

Many thanks for your reply.

I have a few of these bits (I bought a repair kit from Slovakia) but while they fit on the screw that goes through the wheel, they're too small to stop it just popping back out of the gap in the runner. I wonder if there should be a slightly larger one for that job?

Mike
 
I think that is the solution.

Many many thanks for this. How did you manage to get in there to see the bracket though? The black plate is firmly fixed to the cabinet so I couldn't get behind it like in your photo.

Presumably I'll need to detach the bracket from the cabinet which I guess will involve removing the speaker housing to get to the screws?
 
Last edited:
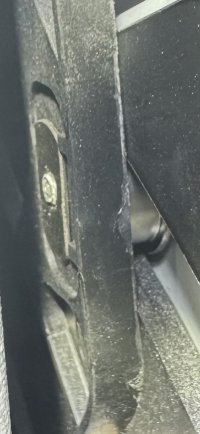
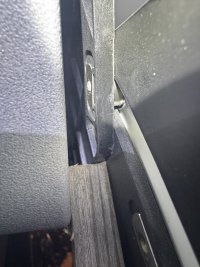
Picture is from the drivers side where the backplate is only fixed to the roof. I just pushed the trim back a bit and wedged it to take the photo. I assume it’s the same both sides.
On the other side the backplate on mine is fixed to the wardrobe with bolts that come through from the inside so I guess you may need to loosen those to get access. Strange that the back bolt has managed to fall out.
 
Thanks again.

Mine is on the driver's side too. The plate where the wheel runs along is attached to the roof but the plate with the bracket on seems to be attached to the cabinet but I'll have another look tomorrow and get in there somehow.

Many thanks again for your help with this. I've been trying to figure out how this works for ages so I'm pleased that I now know what I'm looking for. I couldn't figure out why there was just a hole there but it makes sense that a bracket should go in behind it.
 
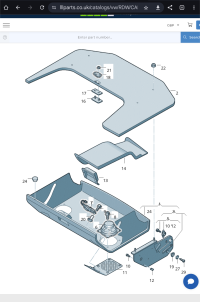
This diagram and website may help, it shows there are 5 threaded plates No.12 used in the locker, I assume with an M5 thread as that matches the bolt No.29.
LLLParts

Screenshot_20250310-080713.png
 
Last edited:
This diagram and website may help, it shows there are 5 threaded plates No.12 used in the locker, I assume with an M5 thread as that matches the bolt No.29.
LLLParts

View attachment 133356
Thanks for your reply KGCali. My layout seems different to that one but it's useful to see how that works as it sort of confirms what I need to do next.
 
For those who are struggeling with an overhead storage bin, I've found this picture on one of my harddisks. No idea where it comes from, but it gives a nice view of the mechanism.

Regards from Amsterdam,

Marc.
Vliegtuigkast_ophanging_2.png.jpg
 
They should enter that hinge into "the most over engineered yet still useless" category of automotive design.
 
Well done, any hints or tips to help others
My local VW dealer wanted £500 to fix it. I bought the repair pack from a site in Slovakia (referenced a few times on this site) for £65 (still ridiculously expensive for a few screws and fixings).

The best hint I can give though is to ask the forum for help if you're stuck. The advice was invaluable.

The hinge on the version of the storage bin I have is a nightmare to get into so I had to pop off some trim (drivers side) and disconnect the light in the back so I could get to the hinge.

Replacing the cog was easy enough and could be done from inside the bin without any problems but getting to the hinge itself was tricky. After that, my next tip would be to acquire the services of a family member/friend to help with undoing the screws. One person to hold the bin in place and stop the small steel plates rotating, the other to do the screwing/unscrewing.

Once all that's fixed the tricky bit was putting the trim back. You'll need to find someone with smal wrists to get the fixings back in place as they weren't so easy to access once the bin was fixed.
 
Back
Top