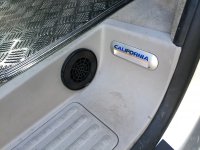
Retro Fitting a webasto parking heater.

Hi Andy, As Requested.

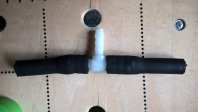
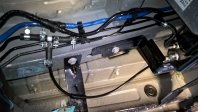
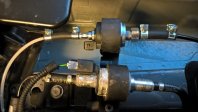
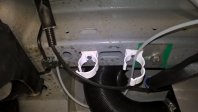
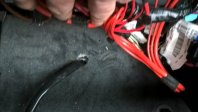
see the attached pictures I changed the size of the T piece to 6mm as I had trouble getting the fuel line on to the on 8mm one supplied from Bowers.

I did manage to get the lines on the 8mm T using a combination of heating the rubber with boiling water and using KY jelly but I cracked the T piece in the process and lost a lot of skin from both hands so I gave up and went for the 6mm which fitted without any trouble.

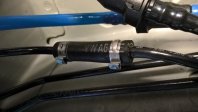
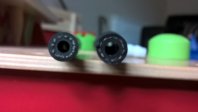
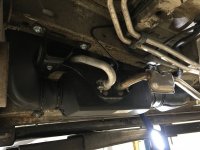
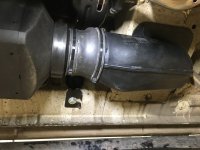
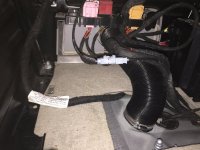
I also found out that the fuel line from the tank to the Webasto heater was smaller see the picture I am guessing probably 4-5mm ID rubber fuel line so I had no issues attaching the 6mm T.

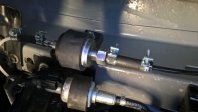
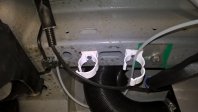
I also shortened the fuel line (fuel tank side) of the Webasto heater just to get it to sit better in the pipe clamps after the T was fitted.

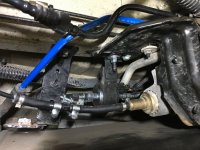
I fitted the fuel pump to the Webasto heater bracket and ran the fuel line from this back to the 6mm T.

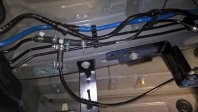
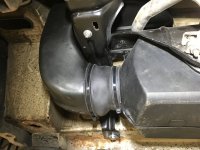
I followed the instructions for the fuel lines and wires back to the heater I ran both through a heat protecting sleeve following the same line as the brake pipes.

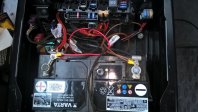
also ran the wires to the battery under the seat (removed the seat first) I brought the wires through the grommet on the front side of the battery towards the foot well.

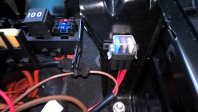
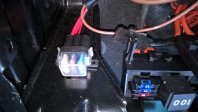
the wiring was straight forward and I used an existing hole in the battery compartment for the heater fuse box.

I removed the 2 screws from the existing fuse box to give myself more room when installing the new power cable and fuse box.

hope this helps.


Regards,


GBO

8mm T piece Pro.jpg

original webasto fuel line Pro.jpg

webasto conection Pro.jpg

6mm T piece 1 Pro.jpg

6mm T piece to FP Pro.jpg

Fuel pump 1 Pro.jpg

Fuel pump 2 Pro.jpg

heat sleave fuel line_Pro.jpg
 
If anyone is doing this addition intending to use the original VW parts to fit a Webasto or Eberspacher I have the hard plastic under shield for the heater spare. It's one that I ordered for this type of fitment but never used it.
Drop me a PM if you are interested.

@Goldie you cannot 'T' into existing fuel pipe (unless you have an auxiliary water heater) as the engine feed is pressurised from the tank primary pump. You need to drop the fuel tank and fit a separate pipe into the tank unit, here in the UK a genuine Eberspacher kit is available for this complete with fitting instructions. I've just fitted mine in a new T6. If you have an auxiliary heater already fitted then you can 'T' into its feed before the metering pump for the auxiliary heater.

I use Bowers at Stoke on Trent as my supplier of Eberspacher parts, they supply a complete kit for a T5/6 currently priced at £635 for a D2 Airtronic with 801 controller or £616 for a Webasto 2000STC with basic rotary controller, other options are available. Eberspacher come with 36 month guarantee whilst Webasto come with a 24 month guarantee. See their website at http://www.bowerspartsonline.co.uk/

I've no connection with the above company except for being grateful for their excellent service.

Rod
Hi,
I've just bought a eberspacher d3 plus airtronic from a California complete with exhaust and carrier. I was wondering what controller I could use with this as I don't have the original California unit installed. I also need a fuel pump for it and I could do with a part number for the correct item as no one lists parts for the D3 plus airtronic.
Any help would be very much appreciated.
Thanks
Luke.
 
I can't be certain but I think if the heater that you have is an OEM fitting for a Cali then you will need the genuine VW controller and have it integrated with the vehicle CAN Bus etc as I believe the OEM fitting version has a unique ECU for VW fitment. It may be an option to change the ECU for a generic one and use one of the many controllers available. I would speak to one of the Eberspacher dealers about this, Bowers at Stoke on Trent (http://www.bowersautomotive.co.uk/), Butler Technik (https://www.butlertechnik.com/) etc. but it is likely to be expensive!

The pump should be a standard one for the model.

Rod
Hmm, I did wonder but I've bought a brand new pump and controller today for a good price so I'll give it a go. I know an electronics wizard so I'll get him to check it out. The whole unit and carrier was a good price in my opinion so I'll see what I can do. I'd like to use the Cali one as it is slightly more powerful than D2 by the looks of it. Thanks for your reply.
Luke.
Hi Luke

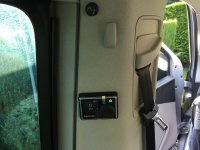
I'm interested to hear how you get on. I'm trying to plan out a retro fit of a parking heater using the genuine VW control panel by the rear view mirror.
 
Hi Luke

I'm interested to hear how you get on. I'm trying to plan out a retro fit of a parking heater using the genuine VW control panel by the rear view mirror.
Hi, I'll let you know how it goes. I've bought a standard controller as I'm not particularly fussed about the vw unit. I'm sure there will be a few obstacles!
 
0F220DC1-C475-4672-A3C1-E249647E5982.jpeg 0F220DC1-C475-4672-A3C1-E249647E5982.jpeg FA8E1895-DEBF-48AF-9872-98DE756480C4.jpeg 8BEF9139-A16C-4BC7-941E-AB6189882873.jpeg Hi guys, just a quick update. I’ve managed to fit the genuine California D3 plus eberspacher and get it running. I connected it using the genuine California fuel line and all of the ducting. We then connected the 801 controller and she fired up! We just need to make up a loom extension for the controller and wire it up to the leisure battery.

F0AC2217-4DD3-4DBA-9164-85894B5438DB.jpeg
 
Hi,
I will soon install a Webasto Airtop heater in my T5.
At the moment, the van is equipped with a Thermo Top, which I installed by myself, as I did in a previous vehicle. So I already have some experience with (water) auxiliary heaters, but I also have a couple of questions for who has installed an air heater in the T5:
  • I plan to drill two big holes for warm air and intake recirculation: one below the right seat and one on the side of the right entrance step. I know that the diameter of the Webasto air pipe is about 60 mm, but what about the size of the drill cup? Is it better to use the 60 mm or the 64 mm to allow some clearance?
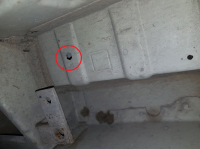
  • The heater kit I purchased online should arrive in few days, however I already know that it comes with metal holder to attach the heater under the floor, bolts and rivet nuts. The components should perfectly suit the VW T5... This morning I had a look under the floor, and saw that there are some premade holes with hexagonal shape, and I suppose that the rivet nuts should go there. At this point I expect the rivet nuts to have hexagonal section. However I am a bit confused about the procedure to block them: should I use the specific tool for rivet nuts (I mean, the one for rounded rivet nuts), or should I just insert and tighten the bolt until the rivet nuts get stuck?

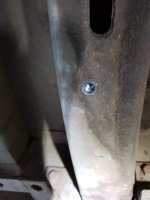
See in the picture one of the hex holes I am talking about:
hole.png

Thanks for any clarification!
 
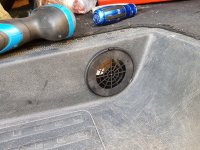
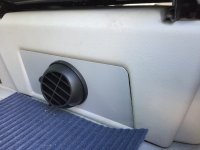
This is how I redid mine:
View attachment 15552
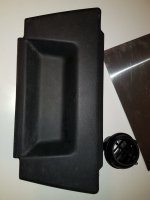
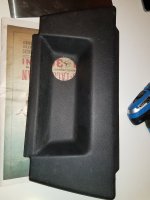
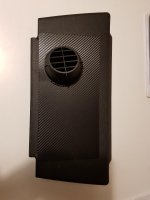
The vent is mounted on a bit of grey painted plywood that has been fixed to the existing seat trim. Needed to do this to get a large enough flat area for the diameter of the vent.
The original fitter (not Slidepods) replaced the whole grey seat trim with a nasty bit of hardboard covered in black carpet. Hated the look of it.


Sent from my iPad using Tapatalk
Is a Ctek charger the one behind the seat? Same system as mine I suppose.
Where does 230 cable enter the van?
Did you fix the Ctek with velcro?
Thanks!
 
Is a Ctek charger the one behind the seat? Same system as mine I suppose.
Where does 230 cable enter the van?
Did you fix the Ctek with velcro?
Thanks!
Hi, yes that is a CTEC MSX 7 charger mounted on another bit of plywood.
The charger is bolted to another bit of plywood and then the grey plastic seat trim.
The 230 socket is mounted under the rear bumper and the cable enters the van in the space where the wheel jack is stored. Have a look at these 2 threads for more details & photos:
https://vwcaliforniaclub.com/threads/230-volt-hook-up-in-your-beach.3650/page-2 (photos at the bottom posted 13th July 2015)
 
We discussed that option on the day and I wasnt sure how clean it would look as the plastic isn't straight and has curves in it. I opted for the plate to be added.

The plastic seat panel is relatively cheap so I could look to reinstall it with just the vent at a later date.
Be aware if you have a 7 seat Beach, with all seats in your passengers will trip over this and break it, and the panel also limits footroom for 2nd row passenger. If you use the 7 seat configuration, it’s best to install the outlet in the OEM position on the B pillar.
 
Hi all,
I am pretty much done with the installation of the Air Top.
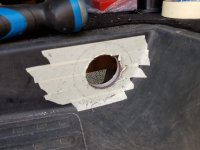
FYI, for drilling holes for 60 mm diameter Webasto air pipes, a 64 mm drill cup is needed. The air outlets instead are a bit smaller than the pipes, thus a 60 mm cup is enough for their holes.
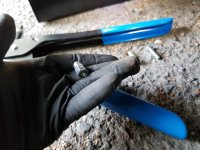
Regarding installation of the rivet nuts (or rivnuts) to attach the heater holder to the chassis, I preferred to rely on a proper tool.

20190912_175647.jpg 20190912_180934.jpg 20190912_193152.jpg 20190912_201111.jpg 20190912_210217.jpg


One of the rivnuts included in the T5/T6 - specific installation kit
20190914_093716.jpg

Rivnut installed in the premade hole
20190914_093720.jpg


20190914_103029.jpg 20190914_105650.jpg 20190914_162755.jpg
 
I now have CNC machined inserts in my seat bases, look very nice and my vent is now more flush.
 
I now have CNC machined inserts in my seat bases, look very nice and my vent is now more flush.

This sounds like the install Jonny at Slidepods described to me. Do you have picture at all?
 
This sounds like the install Jonny at Slidepods described to me. Do you have picture at all?
Apologies @jimmywease here is a picture I have on my phone although its not the vent obviously, I can get a pic later.

1574083041512-png.52750
 
No worries, Matt. Here is mine, as fitted by Slidepods:
image.jpeg
image.jpeg
image.jpeg
image.jpegimage.jpegimage.jpegimage.jpegimage.jpeg
 
The only issue I have with this type of installation is that it limits foot room in the second row when carrying 7 adults, because it blanks off the indentations in the first row seat base. For most this is not an issue, for me yes because I regularly carry a full load of hikers/bikers/skiers (with the multiflex fully extended to increase room for equipment/backpacks in the...boot). For those (extremely few) in my situation, fitting the original VW B pillar outlet is the best answer.
 
Back
Top