Buy all your VW California Accessories at the Club Shop Visit Shop

Roofless Cali Topper - Now Available

Not a problem at all Susanne, thanks once again for the purchases, they'll be will you ASAP and any questions etc, please don't hesitate in dropping us a call. :thumb

P.S. - Good luck with Mr Oxcal :lol:
 
Hi All

Our new compact roofless topper (black with windows) and full awning panel set (dark grey with windows) arrived Wednesday night - they are really fab. We've only had our Cali for three weeks and had not stayed in it yet, but the topper gave us the confidence to try it on Saturday night despite the chill in the air! Ok, it was only in our driveway so no scenic backdrop, but we are still building up our confidence! Putting the topper on took us a little while, but it was our first time so I am sure we will improve. we were toasty warm during the night and sleep pretty well (those ticks from the heater take a bit of getting used to).

Thanks Nick, great product and speedy service, really pleased. Will try and post a pic or two in the Xmas competition - can think of lots of things i might like to spend a voucher on!

MR. OxCal fully convinced now that these were must -have products! :D

:thanks
 
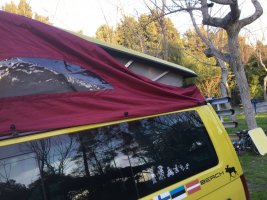
Nick if you look at picture 4 it shows a flap that velcro's to the underside of the roof and the rain runs down the roof under the flap and away keeping the canvas dry if that makes sense there are also thumbscrews like the side ones that fit in the roof channel to hold it down. I hope this helps
Do I get a prize for thread resurrection?
I had a trial erection today, but there were still some floppy bits, especially the flap at the back.
Can anyone explain just what attaches to what?
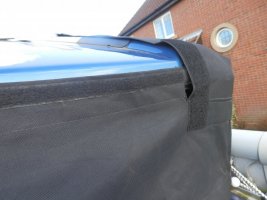
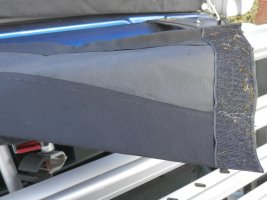
At the back there two half flaps with velcro on. What do these attach to? Does a velcro hook strip need to be fitted somewhere on the underside of the roof?
Although I don't think that they will be needed, what are the roof channel thumbscrews like and where can they be obtained?


P2260198.JPGP2260199.JPG
 
Do I get a prize for thread resurrection?
I had a trial erection today, but there were still some floppy bits, especially the flap at the back.
Can anyone explain just what attaches to what?
At the back there two half flaps with velcro on. What do these attach to? Does a velcro hook strip need to be fitted somewhere on the underside of the roof?
Although I don't think that they will be needed, what are the roof channel thumbscrews like and where can they be obtained?


View attachment 74319View attachment 74320

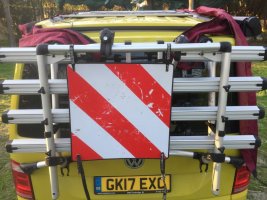
At the rear you should have 2 short flaps and 1 long flap.

The two short flaps attach by Velcro under the rear lip of the roof and then attach to one another.

The long flap runs the full width of the van and makes the rear look neat and tidy.

Water drains off the roof under the long flap and over the two short flaps.

You will need a long strip of Velcro to stick to the underside of the rear of your roof.
 
Thanks, I think that I have the picture now. The topper is not new and the pack contained a strip of self adhesive velcro hook but no explanation of what it was for.
Incidentally, do you fit yours in one piece or as a wrap round each side from the front? I have found it more difficult to fit than the full topper that I originally bought.
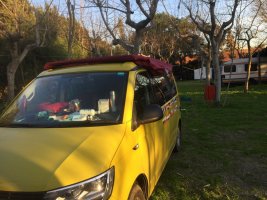
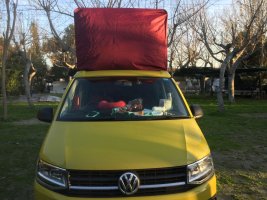
I have found a series of pictures taken January 2018 in Southern Italy for fitting the roofless topper.

IMG_0926.JPG
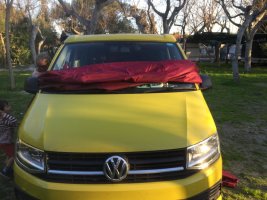
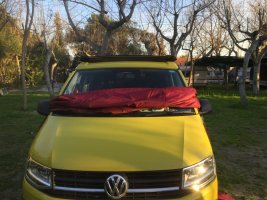
Drape the topper over the windscreen and wing mirrors.

IMG_0927.JPG
Pop open the roof slightly (easy on a Beach, no idea about an Ocean).

IMG_0929.JPG
Attach the sides to the pre-positioned knobs on the awning rail (4 nearside, 2 awning side).
If you are using the over roof bungees, do them at this stage also.

IMG_0932.JPG
Do nothing at the rear.

IMG_0934.JPG
Put up the roof.

IMG_0935.JPG


IMG_0940.JPG
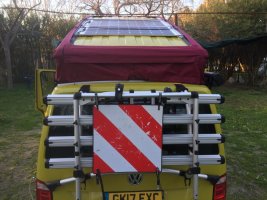
By standing on the tow bar ball and hanging onto the bike rack, fit the two short flaps to the Velcro strip under the roof lip. The long flap goes over the top.

IMG_0953.JPG
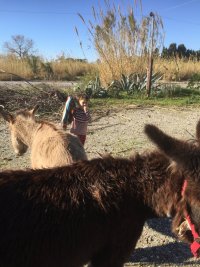
A random photo of Ben in his pyjamas chasing donkeys along a dried up river bed adjacent to the same campsite.
 
I have found a series of pictures taken January 2018 in Southern Italy for fitting the roofless topper.
Thanks very much. That's more or less what I had in mind. The fact that it's open over the roof makes it much less manageable than a full cover (at least in my opinion).
 
Well I'll be attempting to fit my new roofless Mutze today for the first time. Not sure of the practicality of putting it on either over and above the roofed variety Just thought it might be better to have less material to hoof around and easier to get dry when wet.
 
Thanks very much. That's more or less what I had in mind. The fact that it's open over the roof makes it much less manageable than a full cover (at least in my opinion).

The difference is that the roofless variety needs wrapping around the roof and the roofed variety needs pulling over the roof.

I cannot say which is easier as I only have experience of the roofless one, but wrapping around feels easier than pulling over.

One top tip. Don’t attach a drive away awning before doing the roofless topper.
 
Back
Top