chrissmit
- Messages
- 87
- Vehicle
That could work.
I just push the excess down into the Tailgate surround, NOT across the rubber seal. It is not gripped by anything and pulls out easily when the roof goes up.
Ordered my panel kit on Monday, delivered on Wednesday fitted Saturday and Sunday. Great service from Roger at Solar Camper Solutions
Some of photos of the installation.



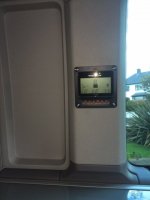
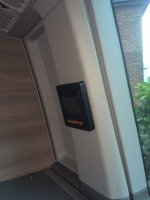
Ordered my panel kit on Monday, delivered on Wednesday fitted Saturday and Sunday. Great service from Roger at Solar Camper Solutions
Some of photos of the installation.


View attachment 14043 View attachment 14044
A great thread with lots of ideas for fitting solar panels. I find the MT50 a bit bulky and unattractive using the connector box, but cutting holes in the wardrobe frame could be seen as permanent and possibly costly! I have tried a halfway house that is easy to return to original spec if necessary by fitting into the trim for the window pillar just above the fridge. It's easily removed and has a convenient recess about in the middle. The cable is just long enough to go from the rear cupboard through the wardrobe and feed through the lower trim just above the fridge.
Bad news is if you want to return to standard spec a new trim panel part no 7H7 867 287 is about £100. !!
Wow. Bravo!I fitted the kit in a Beach today. I'll put it in a seperate thread as this one is getting a bit long...
Hi, please can you give to me any information about the installation in the pillar trim. In particular I need to know how did you solve the problem of the connector thickness. I tried also with a connector at 90° but is always too bulky. Thanks in advance.View attachment 14043 View attachment 14044
A great thread with lots of ideas for fitting solar panels. I find the MT50 a bit bulky and unattractive using the connector box, but cutting holes in the wardrobe frame could be seen as permanent and possibly costly! I have tried a halfway house that is easy to return to original spec if necessary by fitting into the trim for the window pillar just above the fridge. It's easily removed and has a convenient recess about in the middle. The cable is just long enough to go from the rear cupboard through the wardrobe and feed through the lower trim just above the fridge.
Bad news is if you want to return to standard spec a new trim panel part no 7H7 867 287 is about £100. !!
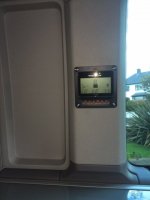
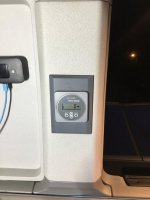
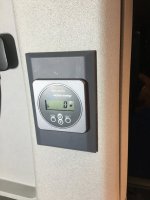
Hi, I recently changed my controller to a victron smart controller, which to some degree made the need for the MT50 redundant. To remove it was going to either leave a hole or require the purchase a new C pillar trim. So as I found it handy to have the in van remote display I decided to upgrade to the victron one. Just using the display and the angle VE connector did not have enough space behind the trim so by fitting the Victron mounting panel I managed to cover the old MT50 hole and create enough space for the VE Direct angle connector.I fit these quite often, including the new 6.1 and they always go in fine.
I use a hole cutter on my drill. The hole is cut centrally so the slight indent in the metal pillar behind the plastic panel is central. I mount both the MT50 and the MT11 with no space problems. You have to push the plastic panel back on firmly. The MT50 uses an RJ45 plug (network) and the MT11 uses a proprietry connector. Both fit.
View attachment 70258


The VW California Club is the worlds largest resource for all owners and enthusiasts of VW California campervans.

