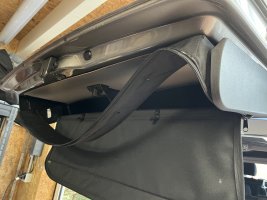
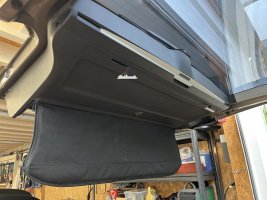
tailgate trim removal to fit rear camera

I like the idea of the Fission Mic. The 36338-6 looks the same as mine with the round roof trim and maybe the 36338-2 is the same mic but without the trim and would fit?
Which model did you get and where from?
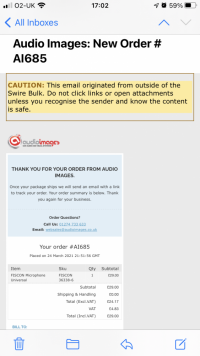
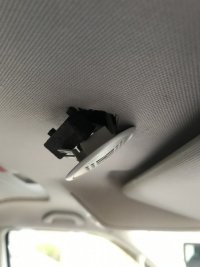
I got the one with the round plastic holder, as wasn’t sure if I would damage the old casing trying to remove the existing mic ( but they come out fairly easily). I left the old mic in the roof pushed to the side so can be reused in future if necessary. Order details as below:


6BB82E45-141A-4E04-BF76-DF760786A62F.png
 
I did try to prise the mic out for a look but it's tight and I risked breaking it. Anyway, I've ordered the same one you did. Should be excellent. The Kenwood mic looks fine but this will look just a bit more factory. I'm extremely happy with the upgrade. Thanks for the info :)
 
I did try to prise the mic out for a look but it's tight and I risked breaking it. Anyway, I've ordered the same one you did. Should be excellent. The Kenwood mic looks fine but this will look just a bit more factory. I'm extremely happy with the upgrade. Thanks for the info :)

450FD83D-EF76-43D2-B497-D2A4D7BBD023.jpeg

03D9B5C4-E7B2-43DE-88CA-FA5EBC77C8B0.jpeg

78AF5C17-9E83-49C9-B0FB-7DF91A805700.jpeg

E2DEFB9F-F4F9-472B-B901-8DE7E2AA542B.jpeg
 
Ok all done. Microphone cover was a bugger as it was glued in! So ended up breaking to remove but lucky had ordered kit with replacement so all ok and looks/works perfect now. Kit has OEM cover.

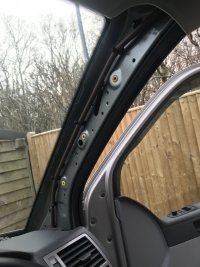
Used foam cover from OEM mic on new mic before inserting into cover/grill. Wrapped old mic in felt to avoid rattles and pushed out of the way. New mic reached to passenger A pillar and back to stereo so could go familiar route without crossing instrument binacle/steering column.

Also fitted some usb sockets in blanks on dash. Could have made up myself but found them for sale on EB using OEM blanks. Good quality and can recommend.

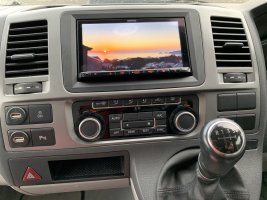
VERY happy with upgrade - got Garmin Nav and Apple CarPlay plus it integrates with MFD, MFSW, Climatronic and the bluetooth phone is way more user-friendly than it was before (although all on head unit and not on MFD).

Hope info helps someone....


Kenwood.jpg
 
Tailgate trim removal was ok but took ages as I had to drill out most of the rivnuts.

I have ordered OEM replacement nuts and bolts from EB which took a while to arrive (foreign seller) but are now here. Just realised that the nuts are steel (presumably stainless) so my diddy nut-setter won't manage so had to buy a decent rivnut-setter. That's arrived, so next opportunity when I'm free I can re-install the tailgate trim and then will be all done.

How did it go? Do you have a link to the parts? I’ll be attempting this job shortly.
 
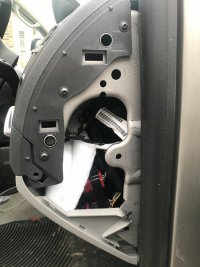
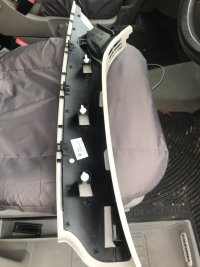
Ok I’m stumped I’ve popped every screw and clip I can see and the dam thing is still rock solid at the top near the blind. Can some one give me some tips. Picture of the parts off the car would be great

IMG_2668.jpeg

IMG_2667.jpeg
 
Ok I’m stumped I’ve popped every screw and clip I can see and the dam thing is still rock solid at the top near the blind. Can some one give me some tips. Picture of the parts off the car would be great

View attachment 130135

View attachment 130136

I did it a while ago to replace the window blind, but no longer have the van. Trying to remember how it all came apart….

Have you removed the two torx screws that sit either end of the blind. Can see that you have removed the circular trim covers in the photo, the bolts are accessed here.
The blind is riveted to the plastic trim so should come out as one section once the torx screws are removed. Needs a firm tug with a trim tool by the wiper motor, to release trim.

There might be some hidden screws under the fabric/board section, some had small self adhesive felt covers on the bolts, that need to be removed to access the heads.
 
Last edited:
I did it a while ago to replace the window blind, but no longer have the van. Trying to remember how it all came apart….

Have you removed the two torx screws that sit either end of the blind. Can see that you have removed the circular trim covers in the photo, the bolts are accessed here.
The blind is riveted to the plastic trim so should come out as one section once the torx screws are removed. Needs a firm tug with a trim tool by the wiper motor, to release trim.

There might be some hidden screws under the fabric/board section, some had small self adhesive felt covers on the bolts, that need to be removed to access the heads.
Thanks for the reply yes I removed those screws under the plugs. Although they were somehow captive and couldn’t be completely taken out.
Sounds like there are some metal clips which need releasing near the wiper motor.
I’ll have another go at it next week Once I have the new rivets and a rivet tool.
 
I think the bolts came out completely on ours (t5.1). Below might help you:

 
I think the bolts came out completely on ours (t5.1). Below might help you:

Thanks that link has the photos and description I was looking for.
 
Glad you like it I have a few projects planned, soft close side door, battery shunt and uprated roof dampers. I will video them and share the experience. It helps me remember too.
 

VW California Club

Back
Top