Upgrading T5 upper bed lattice rost to disc springs

bvddobb

bvddobb

Top Poster
VIP Member
Messages
1,516
Location
Netherlands
Vehicle
T5 SE 174 4Motion
We have decided to upgrade our T5 top bed lattice rost to a disc spring system like available in the T6.1 series.

We nearly always sleep upstairs on our Calibed Roof II mattress and until recently we slept very well. But since Marga's back hernia she was less comfortable and of course the lattice rost has always had one big inherent issue: the 'coupling' of sleepers upstairs. If one turns, the other bobs up-and-down. The disc spring system is said to be more comfortable and it solves the 'coupling issue'.

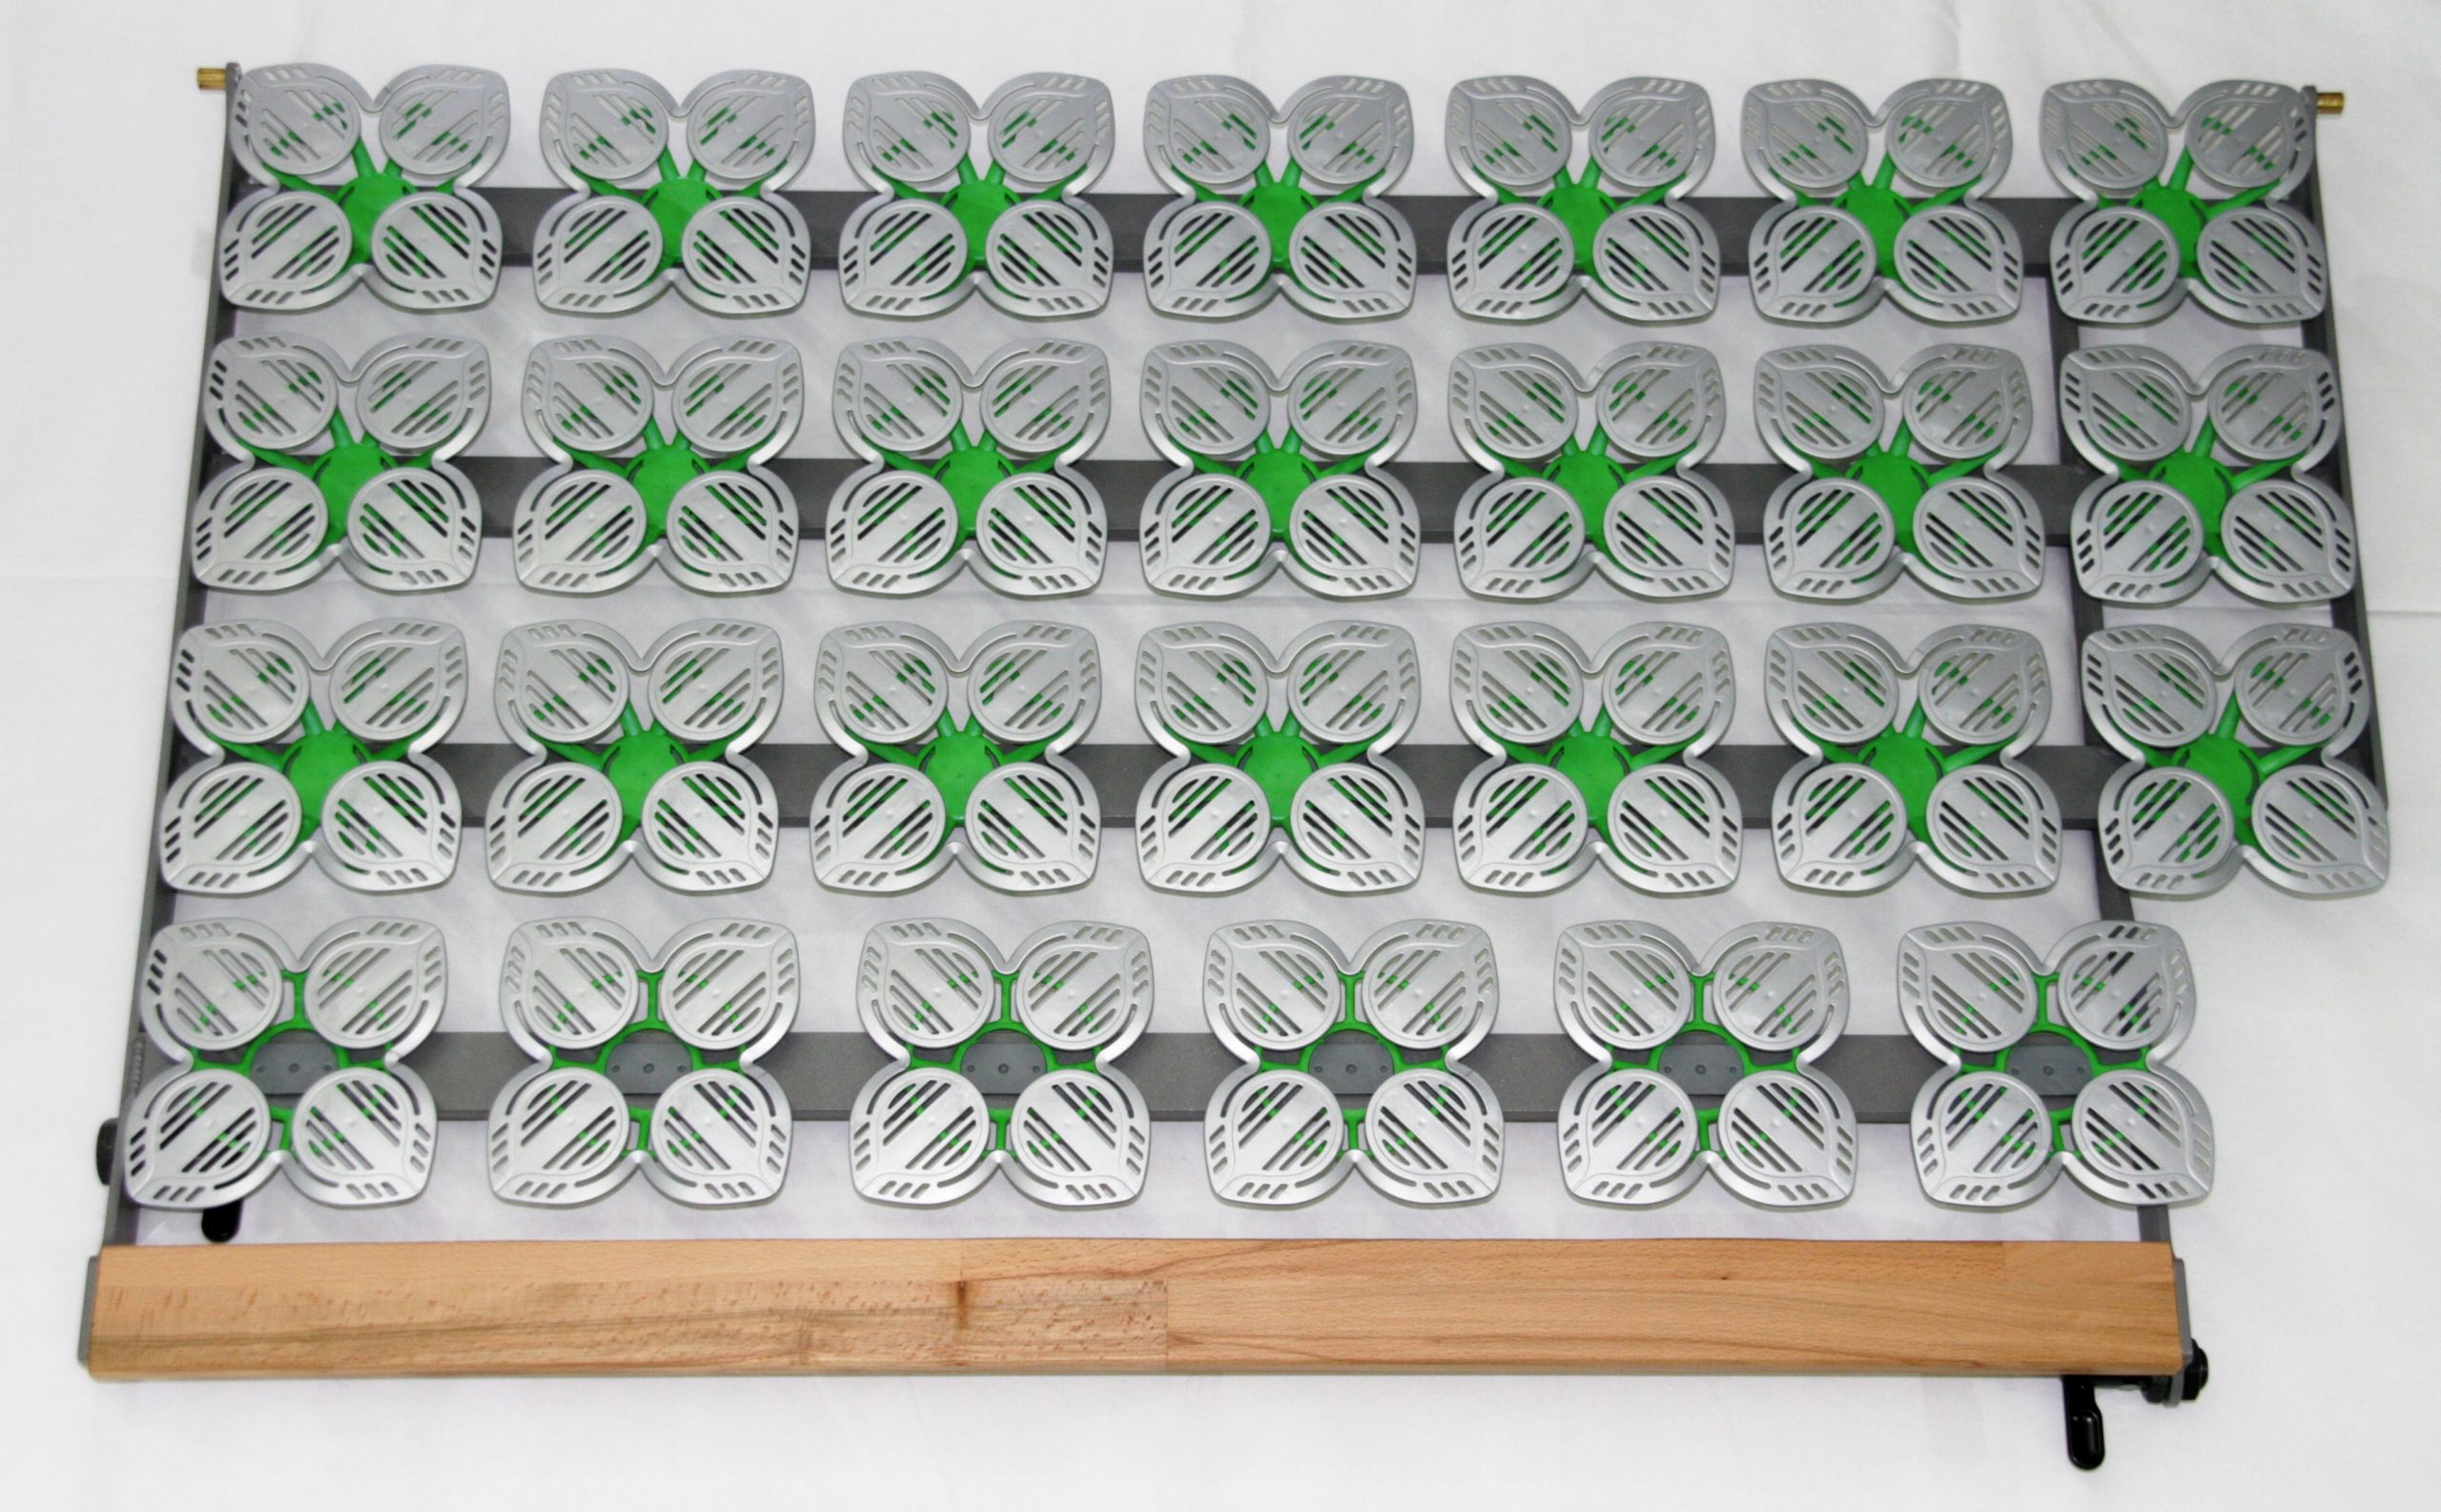
By now, VW offers an upgrade set. Here, we can have it for about € 600.-, incl. installation. Already very soon after VW's announcement of the 6.1, the german firm Squergo offered an upgrade kit. Incl. shipping it costs around € 320.- and supposedly it can be installed by yourself in about 1.5 hrs, without the need to remove the roof tent or inner roof lining. It looks like this:
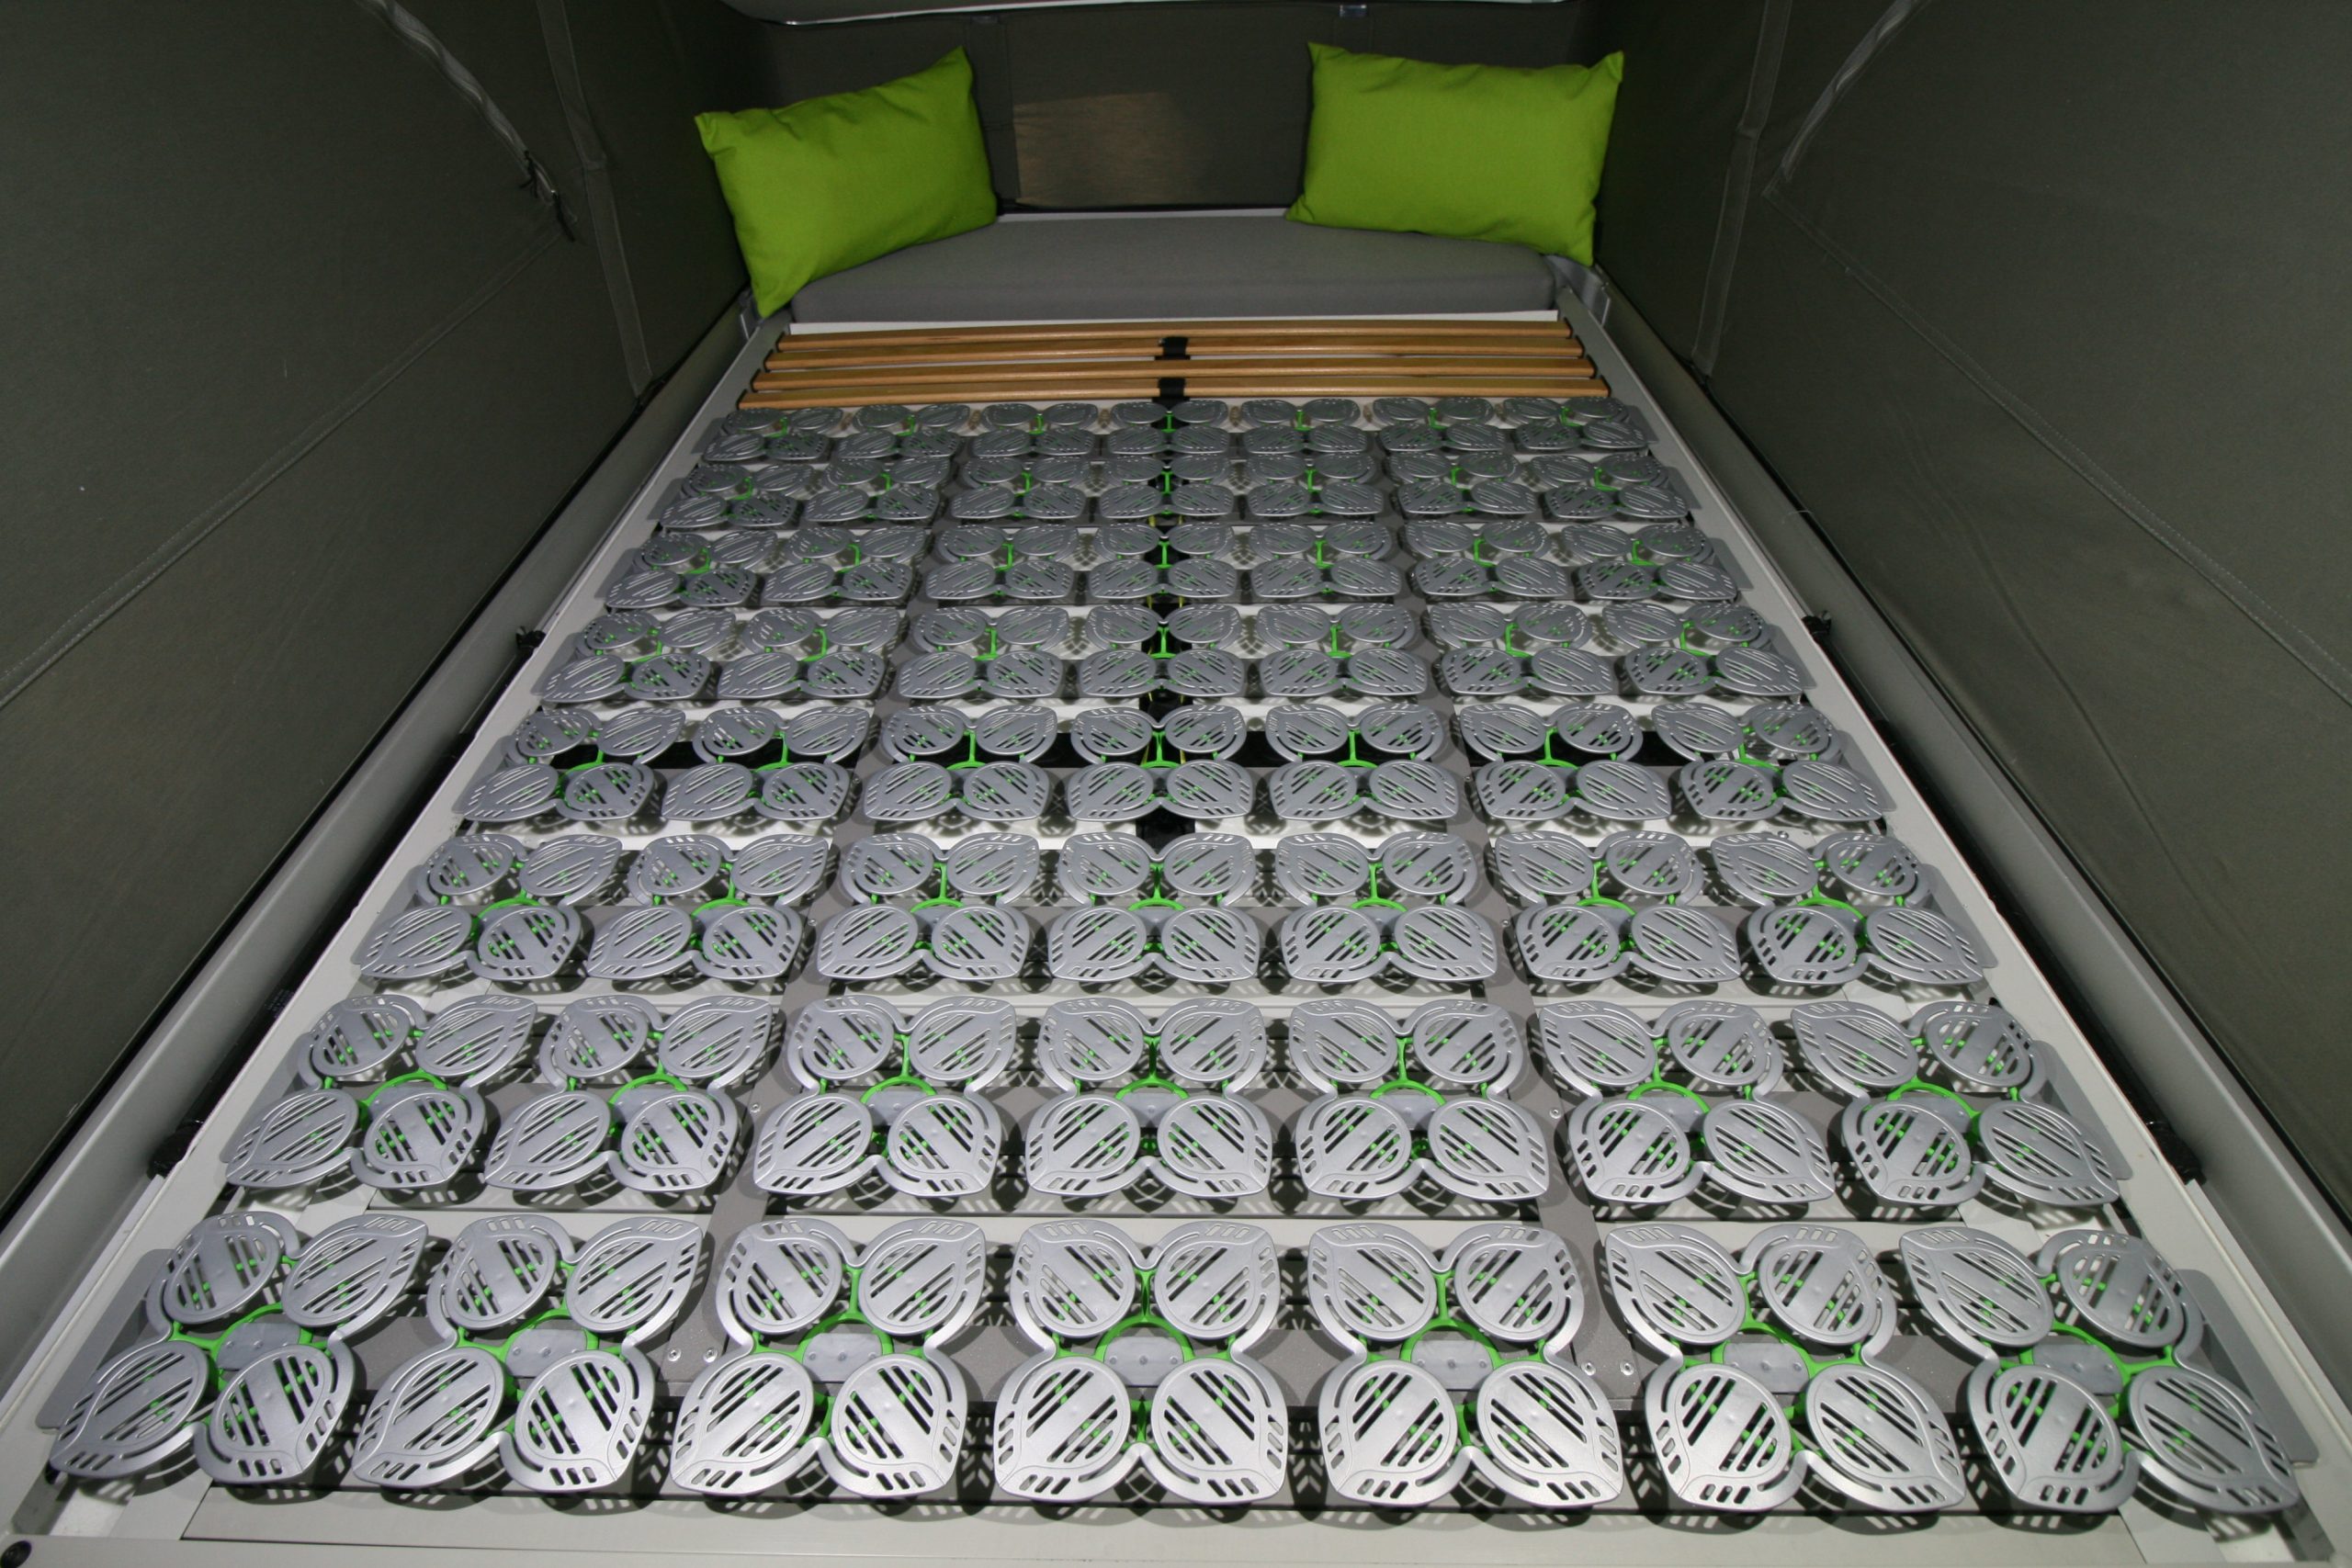
VW_California_squERGO_Dachbett_Unterfederung-6-scaled.jpg


Since the announcement of the disc system by VW, an extensive thread emanated on the german Caliboard forum about the possibilities of an upgrade.
The common opinion there is that the Squergo system is more comfortable and versatile than the VW upgrade. The Squergo system has a bigger spring depth and can have a thicker mattress than the VW system. Also, Squergo offers different disc springs (weaker/stronger, higher/lower springs), so one can more easily adapt the system to individual needs, e.g. more or less lumbar or shoulder support, etc. The german forum has a good story about a man weighing 120 kg with a wife weighing 60 kg who can now both sleep comfortably upstairs without the bed being too soft for the one, or too hard for the other. The VW system cannot be adapted to individual needs.

So, we decided to go for the Squergo system.

Those who know us better know we are not THAT versatile DIY'ers, but this little Youtube movie gave us the necessary trust we could do it:


So we have ordered the upgrade kit from Squergo, ordered a riveting thingy from Amazon (?? never riveted anything in our life before...), everything supposed to be delivered the coming week... Then wait for a morning or afternoon of good weather so we can put the van in front with the roof up, and go to work... :Nailbiting

To be continued...
 
Last edited:
We have decided to upgrade our T5 top bed lattice rost to a disc spring system like available in the T6.1 series.

We nearly always sleep upstairs on our Calibed Roof II mattress and until recently we slept very well. But since Marga's back hernia she was less comfortable and off course the lattice rost has always had one big inherent issue: the 'coupling' of sleepers upstairs. If one turns, the other bobs up-and-down. The disc spring system is said to be more comfortable and it solves the 'coupling issue'.

By now, VW offers an upgrade set. Here, we can have it for about € 600.-, incl. installation. Already very soon after VW's announcement of the 6.1, the german firm Squergo offered an upgrade kit. Incl. shipping it costs around € 320.- and supposedly it can be installed by yourself in about 1.5 hrs, without the need to remove the roof tent or inner roof lining. It looks like this:

VW_California_squERGO_Dachbett_Unterfederung-6-scaled.jpg


Since the announcement of the disc system by VW, an extensive thread emanated on the german Caliboard forum about the possibilities of an upgrade.
The common opinion there is that the Squergo system is more comfortable and versatile than the VW upgrade. The Squergo system has a bigger spring depth and can have a thicker mattress than the VW system. Also, Squergo offers different disc springs (weaker/stronger, higher/lower springs), so one can more easily adapt the system to individual needs, e.g. more or less lumbar or shoulder support, etc. The german forum has a good story about a man weighing 120 kg with a wife weighing 60 kg who can now both sleep comfortably upstairs without the bed being too soft for the one, or too hard for the other. The VW system cannot be adapted to individual needs.

So, we decided to go for the Squergo system.

Those who know us better know we are not THAT versatile DIY'ers, but this little Youtube movie gave us the necessary trust we could do it:


So we have ordered the upgrade kit from Squergo, ordered a riveting thingy from Amazon (?? never riveted anything in our life before...), everything supposed to be delivered the coming week... Then wait for a morning or afternoon of good weather so we can put the van in front with the roof up, and go to work... :Nailbiting

To be continued...
Look forward to hearing how you get on and a review once fitted.
 
Wow, that's quite the upgrade! I bet it will me much more comfortable. The guy in the movie makes it look easy. I agree with @ArunAlec and will follow your endeavours with interest. Oh and pop rivetting is the simplest thing ever; all you have to do is squeeze the pliers.
 
That looks like a good upgrade if it improves the comfort of the top bunk.
very interested to see your upgrade and comments regarding comfort.
look forward to seeing more
 
Oh and pop rivetting is the simplest thing ever; all you have to do is squeeze the pliers.
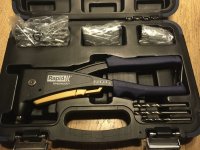
The riveting thingy has arrived:

F58906E4-200E-44F8-B844-17121917CF20_1_201_a.jpeg

No idea how it is supposed to work yet, but we will find a YouTube video or something. The upgrade kit was sent off by Squergo yesterday, will arrive somewhere later this week.

Then we will just have to wait for a nice morning or afternoon off, so we can park the van in front, pop up the roof, and do the actual upgrade!
 
The riveting thingy has arrived:

View attachment 68811

No idea how it is supposed to work yet, but we will find a YouTube video or something. The upgrade kit was sent off by Squergo yesterday, will arrive somewhere later this week.

Then we will just have to wait for a nice morning or afternoon off, so we can park the van in front, pop up the roof, and do the actual upgrade!

Hi Bvddobb

Using the pop pivot gun is simple and very straight forward.

the chrome end nut fitted to the gun has a hole in it.
the gun has two serrated jaws which work on a cam action.
the steel stem of the pop rivet is designed to pull out of the rivet body, collsps the rivet body and deforming the rivet as it is withdrawn ( forming the opposingface of the rivet)

there may be some spare chrome nuts, these may have differing hole sizes for use with different diameter pop rivets. Simple unscrew the existing and fit the new one a required.

place a pop rivet (of the correct length and diameter) into the pre drilled hole(s) of the material being riveted together.
ensue the rivet is a close fit in the hole(s) or use an alternative rivet that is a close fit ( not too loose) In the hole.
ensure the rivet passes through both peice of material being riveted together by a minimum of 3 - 5mm ( protrudes through both prices of material)

ensure the shoulder flange of the pop rivet sits flat on the top piece of material being riveted together.

ensue the two pieces of material ( top & bottom) being joined together are touching with no obvious gaps.

open the levers, of the gun, fully .

place the chrome end nut, (the hole in the chrome nut) over the steel stem of the pop rivet.

ensure the chrome nut touches the rivet flange.

press lightly downwards to ensure the pop rivet is making contact with both pieces of the material being riveted.

close the levers to grip the stem of the pop rivet until you feel some resistance (when the internal jaws of the gun make contact with the steel rivet stem)

check the vertical alignment and contact of the rivet with the material being fixed together, One more time.

keep forward pressure on the rivet while squeezing the two levers together fully UNTILL the levers cannot be pushed together anymore.

The steel stem of the rivet should withdraw from the rivet, ( with an audible pop / crack)
the action of squeezing the levers together deforms the straight section of the rivet ( the section that was inserted into the two pieces of material)
when the rivet is fully formed the steel stem will come loose leaving you with a near fully for,Ed rivet
the steel stem will be held in the hole in the chrome nut, open the jaws of the gun fully, the steel stem should drop out.

note :
if the steel stem does not come loose (pop) the first time, release the rivet gun levers fully, press down, so the chrome nit makes contact with the rivet flange and repeat the above.

if you need to remove a rivet, use a HSS drill bit, same diameter of the straight part of the rivet, (before it was fitted) to drill out the rivet.

practice on some some scrap pieces of material.
 
Well... it is done! Easy peasy!

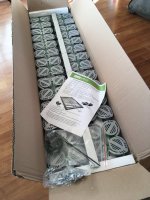
DHL delivered the Squergo kit today at 12:05.

F284E5EA-AC66-4C2E-9B35-629F9E8CAEC7.jpeg

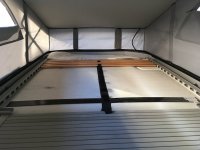
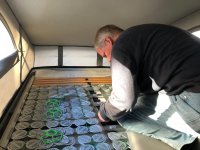
12:15 we had the van in front of the house, and started removing the lattice rost. That requires some strength, and one's position is not always such as to exert strength easily, but it is doable. At 12:30 the lattice rost was out!

C28E33B5-38F8-48B9-B373-C1F47938D44B.jpeg
A good moment for some hoovering... When does one have acces here?

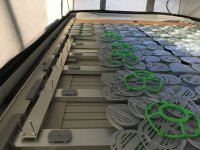
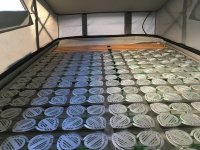
Then came inserting the spring frame and riveting the frame together. Popping 64 rivets with a hand thingy is a bit hard work. Some pneumatic or electric variant would probably be easier to work with.

1D9F7149-51EF-4212-912C-A6ACEAE52958.jpeg

13:45 all that was done, and the rollo was attached to the frame. Now all that needed to be done was weaving a thread to attach the top lining (which normally hangs down from the lattice by velcro rings) to the spring lattice:

D396A3FD-8815-4B1E-8317-7E95BEB867CE.jpeg

And then at 14:00 everything was done! The lattice rost removed, the disc spring system installed!

B10EAEC6-E142-44C0-A7A4-E0C9C5E3DFE1.jpeg

And the really good news is: with our 7 cm mattress, our roof still closes! That was a bit of a gamble, since Squergo says 6 cm is max...

Of course we immediately tried it (briefly). Our first impression is superb. With Marga's back issues, on the lattice rost we usually combined our 7 cm mattress with still an extra topper. Now, with the discs and only the mattress, no topper, we felt already more comfortable than with the mattress/topper combi on the lattice rost bed! And, indeed, the 'coupling' issue of the lattice rost bed is completely gone.

To be continued, after our first few nights out with this bed...
 
Last edited:
Last edited:
A really great upgrade, thanks for sharing. You may have saved someone £40k !

Is your "7cm mattress" the standard one supplied or an aftermarket (thicker?) one? I thought my mattress was only about 5cm and that was the limit.
 
Is your "7cm mattress" the standard one supplied or an aftermarket (thicker?) one? I thought my mattress was only about 5cm and that was the limit.
The standard T5 mattress is 5 cm. Our 7 cm is the after-market Calibed Roof II from the german Caliboard clubshop.
 
Last edited:
Good job, nice post Bvddobb.
please post an update on the comfort of the new bed set up.
 
Well... it is done! Easy peasy!

DHL delivered the Squergo kit today at 12:05.

View attachment 68836

12:15 we had the van in front of the house, and started removing the lattice rost. That requires some strength, and one's position is not always such as to exert strength easily, but it is doable. At 12:30 the lattice rost was out!

View attachment 68835
A good moment for some hoovering... When does one have acces here?

Then came inserting the spring frame and riveting the frame together. Popping 64 rivets with a hand thingy is a bit hard work. Some pneumatic or electric variant would probably be easier to work with.

View attachment 68837

13:45 all that was done, and the rollo was attached to the frame. Now all that needed to be done was weaving a thread to attach the top lining (which normally hangs down from the lattice by velcro rings) to the spring lattice:

View attachment 68838

And then at 14:00 everything was done! The lattice rost removed, the disc spring system installed!

View attachment 68839

And the really good news is: with our 7 cm mattress, our roof still closes! That was a bit of a gamble, since Squergo says 6 cm is max...

Of course we immediately tried it (briefly). Our first impression is superb. With Marga's back issues, on the lattice rost we usually combined our 7 cm mattress with still an extra topper. Now, with the discs and only the mattress, no topper, we felt already more comfortable than with the mattress/topper combi on the lattice rost bed! And, indeed, the 'coupling' issue of the lattice rost bed is completely gone.

To be continued, after our first few nights out with this bed...

Hi, do you have to leave a few of the wooden slats at the rear of the bed area? Is there a reason the new system doesn’t go all the way to the rear?

looks very interesting, we’ll be following your updates on comfort and might look to do this in our T5.1

Thanks for sharing.
 
A very helpful thread, thank you @bvddobb !

Squergo offers different disc springs (weaker/stronger, higher/lower springs), so one can more easily adapt the system to individual needs, e.g. more or less lumbar or shoulder support, etc.
Do you choose springs when you order the Squergo, or does it come with 'standard' and you pay for anything else as an upgrade afterwards?

And do you have an idea how easy it would be to replace the wooden slats if necessary? Presumably once the framework is riveted into place it becomes a serious job?
 
We have decided to upgrade our T5 top bed lattice rost to a disc spring system like available in the T6.1 series.

We nearly always sleep upstairs on our Calibed Roof II mattress and until recently we slept very well. But since Marga's back hernia she was less comfortable and of course the lattice rost has always had one big inherent issue: the 'coupling' of sleepers upstairs. If one turns, the other bobs up-and-down. The disc spring system is said to be more comfortable and it solves the 'coupling issue'.

By now, VW offers an upgrade set. Here, we can have it for about € 600.-, incl. installation. Already very soon after VW's announcement of the 6.1, the german firm Squergo offered an upgrade kit. Incl. shipping it costs around € 320.- and supposedly it can be installed by yourself in about 1.5 hrs, without the need to remove the roof tent or inner roof lining. It looks like this:

VW_California_squERGO_Dachbett_Unterfederung-6-scaled.jpg


Since the announcement of the disc system by VW, an extensive thread emanated on the german Caliboard forum about the possibilities of an upgrade.
The common opinion there is that the Squergo system is more comfortable and versatile than the VW upgrade. The Squergo system has a bigger spring depth and can have a thicker mattress than the VW system. Also, Squergo offers different disc springs (weaker/stronger, higher/lower springs), so one can more easily adapt the system to individual needs, e.g. more or less lumbar or shoulder support, etc. The german forum has a good story about a man weighing 120 kg with a wife weighing 60 kg who can now both sleep comfortably upstairs without the bed being too soft for the one, or too hard for the other. The VW system cannot be adapted to individual needs.

So, we decided to go for the Squergo system.

Those who know us better know we are not THAT versatile DIY'ers, but this little Youtube movie gave us the necessary trust we could do it:


So we have ordered the upgrade kit from Squergo, ordered a riveting thingy from Amazon (?? never riveted anything in our life before...), everything supposed to be delivered the coming week... Then wait for a morning or afternoon of good weather so we can put the van in front with the roof up, and go to work... :Nailbiting

To be continued...
Hi,
LOOKS really easy on the video, and he did it in about 5 minutes. Will be really interested to hear how you get on in real life. I've never managed any DIY job easily.
 
First a few answers to some questions:
Hi, do you have to leave a few of the wooden slats at the rear of the bed area? Is there a reason the new system doesn’t go all the way to the rear?

This is just how the upgrade kit comes. We don't know any fundamental reason. Perhaps it is a matter of cost (one row less of disc springs) combined with that under your feet there is not so much room for improvement. Perhaps also that the end of your bed is thus a bit lower, so the roof closes more easily.
Do you choose springs when you order the Squergo, or does it come with 'standard' and you pay for anything else as an upgrade afterwards?

We didn't choose anything, we just used the kit as delivered, with a Squergo defined set of springs. We know from the german Caliboard that Squergo is very flexible: some people there have discussed with Squergo beforehand and had different sets of disc springs sent with the kit, experimented until they found their ideal setup, and then simply returned the unused disc springs, without extra costs (except the postage).
LOOKS really easy on the video, and he did it in about 5 minutes. Will be really interested to hear how you get on in real life. I've never managed any DIY job easily.

Well, the little movie has a bit of time lapse tricks to not make it too long... Like we wrote, we aren't that capable DIY'ers ourselves, but we managed to do it in under 2 hrs, where Squergo calculates 1.5 hrs. Not too difficult!.
 
This gone weekend we had our first 'live' experience, sleeping on the new bed. A summary:
  • The 'coupling issue' for duo sleepers (when one turns, the other bobs up and down) is completely gone. A big improvement.
  • The lattice rost didn't move that much on the sides. The disc springs go all the way to the sides. As a result, we felt the bed was wider than before. In cm's that is nonsense, of course, but it sure felt that way.
  • With our single mattress on the disc springs, Bart was already quite happy. But he had less of a problem with the lattice rost comfort in the first place. Marga still found it too hard after a while. In combination with the mattress topper we used before, she was quite happy also. We slept from 22:00 to 09:30...
Perhaps we need to experiment a bit more with different discs (higher/lower, harder/softer, placing) on Marga's side to see if we can still improve her comfort and perhaps no longer need the mattress topper.
 
Hi, do you have to leave a few of the wooden slats at the rear of the bed area? Is there a reason the new system doesn’t go all the way to the rear?

Translation from the manufacturer about why some original slats are left:

Springs of different heights are used in order to make optimal use of the available space and to enable maximum comfort. Higher disc springs are used at the important points in the shoulder and torso area, while flatter elements are installed on the head, legs and edges. In the end, the spring strips are retained, as the built-in wardrobe and headliner mean that there is less space available downwards.
 
In addition to this excellent post, there is also an upgrade kit on the squergo site for the lower bed rear lattice shelf above the boot area.


I would be interested to learn of anyone's experience of this.

I assume the shelf is placed in the lower position, allowing the VW standard "uncomfortable" mattress to go on top of the squergo spring upgrade for the shelf to bring the finished bed surface level with the bed surface formed from the rear seat.

Even with a SIM I find the difference between the seat surface and the much harder rear shelf and foam "uncomfortable" mattress too great and cannot use the lower bed unless " in extremis".

I hope this is a possible solution

IMG_1881.PNG
 
Google translate says:
By replacing the standard rear shelf with the slatted rear shelf from squERGO, you not only gain sleeping comfort, but also space in your California. The shelf here is deliberately approx. 8 cm shorter in order to gain space in the living room - as with the new T6.1 (lying area 192 x 115 cm). In addition, the slatted rear shelf is hooked into the upper locks and thus provides a larger trunk volume.
There's also a good video in the "Assembly instructions T5/T6" tab ("Aufbauanleitung T5/T6"). The narrative is that a chap wants to get some tonic water into the boot of his Cali, and upgrades his bed to do so.
The assumption seems to be that you'll use a mattress on top of the slats, so they make them level with the 'seat' section of the bed, i.e. no need for the standard VW mattress in the boot.
 
Google translate says:

There's also a good video in the "Assembly instructions T5/T6" tab ("Aufbauanleitung T5/T6"). The narrative is that a chap wants to get some tonic water into the boot of his Cali, and upgrades his bed to do so.
The assumption seems to be that you'll use a mattress on top of the slats, so they make them level with the 'seat' section of the bed, i.e. no need for the

standard VW mattress in the boot.
Thank you very much for your help via Google with the translation and locating the video.
I was using Safari on my iPad and as soon as I switched to Chrome the translation was offered.

Alles klar
 

VW California Club

Back
Top