Word of Warning, if you have a Spare Wheel.

Thought I would share a puncture experience, I was on my way south on the A1 towing a box trailer in the outside lane overtaking a lorry when my rear near side tyre deflated rapidly. Pulled into the hard shoulder as soon as I could to find the tyre flat as a pancake. I carry a 12v pump so thought I would put enough air in it to get me to the next services to change the wheel.

The tyre would hold no air at all, it was coming out as quick as it was going in, it must have been my lucky day, I could feel the air coming out with my hand and see where it was. I got my tyre string repair kit out, first use, plugged the hole following the instructions and re inflated the tyre all without removing the wheel from the van, took about 15 mins in total.

The repair allowed me to continue my journey and return home a few days later. Since the repair was near the edge of the tyre I had a new tyre fitted the following week.

The repair kit is quite small and can be easily stored, certainly convinced me it was good buy.
Oooo.......I like the sound of that. Which kit have you got?
 
Thought I would share a puncture experience, I was on my way south on the A1 towing a box trailer in the outside lane overtaking a lorry when my rear near side tyre deflated rapidly. Pulled into the hard shoulder as soon as I could to find the tyre flat as a pancake. I carry a 12v pump so thought I would put enough air in it to get me to the next services to change the wheel.

The tyre would hold no air at all, it was coming out as quick as it was going in, it must have been my lucky day, I could feel the air coming out with my hand and see where it was. I got my tyre string repair kit out, first use, plugged the hole following the instructions and re inflated the tyre all without removing the wheel from the van, took about 15 mins in total.

The repair allowed me to continue my journey and return home a few days later. Since the repair was near the edge of the tyre I had a new tyre fitted the following week.

The repair kit is quite small and can be easily stored, certainly convinced me it was good buy.

I've used a tyre string repair kit twice before - they work extremely well.
 
Very interesting Re the string - thanks for the recommendation. I’m also looking for a proper 12v or battery pump that copes with tyre inflation and would also use for paddle boards, but most of the pumps seem to be Mickey Mouse construction.
Any recommendations for decent pumps pls?
Thanks, Mike
 
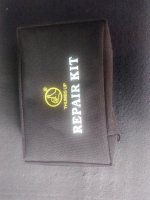
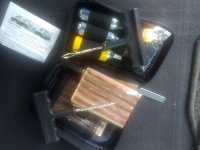
I used a Thumbs Up repair kit marketed for motorcycles so a neat kit, you can buy extra strings very cheaply on line.


I also use a Ring 12v pump, just the basic one, got it at screwfix. Very useful to have a pump as it may get you to a garage, and or prevent you running on a flat which will destroy your tyre and maybe damage your rim.

IMG_20191024_115813.jpg

IMG_20191024_115908.jpg
 
Very interesting Re the string - thanks for the recommendation. I’m also looking for a proper 12v or battery pump that copes with tyre inflation and would also use for paddle boards, but most of the pumps seem to be Mickey Mouse construction.
Any recommendations for decent pumps pls?
Thanks, Mike
I use a Ring 12v pump but not sure if it would work on a paddle board, does high pressure but is not that fast.
 
I've used a tyre string repair kit twice before - they work extremely well.

Invaluable if you are on holiday somewhere a bit remote, say stuck in a campsite in the mountains with a flat, I am a convert for sure.
 
Very interesting Re the string - thanks for the recommendation. I’m also looking for a proper 12v or battery pump that copes with tyre inflation and would also use for paddle boards, but most of the pumps seem to be Mickey Mouse construction.
Any recommendations for decent pumps pls?
Thanks, Mike

I use a Ring RAC900, but that's a high pressure pump - no good for high volume low pressure kit like inflatable canoes, paddle boards etc. For that you need a high volume pump. For that I use a Bravo BP12.

So you need two pumps!
 
Very interesting Re the string - thanks for the recommendation. I’m also looking for a proper 12v or battery pump that copes with tyre inflation and would also use for paddle boards, but most of the pumps seem to be Mickey Mouse construction.
Any recommendations for decent pumps pls?
Thanks, Mike

We have this one Halfords Rapid Digital Tyre Inflator 239074 it’s easy to use & nice & compact to store but there are loads of options available
 
In my cali I have a repair kit - but for my trip to iceland next year I want to have a spare wheel set.

What kind of tools are essential to buy to swap it around?
Wanted to ensure I have got everything before it's too late :)
 
Ring, Halfords, RAC all make decent 12v pumps . Just a case of finding one which best suits your intended stowage spot in your van.

For SUP’s - We use a twin barrel manual pump for paddle boards & just treat it as part of the warm up before we get in the water!
 
Any recommendations for decent pumps pls?
I use a bicycle track pump to top up air. It’s about 10-15 pumps per psi, so a good workout. The pressure gauge to 200psi is marked every 5psi so you still need to recheck pressures with a decent tyre gauge.
 
Ring, Halfords, RAC all make decent 12v pumps . Just a case of finding one which best suits your intended stowage spot in your van.

For SUP’s - We use a twin barrel manual pump for paddle boards & just treat it as part of the warm up before we get in the water!
Agreed. Manual pumping warms you up nicely before going on the water. Plus I hate it when another paddle boarder rocks up, plugs in his 12v and then ruins the peace!
 
That time of the year, but the garden and lawn still too sodden, so decided to remove my 17” Steel Spare with 235x55 tyre and clean it, rub it down and apply some Hammerite paint.
So, undo captive bolt on L side - no problem, unscrewed about 1.5 cm.
Removed dust cap on R side Locking Bolt and using Socket key removed bolt and Safelock.
Using Tool Kit wheel wrench fitted into wheel carrier lift and slide to the L to disengage Carrier from the captive bolt. No problem and lowered to the ground with the Wheel wrench still in place.

Then fun and games. Couldn’t slide the wheel out because of the Captive Bolt AND the Towbar Electrics Socket were in the way and the Wheel wrench was holding the carrier up slightly. With great difficulty and a large screw driver managed to lift carrier and remove Wheel wrench. Still not enough room so had to resort to jacking the Rear Nearside up so I could get the wheel out.

The Wheel was in quit good condition after almost 3.5 years and 65,000 miles. A good clean with the water jet, wire brush and 2 coats of Hammer finish Silver Hammerite and it looked like new. The wheel has been out before but at the local tyre fitters but not on the driveway before.
Also SafeLock cleaned, wire brushed and coated in Red Enamel paint.

SO, if you have a flat tyre then remove the spare first , especially if the damaged tyre is on the front.

How those who have lowered suspension manage I do not know, but I doubt if many carry a Spare. If you do check to see how easy or not it is to get the Spare wheel out in anger.

Have Fun:thumb
Biggest problem with 18" or more wheels is that if you do have a 17" spare the punctured wheel/tyre won't fit the rack and has to be carried inside the van until repaired and refitted. Might be almost impossible with passengers etc.:eek:
Rubbish, I did have a 255/ 40/ 19 wheel and tyre as a spare, but now I have a BMW X6 space saver 19" wheel which fits and comes out with no problems on a lowered 4 motion 20170403_153500.jpg
 
In my cali I have a repair kit - but for my trip to iceland next year I want to have a spare wheel set.

What kind of tools are essential to buy to swap it around?
Wanted to ensure I have got everything before it's too late :)
In my cali I have a repair kit - but for my trip to iceland next year I want to have a spare wheel set.

What kind of tools are essential to buy to swap it around?
Wanted to ensure I have got everything before it's too late :)
Hi, you need a 5 ton bottle jack, 600mm breaker bar and 19mm long socket. No problem lifting loaded van or removing wheels. Have a great trip
 
Rubbish, I did have a 255/ 40/ 19 wheel and tyre as a spare, but now I have a BMW X6 space saver 19" wheel which fits and comes out with no problems on a lowered 4 motion View attachment 51876
And a Towbar with electrics?
 
Well you must be one of the lucky ones. Many have had problems. And the term " Rubbish " is not one I would have used especially when using a non VW wheel which , as you say fits in the carrier, must be of different dimensions to the standard VW offering.
 
That time of the year, but the garden and lawn still too sodden, so decided to remove my 17” Steel Spare with 235x55 tyre and clean it, rub it down and apply some Hammerite paint.
So, undo captive bolt on L side - no problem, unscrewed about 1.5 cm.
Removed dust cap on R side Locking Bolt and using Socket key removed bolt and Safelock.
Using Tool Kit wheel wrench fitted into wheel carrier lift and slide to the L to disengage Carrier from the captive bolt. No problem and lowered to the ground with the Wheel wrench still in place.

Then fun and games. Couldn’t slide the wheel out because of the Captive Bolt AND the Towbar Electrics Socket were in the way and the Wheel wrench was holding the carrier up slightly. With great difficulty and a large screw driver managed to lift carrier and remove Wheel wrench. Still not enough room so had to resort to jacking the Rear Nearside up so I could get the wheel out.

The Wheel was in quit good condition after almost 3.5 years and 65,000 miles. A good clean with the water jet, wire brush and 2 coats of Hammer finish Silver Hammerite and it looked like new. The wheel has been out before but at the local tyre fitters but not on the driveway before.
Also SafeLock cleaned, wire brushed and coated in Red Enamel paint.

SO, if you have a flat tyre then remove the spare first , especially if the damaged tyre is on the front.

How those who have lowered suspension manage I do not know, but I doubt if many carry a Spare. If you do check to see how easy or not it is to get the Spare wheel out in anger.

Have Fun:thumb
I checked both my bolts today WG but bottled dropping the wheel as was afraid it might be too heavy to lift back up. Is it that heavy to shove back up and do you recommend spraying the underside of the van liberally with Waxoyl to prevent corrosion when dropped? My Cali is now 3 years old and no doubt will need to have some rusty areas scrubbed and treated.

Cheers

Taff T
I didn't find it too heavy using the wheel wrench in the carrier. Lift up and slide onto the L hand bolt.
Almost 7 yrs on and the underside on mine is dirty but corrosion free. In fact the wheel carrier has minimal corrosion, but I don't think it is galvanised.
 
I didn't find it too heavy using the wheel wrench in the carrier. Lift up and slide onto the L hand bolt.
Almost 7 yrs on and the underside on mine is dirty but corrosion free. In fact the wheel carrier has minimal corrosion, but I don't think it is galvanised.
Thanks WG…I’ve now no excuse and need to get on with it!
 
Took my spare off the other day to check it. It looked fine but the inside of the tyre (the bit you can’t see without removing the wheel from the carrier) was cracked. Checked the date stamp and it was the original (12 years old), complete with original stickers so never been used. It was immediately replaced, the thought of having to use a 12 year old cracked tyre on the motorway doesn’t bear thinking about. The rest of the van underneath is clean as a whistle.
 
Last edited:

Similar threads

VW California Club

Back
Top