Buy all your VW California Accessories at the Club Shop Visit Shop

VW California T5 ONLY Roof Corrosion - General Discussion

Where do you have the Roof Corrosion on your VW California?

  • Front panel only

    Votes: 193 37.3%
  • Main elevating roof only

    Votes: 78 15.1%
  • Both Front panel and main roof

    Votes: 247 47.7%

  • Total voters
    518
Mine (2012 150 PS) goes in on Monday
Identified when in for service last Jan so no too long a wait..and declining the loan Cali meant it bumped up by 3 weeks...
I have this simple summary below from Press Office at VW last week about what's going on and why - I just could not make sense of all posts on this thread.
I am still in process of trying to find out from dealer exactly what was found and what is being done..that's HARD WORK!!!!!
and re the last sentence...from this thread it would appear not all dealerships are equally good? But that's whole new can of worms!

"...Since this initial roof repair you had the factory have identified two further preventative measures:

1. To address the contact point for the resting position of the roof on the front reinforcement where it has the potential to rub due to dust ingress, we fit paint protection foil onto the front reinforcement.

2. To inspect the main roof panel for any signs of corrosion around the edge where the rubber seal fits. This allows us to address any signs of corrosion and finally apply paint protection foil, and then refit the seal. We would urge owners not to remove the seal themselves as putting it back on without the skills needed to do so has in some cases resulted in paint damage! (my italics!)

If either of these are required, this will show on our systems and the work will be done at any of our franchised Van Centres."
 
F6D09126-5F4F-4A0C-8A0C-D50AF5CBD735.jpeg

Step 2. Getting cable into the vehicle.

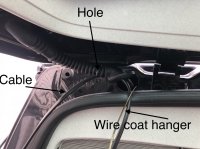
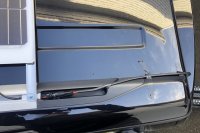
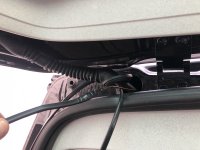
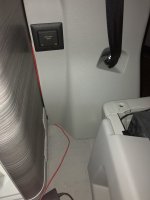
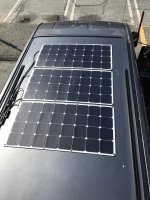
Roger provides detailed instructions for fitting the panel and connecting to the existing electrical system. I mostly followed these. At the rear left of the vehicle, there is a rubber grommet that allows cables to pass from the interior of the vehicle to the rear door.

17E9C547-E731-43D1-B992-24597EE3BA8F.jpeg

By making a small hole in this rubber grommet, it is possible to thread a guide wire through the tight hole, attach it to the end of the solar cable and slowly pull it into the vehicle.

0C81E8B0-8341-4837-B038-1BCCA5582328.jpeg

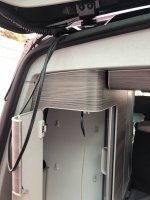
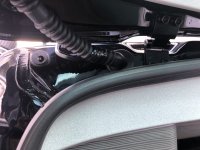
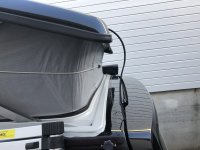
The roof was raised to ensure there the cable was long enough and then the cable sealed into the grommet with electrical tape. The cable was left long enough so there was a loop below the entry point, this will ensure any rain water running down the wire drips off before it enters the rubber grommet. The solar cable was secured to the roof with a zip wire through a drain hole.
72136626-92DB-4AB3-AEB8-50007E0A5CBB.jpeg

31E6F250-7F32-4CE2-B1F3-CC4DC9C902F9.jpeg

D6E24F3A-A09F-43F9-8D7F-6023FBA3F739.jpeg
 
09238BF3-D8DD-4F24-BDE6-708A1B25734E.jpeg

Step 3 Charge controller

I wanted to be able to charge the twin auxiliary batteries and also the starter battery if it ever drops in voltage, as my next mod is adding a Telestart for the Webasto to turn it into a controllable diesel block heater. This runs of the starter battery so for peace of mind I went for this option.

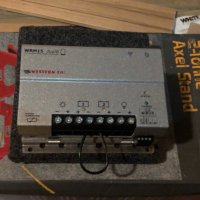
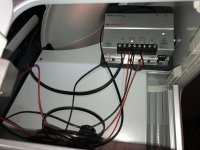
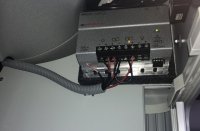
The selected charge controller is a Western CO WRM15 MPPT dual battery unit. It has a Bluetooth connection for your phone for monitoring power production and battery voltages. It will not monitor the load on the batteries the way it’s set up here.

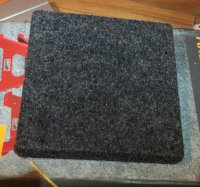
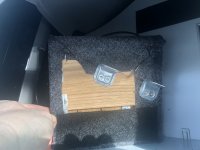
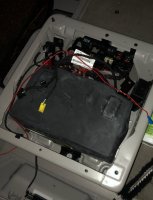
Again, the intention was to fit the controller without making any holes in the vehicle. So a mounting panel was made that hooks over the interior panel between the rear cupboard and the main one with the hanging rail. Some Velcro secures it from falling off. The charge unit is then screwed to the panel.

1A726887-D8FD-4BC9-93CD-2D90DDBD76C7.jpeg 7B0A989A-353D-475B-BB8C-FA3B86151C0D.jpeg
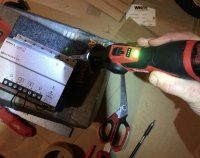
My new toy - cordless soldering iron

03EDF6F6-35A9-4464-85F0-18EEAF96D874.jpeg
It’s not pretty from the back but it’s functional.

6A36B3CB-880E-4752-8420-85A7FCCD6CF6.jpeg
Cables to be tidied up on the next phase.
 
C0E58674-C761-49EF-AD1F-742976E9201E.jpeg
Sometimes you have to improvise

D4920718-1C1B-477E-B34E-F54B369CA997.jpeg
Step 4 Connecting to the batteries.

Sorry the photos came out in a random order.

The intent here was to connect to the California in a way that wouldn’t interfere with existing electronics or invalidate the 5 year warranty.

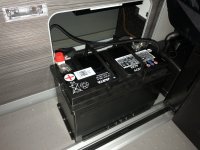
One of the auxiliary batteries is under the front left seat, the other is beside the water tank in the rear unit. The starter battery is in the engine compartment.

The selected charge controller is a Western CO WRM15 MPPT dual battery unit.

It is connected to one of the auxiliary batteries (the two auxiliary batteries are connected, so it will charge both). The benefit of this unit is it has a second battery output which has been connected to the starter battery.

D22FFB98-D911-4F99-A560-CE226F3A724F.jpeg
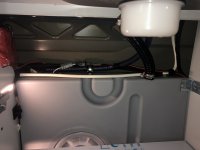
Running the wire for the second output to the starter battery. This is the space where the auxiliary battery site.

AA0020C6-7FDB-4174-B3E3-87658D795D9C.jpeg

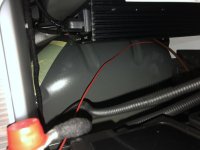
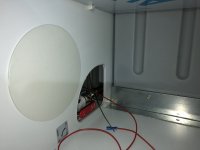
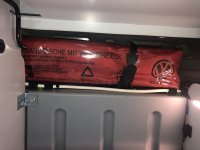
While the auxiliary battery is removed, the wire can (with some patience) be poked from the auxiliary battery space behind the fridge, it will come out here. Then go up and into the space where the first aid kit is and on behind the sink.

63C1F991-1E7D-452C-8428-4DAF16276B3C.jpeg
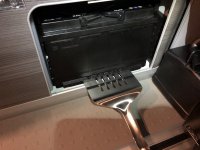
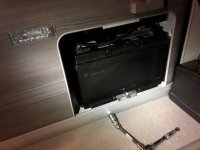
Remove the clamp bolt and the battery will slide left before being able to slide out with a piece of thin flat metal as a ‘ramp’

CC3E5C1A-C9DE-4555-B280-922029124970.jpeg
The cable to the starter battery exits the cabinets here and can be tucked behind the panelling.
CB632E3F-49CD-4EFC-9F98-4EECE23DBA85.jpeg
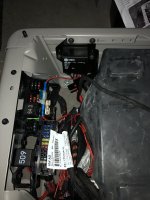
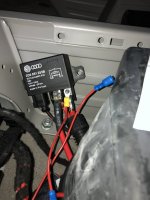
Run the cable to the relay box in the top right of the seat unit.

There is a relay from the alternator under the front left seat that is connected to both the auxiliary and starter battery. This was a good place to tie into the starter battery, without having to go through the bulkhead or have a very long wire.

Threading the wires from rear to front is fiddly but possible without removing any panels. It just takes a bit of patience and make sure you take off your watch. The only visible evidence of the new wire is just behind the seat.

5F82B2C8-DB82-41A9-95A3-BA1AF8EB932A.jpeg
The only evidence of the new wire.

35A3FC81-E027-4F6D-935E-0012B48AE574.jpeg
The fuse is placed where it can be accessed as ‘easily’ as the other fuses.

D0B4A77C-BAE1-4EFD-8631-A30C88F73D77.jpeg
Cable connected to the right hand terminal of the relay. This is connected to the starter battery.
 
35A5F2F2-3210-469B-A80C-F1504AB69807.jpeg
The finished charge controller out of the way.

6E0785DE-F04F-4089-A4FC-78D47A0096E8.jpeg
No evidence of the new addition without a good poke around.

2A806AE3-4310-4225-998C-82207E073A1E.jpeg
You can just see the red wire that goes to the starter battery.

2F5F82EA-4EB2-42F7-B157-9B4024A36612.jpeg
There are two zip ties security g the wire here.
 
Awesome description! Thanks for sharing! I am way behind of doing something like this myself however good to know who to ask or ref
I look forward to hear what your next of grid adventure will be!
 
0B303EA5-C39B-4E97-B100-2000EF1F2CF8.jpeg
Awesome description! Thanks for sharing! I am way behind of doing something like this myself however good to know who to ask or ref
I look forward to hear what your next of grid adventure will be!
I’d be happy to help in any way I can. Previously, I built my own campervan while I was living in the states and learned a lot from the process. It had a 200Ah auxiliary battery, 300w of solar, automatic ventilation system and 2000W inverter that could run anything.
 
Update
Apparently I am having the new foil protection for front panel BUT the corrosion found on roof is bad, really bad and has worsened considerably just in the couple of months since it was first identified! Quite a big job. I am talking with VW at the moment to try find out why it has come back after a major repair and repaint by Shorade a couple of years back during Roofgate, and if it's likely to come back again in a couple of years!
Worrying though - if you had your roof done during phase 1 it may have come back without you knowing. So get your Cali looked at by dealer! And if you have bought second hand - get it checked!
UPDATE 2! apparently the corrosion on roof is so bad it can't be dealt with by dealer bodyshop and usual procedure but needs to go to a specialist bodyshop
aaagghh!!!
Oh well, a loan Cali will be provided when they sort out taking it back in again...I'm just pleased that the recall / check system picked this up.
 
Last edited:
Noticed today that my seal no longer seals, anyone else experienced this?

I had the repair recently.

bb163564ec424ab1a61b82bbd0c5f328.jpg


Sent from my iPhone using Tapatalk
 
interesting..and worrying! So they must have removed the seal .. did they find or do anything there to the roof edges? If they found corrosion must have been small as dealt with in-house
Am wondering how many others out there are like me - had it all done including total roof repaint under the big phase 1 Roofgate but have now found it has come back ... and needs a specialist as opposed to dealers body shop
Co-incidentally I looked at my roof this week. Heritage Westbury did the work under Phase 1 back in Feb 2015.

Happy to report I have found no evidence of the dreaded rot returning. I haven’t been into a dealer recently so don’t know if our van is subject to the roof taping recall.

Alan
 
Hello chaps.

Just took my 2014 Manual 140 SE in for a complimentary health check with VW Heritage in Bristol.

When booking it in, I was advised about a recall underway to check roof corrosion. Although I’ve never noticed any, I was told that some was discovered as that I would be contacted by VW directly in the next 6 months to discuss further action.

I’ve had a good look and can’t see any serious damage, but perhaps I’m missing something.

Does anyone know what action they are likely to take? Is it a fix or a complete roof replacement?

Anyone had a recall and similar result recently?

Many thanks

TTP Bristol
What was your manufacture date?
 
Heritage VW changed the Westbury body shop operation to just covering Pre-Delivery Inspections a couple of years ago and so dropped off the Cali repair listing. Think this was about the time VW Germany changed the repair process and VWUK increased the number of companies able to do the official repair.

Since then the bodyshop side of Heritage VW has been sold on to MG Cannon.

I had some accident damage repaired by them last year and was pleased with the result, but I don't think they are listed for the roof repair.

Alan
Thanks for the heads up. I'm off to Spain next week so I won't be pushing for a fix for a few months. I checked in this week and was told that I'm one of 8 waiting for this roof fix at the Swansea VW centre - my local site for carrying out this work. If there is no progress I'll be trying other locations. If VW Heritage is out of the frame my next try will be south Hereford. A friend deals with them for Transporters and has found them very helpful.
 
Noticed today that my seal no longer seals, anyone else experienced this?

A previous repair for us produced this problem plus a very long list of other dire problems which I would rather not discuss as it was very very frustrating and stressful getting the van ship shape. You’re right Matt this ain’t good and needs sorting. Claridges in Southport done an excellent this year to rectify our long list of faults. We are in Devon, so it says a lot when VW have to ship the Cali way up north to get a good outcome for the customer. My point being, if it doesn’t look right, it very likely is not, and not been completed to the correct standard. Personally if I found that I’d be going over it with a sharp eye, or getting an independent report done. I’m lucky being an ex engineer, however most things come down to common sense. We were without the use of ourCali for 13 months because it was either in a body shop or not roadworthy. But I am very pleased we stuck to our guns now; writing a long letter of complaint to HQ Germany after we hit a wall with VWCS UK got things moving for us

bb163564ec424ab1a61b82bbd0c5f328.jpg


Sent from my iPhone using Tapatalk
 
I had photos taken at my local dealership for corrosion end of December 2018
With the hope of a replacement sagging rusty roof seal, minor blistering above roof seal line also visible
My vehicle was serviced a coupe of weeks ago and dealer was going to carry out in-house repair to roof which horrified me (long story)

I had a phone call last week from VW customer care to say I have a collection date for repair October 2020 and let my dealer know if Curtesy vehicle will be needed
I just hope I get a replacement roof seal.......I can’t seem to get a positive answer up to now!

Alan
 
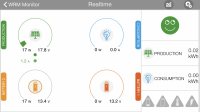
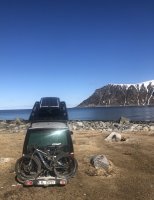
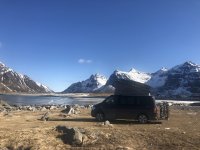
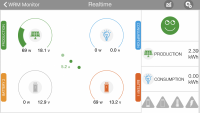
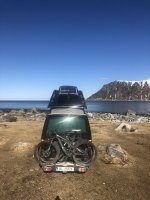
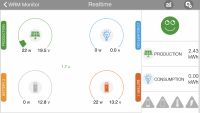
Happy smiley face from the Solar Charge Controller today with a North facing beach Evan at 62 degrees North.
593F4DFF-D387-443F-94F2-8934E0B901CC.pngB2BE1B51-8C9B-4A05-A351-773F234A0E14.jpeg9CAA3164-9FB4-456D-823F-EEF1A2DB5E68.jpeg
 
F2B06F3A-C954-4B19-A549-0541C2578209.png
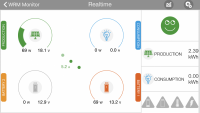
Clear roof panel giving 69 watts
61E21973-72E4-44A6-827D-960D148E9A7F.jpeg
I did a little test and left the brush on top of the panel.
2A41249E-F64B-4576-AD2D-79BD1275A055.png
Result is significant (disproportionate) reduction in power.

Worth remembering if you are in a partial shade and possible confirmation that things like a single roof bar would impact on solar performance.
 
Made an appointment for maintenance on my Cali beach T5 140ps MY 2015 here in Belgium. I was told there was a "VW Warranty replacement" action code active. When asked what it was for, they said "Roof corrosion". I then said I read about it and asked how long it would take. They answered: this is just a basic checkup/fix, when thorough repairs are necessary you'll have to go to another dealer/workshop.

I never saw any roof corrosion on mine, must say I never looked under the seal. Guess I will now, reading this thread.
But the good news is VW seems to finally accept there is a structural issue and start proactively investigating those cali's that have not yet reported anything before the damage gets bigger.
 
October 2020
Seriously October 2020!! That's ridiculous.

I wonder if the workshop action has turned up so many that need to go to a bodyshop that the waiting time has shot up again. That sort of wait was what people had to put up with a few years ago.

We had ours done last year and it was probably 3 or 4 months from them saying they would do it to it actually being done and part of that was that we delayed it as we were away.
 
My 2012 Cali SE was serviced recently, a roof inspection was made, and I’ve now been invited to book it into the body shop for unspecified remedial work. The roof is in decent shape after 6 years, with just a few tiny areas of paint bubbling on the front section, and a single small patch on the raising roof, some distance from the seal.

I assume they want to apply the tape under the raising roof seal, and the heli tape to prevent rubbing at the front. It’s not clear to me if any work on the front panel is planned.

Having followed this saga from the beginning, it’s obvious that VW still haven’t come up with a good long term fix, and the reports of shoddy workmanship, poorly refitted parts, malfunctioning roofs and reappearing paint blisters following the repair don’t fill me with confidence.

Therefore I’m thinking of not having the work done, and dealing with the problem at some point in the future, probably using a reputable paint shop with experience in finishing aluminium panels.

Am I worrying too much? Is it crazy to pass up VW’s free fix? Does anyone have any positive experiences?
 
Back
Top