Buy all your VW California Accessories at the Club Shop Visit Shop

2 years a California

Alfokla

Alfokla

VIP Member
Messages
36
Location
Belgium
Vehicle
T5 SE 140
In a few weeks I can celebrate the 2nd birthday of my California. After 2 years, I noticed I don’t change too many things anymore, so I guess I am quite well settled down right now.
So it seems to be a good moment to share how I live in my California. Maybe there are some useful ideas for others.

Good to know is that I have a LHD Cali and I am traveling alone a lot, or with a friend. (max. 2 people, no children). So some of my choices will probably not be the best for families with kids.
I work part time (50%), never on Monday and Friday, so I make a lot of short trips (long weekends) to go walking or mountain biking. Due to the short trips I have hardly any issues with lack of space and can afford to take some “non-indispensable luxury items” with me. I always stay on campsites. When I return from a bike tour, covered with mud, I can appreciate a shower.

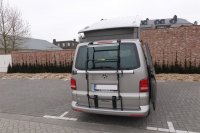
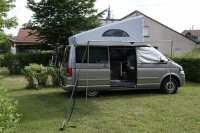
This is my Cali. I have no wind-out awning and I always use a cali-Topper.
00 DSC01116.JPG
 
let’s start the tour with the kitchen:
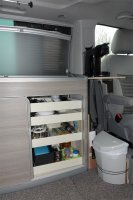
In the right cupboard, under the sink I removed the original drawer and shelf and made 4 new drawers.
01 lade 1.JPG


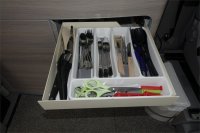
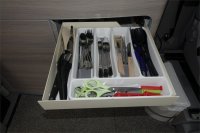
The upper drawer is for cutlery:
02 lade 2.JPG

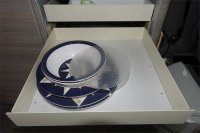
In the 2nd one I store the plates. I cut round parts or IKEA VARIERA drawer mats and put them between the plates to store them rattle free.
03 lade 3.JPG


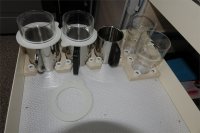
In the 3rd drawer I made a cup holder. Piece of wood, with hole larger than the cups and dampers to hold them in place. With the white IKEA KORKEN seals, I hang the glasses rattle free in the cups.
04 lade 4.JPG


These drawers are really convenient. You don’t have to sit on your knees to take something out of the back of the cupboard, and , as I always forget something after setting the table, I can now, sitting on the bench, reach under the table, pull out a drawer, take out whatever I need and push the drawer back. For me it is one of the best things I made in the Cali.

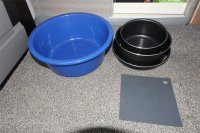
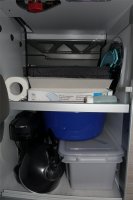
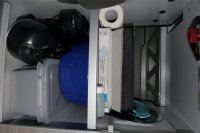
In the left cupboard I store the pots and pan in the blue washing-up bowl. On the bottom of the pots I put IKEA 365+ HÄNGSYREN pot stands to protect the Teflon coating and keep them rattle free.
06 kast links 2.JPG


When I expect to have 10 Amp hook up, and have plenty of free space, I also take a small Senseo machine, but this is the first thing to stay at home when I can’t put away all the things I need.
05 kast links 1 .JPG

02 lade 2.JPG

05 kast links 1 .JPG
 
Last edited:
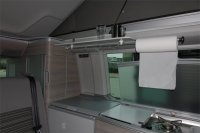
Above the kitchen unit, I have a this shelf: http://www.calitop.de/RegalLinks2.html

It’s good, because you have always a lack of space to put things away. Just don’t forget to remove high objects from the shelf before lowering the bed. Also the kitchen role carrier looks nice, but here I have some 2nd thoughts: 1 don’t let the paper hang as low as on my picture before you light the gas to put the kettle on. 2. The kitchen role hangs just in front of the main kitchen light, so it takes away some light.
07 keukenschap 1.JPG


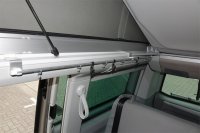
From the same house I have these hooks on the other side of the van.
08 keukenschap 2.JPG


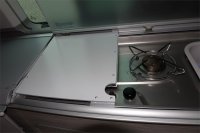
From the material of the shelf from right cupboard under the sink, I made this cover. Handy to put things on when I only need one cooker. When I need both cookers, I place it behind the work top. It can stay over the cooker when closing the work top.
09 keukenschap 3.JPG


And of course I also have a set of Andy’s work top protectors….
 
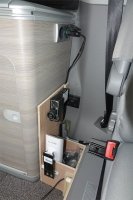
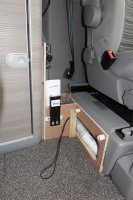
To the right of the kitchen I have my “technical unit”. Well… a few pieces of plywood squeezed between the kitchen and the driver’s seat. On the left wall I mounted a unit with 12V sockets and behind it an iBoost router. In the box below are the power supply, Ethernet cables, the suction mount and the antenna for the iBoost.

In one of the 12V sockets I have a 12V to USB adaptor. When you buy such an adaptor, don’t go for the cheapest as they probably have an USB output of only 1 Amp. This might result in slow smartphone/IPhone charging, and probably no charging of tablets/IPads at all. The better ones have an output of 2 or 2.1 Amp. When not in use these things use some power and drain the battery in the long term when they remain in the socket. To prevent this, I pull it forward for a few mm to break the contact.

To the right I have a dust bin (see image above). Yes, I know, some of you don’t like dust bins in a Cali. It’s only fixed with a small elastic cord so it can be removed very fast. But until now I could resist the urge to do so. In fact I am quite happy with it…
1_DSC02086.JPG
2_DSC02087.JPG


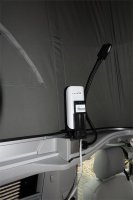
When there is a WIFI signal available on the side or the front of the van I mount the iBoost antenna in this location. When there is nothing I try outside (rear of the van), or put it away and read a book.
3_DSC02106.JPG
 
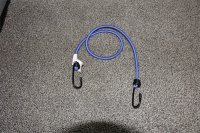
Above the front seats I use this a clothesline.
3a_DSC02088.JPG

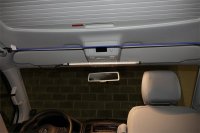
I long dark evenings I like to have some more light above the front seats. Especially with Comfortz’s (outstanding) Thermal Windscreen Cover. For the moment I use this LED bar. It’s a light for under kitchen cupboards, bought in a DIY shop. As operates at 12V light so I discarded the supplied 240V/12V adapter and connect it to one of the 12V sockets. With an elastic cord I fix it to the sunglasses holder under the camper unit. I am still looking for a more elegant and permanent solutions here.
4_DSC02147.JPG


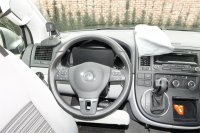
To listen to music I have a Cambridge Audio “Minx Go” portable speaker: https://www.cambridgeaudio.com/products/wireless-speakers/go

I put it with an MP3 player on the dash behind the wheel, well in reach but out of the way.
1_DSC02108.JPG


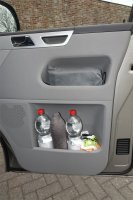
When not in use it sits, in its pocket with the MP3 player, in the passenger’s door. In the lower pocket of the front doors I keep some spare bottles of water. The moving PET bottles can make an annoying squeaky noise. An old sock over the middle one makes an end to this.
2_DSC02089.JPG
 
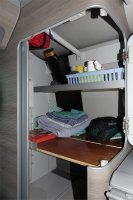
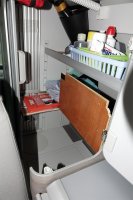
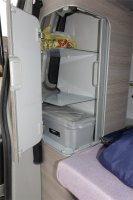
In the rear cupboard, I made 2 shelfs
1_DSC02121.JPG


I can lift a part of the lower shelf to access the bottom.
2_DSC02124.JPG


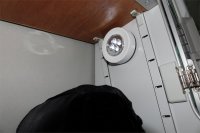
I use these battery operated lights. They came packed with 3 in the Aldi. It was meant to be a temporary solution and install more permanent 12V lights, but as I use them each time for a few seconds only to take something from the cupboard, the batteries last for 2 years already. 3_DSC02122.JPG


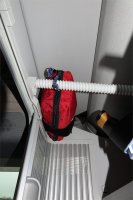
With some rope and Velcro straps I fixed my first aid kit above the sliding door at the inside of the cupboard. It’s a bit fiddling to put it there but I don’t need it often. Its available and out of the way. Probably not the best choice for a family with kids when you have to do daily repairs on scraped knees or cut fingers…
4_DSC02123.JPG
 
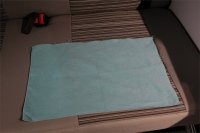
This is my towel for showering. A piece (approx. 30x40cm) cut from a microfiber towel. To dry myself I use it as a chammy: dry one arm and squeeze out the water, dry the other arm, leg chest,.. and each time squeeze. I finish with a small cotton towel to have a nice dry feeling. This one takes hardly any water. Each time I am surprised how much water you squeeze out after drying one body part (arm, leg, chest,…) a normal towel absorbs all this water and when you have to dry it in bad weather in the Cali, all this water will be dissipated in the interior and must be evacuated by ventilation. After use I rinse my small towel under the tap, squeeze out the water and in the Cali it is dry after an hour or so.
4a_DSC02149.JPG
 
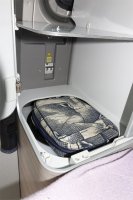
In the rear cupboard I have a little bag with some tools (screwdrivers, pliers, Allan keys, torx keys,.. for bike repairs. Also when I don’t take my bike they can be useful.
5_DSC02139.JPG


In this Allibert box I have some bike stuff (chain locks, pump, brushes, degreaser, oil, lube, …) it stays at home when I go without the bike.
6_DSC02138.JPG


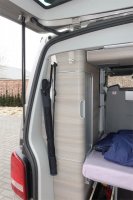
The umbrella hangs on an IKEA hook, clipped over the top edge of the cupboard.
7_DSC02137.JPG
 
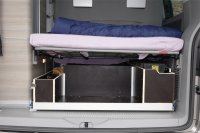
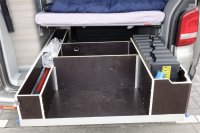
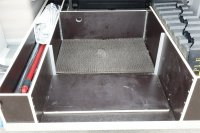
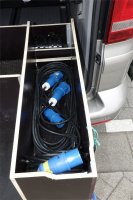
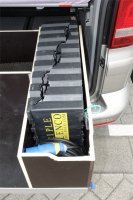
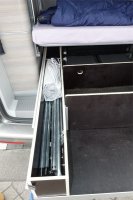
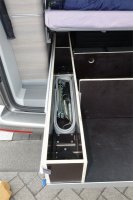
In the boot I made a large drawer. Left part is for the awning (I don’t have a cassette awning). The right part for leveling ramps and the middle part for backpack, walking/biking boots,…)
1_DSC02128.JPG
2_DSC02130.JPG


When I have bigger items for the middle section, I can slide out the panel
3_DSC02133.JPG


The box on the right is for the ramps. A have cut up a 25m hook up cable in 2 pieces of 12.5m. In most cases 1 part will do. One part sits under the ramps, the other in a small roll in front of them them. Behind the ramps I have a small space to fit 2 foldable wheel shocks. The height fits under the bed shelf in its lowest position
4_DSC02131.JPG
5_DSC02132.JPG


The left box is for the awning. As the poles are longer than the boot, the box fills the space between the bench and the folded table.
6_DSC02135.JPG


Under the poles are the pegs, storm straps, kador strip and a hammer.
7_DSC02136.JPG


Only the long left box is fixed with one bold to the drawer. All the other part can be taken out without tools to have one big flat drawer. Removing the complete drawer is possible but requires some effort.

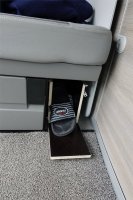
The left box is longer than the awning poles, so I had some space left. With the drawer closed it aligns with the front of the bench. For the moment I store some plastic bags and shower slippers in it. Maybe someday I’ll find a better destination for it.
8_DSC02113.JPG
 
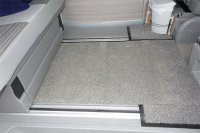
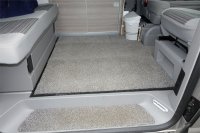
The carpets on the floor are regular doormats. They are sometimes available at Aldi or Lidl. The largest size was too small so I needed 2 of them., I cut the width of the left part a bit smaller than the distance between the bench rails. DSC02109.JPG


To make the bed, the front part (to the right on the image) stays in place and I turn the left part 90°, place it between the rails and the bench slides over it.
DSC02110.JPG
 
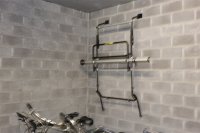
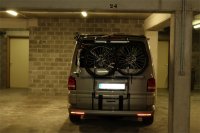
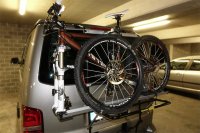
I have this bikerack: https://paulchensystem.net/products/de/heckträger/volkswagen/bus-transporter-t51.html

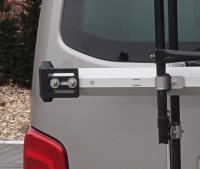
It comes with 2 rails and clamps. Possible to add a 3rd rail and for a 4th one an extra extension is needed. Most of the time I have only one bike on the rack so I mounted only one rail. Advantage over the standard Cali rack is that you don’t have to reach so far to mount the bike in the 1st rail..

They have optional wall mount brackets to hang the rack on the wall when not in use.
2. DSC02076.JPG


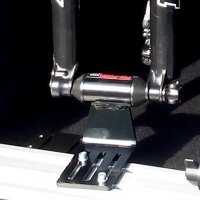
I bought a Fix-fork quick release holder and bolted it on the rail. http://fix-fork.com/
3. fix-fork-15-mm-qr15.jpg
6. DSC02112 - kopie.JPG


With the fork clamped in it and the saddle lowered the bike doesn’t come higher than the roof. I can mount the bike on the rack in the car park of our apartment building. With one bike on the rack I can raise the tailgate without bike parts touching the canvas of the roof. In summer the tailgate stays (just) open at its own. (But I wouldn’t let play children under it!!)
4.DSC02081.JPG
5. DSC02080.JPG


Compared to the VW bike rack it has one major drawback: it is ugly. But I choose for the functionality.
1. DSC02112.JPG
 
Recently I bought this for the colder evenings/nights. http://www.shop.ecomat2000.de/collections/frontpage/products/ecomat-2000-version-classic-plus

It is expensive but excellent build quality. Safe, no smell and in the lowest setting hardly any sound. It is built for continuous operation. It has 3 power settings: 450W (suitable for 2 Amp. hookup), 750W (4 Amp.) and 1800 W (10 Amp.)
DSC02126.JPG

Of course the diesel heater of the Cali works good, but this one makes less noise and doesn’t smell. I use both: the diesel heater to heat the van quickly in the morning or when returning from a walk, then change over to the ECOMAT.

Good for Beach owners, not indispensable for SE owners.
 
Thankx for sharing!
Got also the ecomat electric heater , so small and works realy good and safe!
And you can use low wattage if not much power is provided on site....

The pack you store under the loose shelve in the rear wardrobe above the gasbotlle is a good tip , must look in to that.

But one thing , did you by chance now how much wieght you added with all that wood/ multiplex ....?
Think there are better materials , read: lighter but probally more expencive.

We also travel two and a dog and think thats a plus , can't see me carrying gear for four people in a Cali , you need roof-or towbarbox imo.

Also nice your bike not exeeds the hieght of the Cali ...toll roads and hieght barriers.

Tip:
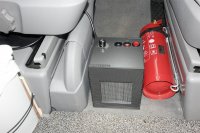
Relocate the fire extinguischer to the front rear off the passenger/right seat , does not bother the passengers space and gives more space between the seats;)
 
Last edited:
@hotel california You have a point with the weight. As we only travel two I didn't worry too much. I didn't calculate the weight. The drawers in the kitchen are made from Dibond (bottom) and Aluminum L-profiles (front and side walls). But the construction in the boot has a lot of wood and also a considerable weight for the guides and the aluminum construction.
Good idea for the fire extinguisher.
 
Great review. Thanks. Nice simple idea to use a bungee cord for a drying line. I'm going to use that one!
 
Great review. Thanks. Nice simple idea to use a bungee cord for a drying line. I'm going to use that one!

I got a line between the attatches in top of the pop-top where the safetynet fits , to dry things inside when the roof is up...
The bungee between the handles in the cabinspace sure is yet another good tip:thumb
 
@hotel california You have a point with the weight. As we only travel two I didn't worry too much. I didn't calculate the weight. The drawers in the kitchen are made from Dibond (bottom) and Aluminum L-profiles (front and side walls). But the construction in the boot has a lot of wood and also a considerable weight for the guides and the aluminum construction.
Good idea for the fire extinguisher.

Sure the weight in your case is'nt a prob. trvavelling solo or just two , but any weight non to carry is better.
The Cali got already lot of weight on the rear axel.
Did you read my topic ?
https://vwcaliforniaclub.com/threads/inside-the-hotel-california-for-your-eyes-only.9776/
But actually some things are already diffrent than when inposted it , but in general it is still likewise....
You can see my fire extinguischer....
 
Thanks for taking the time to share Alfokla - some great tips!
 
All very informative
Some good ideas there Alfokla
Your Carpet outlay I liked,but got me wondering about carpet tiles as a budget solution,if they were fitted between the seat runners would the seat draw be able to glide over the top (saving the need to move carpet) ?
Also spares could be kept for any accidents
Just thinking out aloud,not a criticism

Alan
 
Hi Alan. I have no problem with the seat draw gliding over my carpet. So with tiles could work also. Depends on the thickness.
I my case I wanted something that covers the seat runners: 1. more comfort not standing on the cold aluminum runners with bare feet. 2. prevent sand goining in the runners. (although I had never issues with that before I had the carpets)
Also the carpets are not too big, so easy to take out and shake off the sand/dirt.
When I wanted something that keeps the runners free, I might consider the (very expensive) Brandrup or maybe these:
http://www.california-camping.de/vw...-edelvelour.html?___store=en&___from_store=de
 

Similar threads

Back
Top