Buy all your VW California Accessories at the Club Shop Visit Shop

BRANDRUP ISO-TOP VI INSTALLATION - Questions!

t6.1

t6.1

Messages
68
Location
UK
Vehicle
T6.1 Ocean 150
I recently did an install and wrote up some instructions:

Here's some things I'm not sure about:

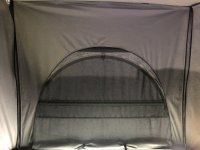
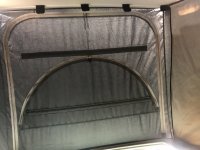
1) It's mentioned that to close the roof, the front needs to be open. Does this mean take the whole thing off, or…
IMG_5376.jpg

Just open this bit?
IMG_5383.jpg

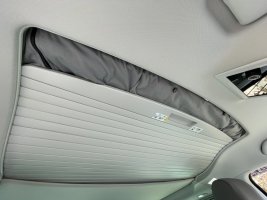
I tried just opening and rolling down this section, but the roof didn't close fully :\

Also, where do you then put the rolled up bit / front section when closing?

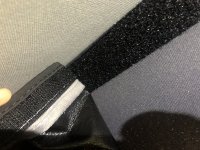
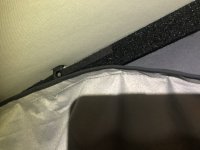
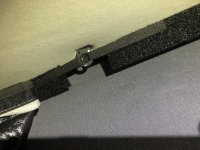
2) Maybe just a design improvement here, but I'm wondering how other people did this bit.
- If you go high with the velcro on the material it doesn't get attached here due to the 'folded back' none velcro material.
- If you go low just under the 'folded back' section you then end up with a gap at the top.
-- I think there's a few rooms for improvement here. 1. Make the velcro on the material the same height as the velcro it's attaching to. 2. Have the 'folded back' material double coated in velcro so it attaches all the way along.
IMG_5379.jpg
IMG_5378.jpg
IMG_5380.jpg

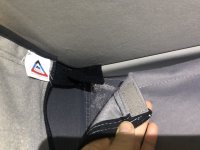
3) Any reason the tabs that go in the front are double the size of the velcro they attach to? Maybe so you can attach slightly lower to allow some air in?IMG_5382.jpg

4) After managing to install and going back to check on it the next day, the back left corner was all wet :( I'm wondering if anyone else has this? or could it just have been due to having left the roof up for 2 days and condensation built up inside?IMG_5377.jpg

Thanks in advance for any replies!
 
Last edited:
I see you have a T6-1 Ocean. Whilst I haven't fitted a Brandrup Isotop into a T6-1, I doubt if it is that much different to the T5-1 SE and 2 x T6 Beaches that I have fitted them to. However, judging from your photos I suspect the lastest Isotop has been altered slightly as certain fitting aspects appear to be different to how I remember it.

1. I have never opened the vents or the two vertical zips at the front of the roof when lowering and I have never experienced any issues. Be sure to open a door or window on the leeward side before lowering though. I'm not saying that you should do as I do but merely making a comment.

I don't recognise the wide band of velcro running along the top of the sides in your photos so unless my memory is playing tricks Brandrup have changed the design. So I can't help you with questions 2 and 3.

With item 4, someone recently posted about rain coming in through the canvas in extreme conditions. I can't recall which model or year it was but it can happen. My experience is that it doesn't get in past the Isotop. If the van roof is left up then condensation could form especially at this time if year.

Sorry I can't be more help.
 
I recently did an install and wrote up some instructions:

Here's some things I'm not sure about:

1) It's mentioned that to close the roof, the front needs to be open. Does this mean take the whole thing off, or…
View attachment 69946

Just open this bit?
View attachment 69947

I tried just opening and rolling down this section, but the roof didn't close fully :\

Also, where do you then put the rolled up bit / front section when closing?

2) Maybe just a design improvement here, but I'm wondering how other people did this bit.
- If you go high with the velcro on the material it doesn't get attached here due to the 'folded back' none velcro material.
- If you go low just under the 'folded back' section you then end up with a gap at the top.
-- I think there's a few rooms for improvement here. 1. Make the velcro on the material the same height as the velcro it's attaching to. 2. Have the 'folded back' material double coated in velcro so it attaches all the way along.
View attachment 69948
View attachment 69949
View attachment 69950

3) Any reason the tabs that go in the front are double the size of the velcro they attach to? Maybe so you can attach slightly lower to allow some air in?View attachment 69951
4) After managing to install and going back to check on it the next day, the back left corner was all wet :( I'm wondering if anyone else has this? or could it just have been due to having left the roof up for 2 days and condensation built up inside?View attachment 69952

Thanks in advance for any replies!
1/ Unzip the whole front bit, but not detach completely, and let the material hang down. Close the hatch to within 15 cm and push the extra fabric in over the other side of the hatch. Fully close the hatch.

2/ it never bothered me but good tips, thanks

3/ not all Calis are exactly the same measurements, perhaps it’s incase some can take up more of the tab than others or some front parts are taller.

4/ I’ve never had that problem.
 
1/ @Elly Swanson thanks for your reply, I'm wondering if you have buttons on yours and if you have a solution to stop them catching as you shut it? Also, I find it tends to generally get a bit bunched up and difficult to close, I'm wondering if you encounter this?

IMG_8584.jpg
 
1/ @Elly Swanson thanks for your reply, I'm wondering if you have buttons on yours and if you have a solution to stop them catching as you shut it? Also, I find it tends to generally get a bit bunched up and difficult to close, I'm wondering if you encounter this?

View attachment 76630
We have buttons too. It’s been so long that we’v e done it, I’ve forgotten what we do. Bloody lockdown!
Will get back to you on it.
 
if of any help, I too unzip completely and detach the side zips at the corners bottom right and bottom left the front panel, leaving it hanging down attached only with the Velcro at the bottom.
I then close the hatch partially, then fold the sides left an right of the front isotop panel, and just a little at the top part part of the panel (side opposite to the bottom velcro) and tuck it under the part of the hatch that I already partially closed.
This is because there is already a bulk of fabric from the front and the side of the tent, forming sort of a "U" of fabric at the front with the open part of the "U" towards the back. There I place the folded top part of the front isotop panel. Then with one hand pressing/holding the panel in place and with the other shutting the hutch. Yes the buttons can get caught, no solution other than being careful when shutting the hatch.
 
Hi,

Is this a real problem or just a minor irritation? I haven't fitted mine yet as I dont have my van yet, but i bought for the benefit of its "fit and forget" nature and it sounds like its now quite cumbersome to put the roof up and down, which is something i expect to be dong daily so amy need a rethink before i fit it.
It's a minor irritation. Some procedure to get used to. But you are right, it is a bit less "fit and forget" then previous versions were, but you have the advantage of being able open the front fully. I did find this quite useful in hotter climates.

It still remains way way quicker and less faff than any external cover.
In summer, you may decide to remove the front panel completely as the need for thermal insulation is not as strong as in colder months.
 
Hi,

Is this a real problem or just a minor irritation? I haven't fitted mine yet as I dont have my van yet, but i bought for the benefit of its "fit and forget" nature and it sounds like its now quite cumbersome to put the roof up and down, which is something i expect to be dong daily so amy need a rethink before i fit it.
Something you need to think about in the beginning, at worse a minor irritation if things like this bug you. But it’s one of those things that you find a way that becomes intuitive and you don’t need to give it any thought anymore.
 
if of any help, I too unzip completely and detach the side zips at the corners bottom right and bottom left the front panel, leaving it hanging down attached only with the Velcro at the bottom.
I then close the hatch partially, then fold the sides left an right of the front isotop panel, and just a little at the top part part of the panel (side opposite to the bottom velcro) and tuck it under the part of the hatch that I already partially closed.
This is because there is already a bulk of fabric from the front and the side of the tent, forming sort of a "U" of fabric at the front with the open part of the "U" towards the back. There I place the folded top part of the front isotop panel. Then with one hand pressing/holding the panel in place and with the other shutting the hutch. Yes the buttons can get caught, no solution other than being careful when shutting the hatch.
Many thanks, this sounds very similar to what I'm currently doing. Sometimes it seems to work great, sometimes it seems extra fabric gets caught and then when I check the roof, it's not closed fully.
 
Many thanks, this sounds very similar to what I'm currently doing. Sometimes it seems to work great, sometimes it seems extra fabric gets caught and then when I check the roof, it's not closed fully.
To be honest I am going take the front panel out going forward it’s just to much chew trying to fold it perfect to get the roof blind closed,I have recently just left the blind open a fraction but looks a bit of a mess,still worth it really makes a difference in my opinion
 
To be honest I am going take the front panel out going forward it’s just to much chew trying to fold it perfect to get the roof blind closed,I have recently just left the blind open a fraction but looks a bit of a mess,still worth it really makes a difference in my opinion
I'm with you on this one! :)
 
1/ @Elly Swanson thanks for your reply, I'm wondering if you have buttons on yours and if you have a solution to stop them catching as you shut it? Also, I find it tends to generally get a bit bunched up and difficult to close, I'm wondering if you encounter this?

View attachment 76630
The Trick to (1) We found on our late T6 (one with the full drop down front) is to unzip the front isotop to within say 1/2 inch of the bottom. then
  • Detach from the top velco pads at the front and let drop
  • Fold in half so the top velcro of the isotop now sticks to the bottom of the isotop front
  • fold in half again like this x2
  • Loosely (and loose is the key) attach the elastic at the bottom of the isotop front to the buttons
  • Allow loosely rolled up isotop front to hang down
  • Close the roof
  • Once roof slider is mostly closed.. gendtly tuck the loose isotop front in
  • Close roof slide some , tuck in more, more and close.
Doesn't take too long at all for us and repeatedly has worked fine without catching or trapping.
I'll see if I can get a picture in the next few days..
 
Hi,

Is this a real problem or just a minor irritation? I haven't fitted mine yet as I dont have my van yet, but i bought for the benefit of its "fit and forget" nature and it sounds like its now quite cumbersome to put the roof up and down, which is something i expect to be dong daily so amy need a rethink before i fit it.

I have a T6 - for me it is one of the best things we bought - and is fit and forget. I just put the roof down and slide the shutter across. All goes down easily!


Sent from my iPhone using Tapatalk
 

Similar threads

Back
Top