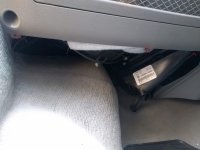
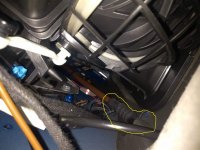
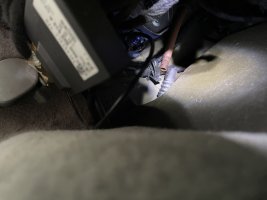
Roof drains

I have a similar issue to @steve_b. Any chance of some photos of the two black metal parts you are referring to that can be removed to reach the outlets?
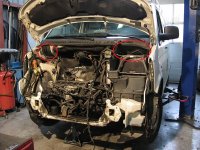
Cilinderkop-monteren-VW-T5-2.5-TDi.jpg
I have taken half the engine out to show you guys.
Can someone help me a hand to put it back together?


It's not mine of course. All credits go to our best friend Google again.
 
View attachment 59544
I have taken half the engine out to show you guys.
Can someone help me a hand to put it back together?


It's not mine of course. All credits go to our best friend Google again.
Looks like a job for a professional!! Thanks for the photo though, I will do a bit of tinkering at the weekend
 
Looks like a job for a professional!! Thanks for the photo though, I will do a bit of tinkering at the weekend

Just had a look in the twilight and it looks like the panel above the battery is held on by two bolts so I recon I would take a chance on that, thanks. Will report back with words and pictures if I succeed.
 
It really isn't more than two hexagon screws, so it's not such a hell of a job. The worst part is to get to the bolts under the plastic trim. The side trims should come off, but I didn't. I just pulled off the rubber strip alongside, and opened the gap to unscrew them.
 
I have a set of bike tools so some very long T handled hex heads in various sizes which look like they will fit through the gap in the trim and probably fit without unnecessary bending or swearing. Hopefully :)
 
Right, I have made some investigation but would appreciate a confirmation before I commit to something

For info, the front drains as triplebee states seem to discharge rather bizarrely into a compartment of the engine bay that is hidden under the windscreen scuttle panel - they just discharge into an area that is full of leaves, other detritus (mine had an old bic biro and a cigarette lighter) then finds its own way to the ground.

The drivers side (UK vehicle, 2008 SE) drain is behind the battery and this is the one I was having trouble with.

front-access-panel.jpg


the panel behind the battery is secured by two T30 screws (circled in red) and you can see a bit more by pulling off the rubber seal (yellow line - you can see the seal sitting below)

Access to one is awkward - but do NOT make the mistake I did and tried to unscrew the nut underneath because as far as I can tell, that nut is welded to the plate, not a loose one . oops

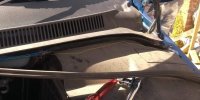
However - to actually see anything you don't need to do any of this - the windscreen scuttle with the vent holes in just pulls off fowards (green arrows).

That allows you to see inside the compartment behind:

the outside-drain.jpg

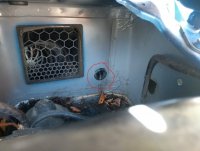
So this view is looking over the battery after lifting away the scuttle - you can see the detritus on the bottom and the vent hole outlined in red. When you pour water in the channel on the roof , it pours out of this hole, which is part number 6X0877236A as far as I can see - the device that is meant to hold up some water and let it all go at once - presumably to flush any crud through rather than have it continually running slowly.

I tried cleaning the visible part by sticking pipe cleaners up it but didn't make any difference. I also couldn't pull it through, maybe it is fitted from the rear...
 
I Trimmed the valve with some side cutters it helped the flow
 
So my investigation turned to the interior - there is a panel in the passenger footwell that looked the easiest and least destructive to access. Three torx screws later (two ringed red one with an arrow) and the panel just pops out.

internal access panel.jpg

This allowed me some quality time lying on my back in the footwell

This picture is looking upwards - the orange pipe next to the red line I believe to be the drain tube coming down from the A pillar and the yellow highlighted part is the back of the drain piece that we could see the outlet of in the compartment behind the battery.

internal drain tube.jpg

So the big question is - what do I do next! I assume I have to take off the yellow highligted item but not sure whether it is taken out from the inside or outside of the vehicle - and once I do that I will have a drain pipe venting into the footwell so it needs to go back or I need a replacement to hand :)
 
I Trimmed the valve with some side cutters it helped the flow

interesting - what did you trim off and did you have to remove it from the vehicle to do so or could it be done with arms through the scuttle?

Thanks
 
sorry to be rude but i liken the valve to a fanny i trimmed the lips to make the hole bigger without removing them its just a rubber valve that opens when there is enough water behind it thats why you sometimes get a gurgling sound. It did help in my case
 
I don’t think I can get that mental image from head now...

could you get your hoover pipe in there and suck on the fanny valve?
 
sorry to be rude but i liken the valve to a fanny i trimmed the lips to make the hole bigger without removing them its just a rubber valve that opens when there is enough water behind it thats why you sometimes get a gurgling sound. It did help in my case
Didn't know you had a Brazilian VW Kev.
 
interesting - what did you trim off and did you have to remove it from the vehicle to do so or could it be done with arms through the scuttle?

Thanks
Sometimes the rubber of the valve becomes sticky with time and dirt. I've had success using a silicon spray and Pledge Spray furniture polish on the inside so the valve lips no longer stick together. EITHER WILL DO.
 
Sometimes the rubber of the valve becomes sticky with time and dirt. I've had success using a silicon spray and Pledge Spray furniture polish on the inside so the valve lips no longer stick together. EITHER WILL DO.
So no need to trim, just use a really good lubricant!!
 
I try to use a small tube that fits in the hole, and flush it with water pressure (hand pressure, no machines!!!).
Something like this:

View attachment 56084

Like a nose sucker or something.

This post saved the day for me. Thanks TripleBee.

I usually just used a bag tie or paper clip (carefully). Must have omitted cleaning the roof drains all winter, and found one blocked some days ago. Thankfully, there was no water ingress. I tried strimmer cord, electric cable coat, TV ariel wire and syringed water in with force. Felt like a cardiac surgeon up the ladder trying to insert stents, but finding the vessel blocked! I could get nothing in further than 2”. Nothing would go round that bend and down the pipe.

Thanks to this forum and all the suggestions and discussions I tried this ear syringing gadget and was able to poke it into the orifice with a tight fit and give a good finger pressure blast of water. I felt it “give” and heard gurgles around lower windscreen area. Success!

612BAE5A-3FE5-4A0D-9AD1-FE76B8CDE627.jpeg
 
Last edited:
I’m still in trouble with roof drains. Seems that the driver’s corner drain tubing is disconnected from it’s outlet as there is a leak into roof lining.

The next step is to strip the pillar, but for several reasons I’m not going to do this, not least the fact that we have incessant rain these days. I’m using a wedge to raise the faulty quarter and it’s working.

I wonder if anybody can advise on any problem that might arise if I simply PLUG the drain hole? I could cut a rubber bung that can be removed. It would mean all water in channel would drain by the rear drain hole, which is clear.
 
My guess (from having a blocked drain) is that if you don't forever park on a favourable slope the gutter will overfill and water will come over the top and into the head liner at the top of the pillar so you would be no better off.
 
Reviving an old thread here. Having just purchased a LHD T5 California I too noticed the drivers footwell was wet. Upon further investigation and after reading the extremely helpful posts on this forum I managed to pin the leak down to the drain tube where it goes into the grommet taking it out behind the battery tray as per the photo. Really happy to have identified the issue so quickly but I am struggling to locate the drain pipe back Into the grommet inlet. The pipe is sitting flush with the orifice and there’s no additional give in the pipe to locate it. Has anyone else come across this same issue? If so, what did you do to resolve it? I’m thinking I can sleeve the two ends with a slightly larger diameter pipe as a last resort but just wanted to hear your thoughts based on experience.
TIA Alan.
88A30B84-1F29-4F73-8014-CE22937EAB4F.jpeg
 
i'd be starting with a piece of small diameter tube. trouble is, it has to give a good tight fit on both ends as the black device is would seem is designed to back water up until a certain pressure is reached . So maybe a short piece of plastic hose can go inside the brown tube, and then a tie wrap round that and the black grommet end to keep it tight.

the sort of tube I would be looking for would be used as fuel lines in lawnmowers, syphons for fish tanks or tubes for hand pumps. Might be able to rob one from an empty hand-pump soap dispenser :)
 
Thanks, seems we are thinking along the same lines. I also tried removing the grommet, attaching it to the pipe then pushing it back through the bulkhead but the pipe’s too short and came dislodged every time. I may look into removing the a pillar trim and making sure the drain pipe isn’t snagged/pinned anywhere which could have caused the pipe to pull out in the first place - scary stuff with the blinds/clips involved!
 
or go cheap and keep a bucket in the footwell

-edit- although I would be messing about with plastic tubes for a long time before I could be convinced that removing the trim was a good idea. Although I have removed the sliding door panel trim and the rear window trim, but it scares the life out of me every time
 
Yeah, I will be looking to remove both of those panels in the near future too. (Tailgate window blind is jammed and sliding door panel is rattling quite badly) - all good fun!
 

Similar threads

JohnCalifornia
Replies
14
Views
3K
Taff Tenor
Taff Tenor
Jabberwocky
Replies
0
Views
1K
Jabberwocky
Jabberwocky
S
Replies
11
Views
2K
mrcheesbrough
mrcheesbrough
Billywizz
Replies
8
Views
2K
Jabberwocky
Jabberwocky

VW California Club

Back
Top