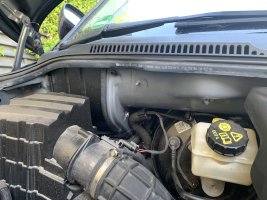
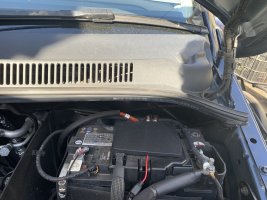
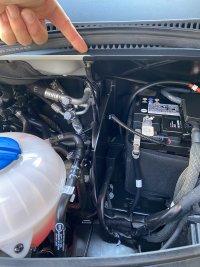
Roof drains

. Has anyone else come across this same issue? If so, what did you do to resolve it? I’m thinking I can sleeve the two ends with a slightly larger diameter pipe as a last resort but just wanted to hear your thoughts based on experience.
TIA Alan.

I’ve just found my passenger mats wet and found this thread.
same issue with the pipe being disconnected & too short to reach the rubber elbow.

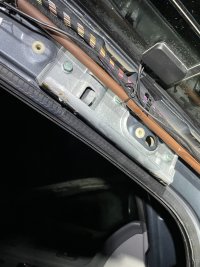
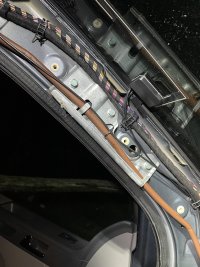
turns out that the drain pipe had been clipped up with the electrical wires in the A pillar and so ran a longer route.

unclipped and shifted it to what appear to be the correct metal clips. Freed up the pipe, all connected properly again & fingers crossed problem solved. HTH.

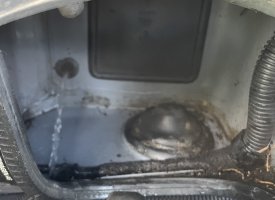
wrong!
1D782503-4957-48AF-BC21-04C93F036634.jpeg

right!
8520308E-F18B-4E16-ACFE-58C833A1A620.jpeg
 
An old thread I know but it’s topical at this time of year. I had a look at mine and both the front drains were blocked. I used my portable garden sprayer and squirted some water into the top drain points……. Worked like a dream :thumb There is a strange satisfaction hearing the gurgling sound than others have mentioned elsewhere when testing them:)
 
Sometimes the rubber of the valve becomes sticky with time and dirt. I've had success using a silicon spray and Pledge Spray furniture polish on the inside so the valve lips no longer stick together. EITHER WILL DO.
Reviving an old thread…

How much water should be needed in the inlet area to the front roof drains for flow to start?

I found my passenger side front roof drain needed to be filled almost to the level of the base of the canvas before flow would start through it (clearly wrong). When it had enough head of water, flow would start and it would flow really well (you can tip a 2L bottle through fairly quickly), and empty with a gurgle.

But then after a few minutes it would again need a big head of water to get flow started.

Flushing with hot water and washing up liquid didn’t help.

I then syringed in and out through the drain inlet which improved it.

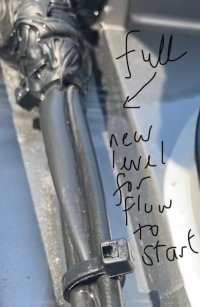
It now starts to drain when the inlet area is just full, both passenger and drivers side (see photos).

My question is: what level of water should be needed in the inlet area to the roof drains for flow to start? Should it start flowing into the drains as soon as it covers the drain entry holes? Or is it normal to have to fill the entry areas full (to get enough head for the outlet valve to open)?

The level I now need for flow to start is just below the level of the black plastic covers over the drains, so you don’t realise the entry area is filling up before flow starts unless you remove the covers.

I’m not sure if I’ve fixed the problem, or if flow should start into the drains with much less water in the entry area.

It’d be good to know what others find as normal before I try removing the scuttle cover to silicone spray the outlet flow valves.

Thanks!
IMG_2196.jpegIMG_2240.jpeg
 
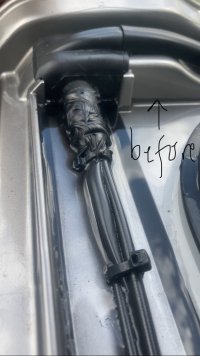
I too found my valves a bit restrictive.
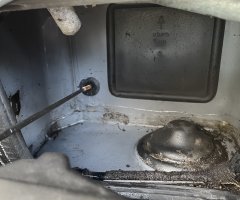
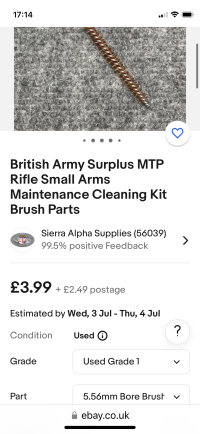
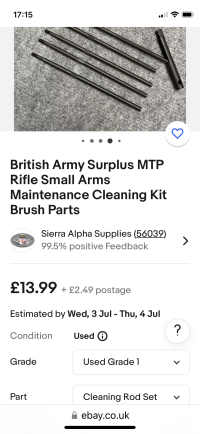
I used a bronze 5.56mm /0.22” rifle cleaning brush to give the valves a clean from the scuttle area. Worked a treat.

Dribble before. Nice flow after.
Perhaps the bronze bristles ‘scuffed’ up the valve lips a bit.

IMG_1327.jpeg

IMG_1329.jpeg

IMG_7898.png

IMG_7899.png
 
Last edited:
I too found my valves a bit restrictive.
I used a bronze 5.56mm /0.22” rifle cleaning brush to give the valves a clean from the scuttle area. Worked a treat.

Dribble below. Nice flow after.
Perhaps the bronze bristles ‘scuffed’ up the valve lips a bit.

View attachment 125419

View attachment 125420
Now you have access to the drain outlets, just cut out the closing flaps.
I did it on mine (both sides) and now no water will ever collect up above.
 
It will have cost VW to add those valve outlets.
I’m not saying they always get it right but IMHO if it ain’t broke…..
Just needs a clean out every once in a while!
 
It will have cost VW to add those valve outlets.
I’m not saying they always get it right but IMHO if it ain’t broke…..
Just needs a clean out every once in a while!
I had given up trying to drain the drains.
I cut the crap and cut off the closing flaps of the outlets.
Why would you close outlets, giving debris chance to clog up?
Now, all the water just flows straight through. I will never have to look at it anymore.

But just do as you please, I am not forcing you to do it.
 
I too found my valves a bit restrictive.
I used a bronze 5.56mm /0.22” rifle cleaning brush to give the valves a clean from the scuttle area. Worked a treat.

Dribble before. Nice flow after.
Perhaps the bronze bristles ‘scuffed’ up the valve lips a bit.

View attachment 125419

View attachment 125420

View attachment 125421

View attachment 125422
Thanks!

Please could you let me know: did you remove the panels between the engine bay and scuttle to do this, or the just the plastic scuttle cover (if that is what it is called, the plastic piece with the slots along the front, below the windscreen)?

I also wondered: once you’ve got the outlet valves opening properly, do you still need to build up a bit of water in the drain inlet area for flow to start, or should it flow right in (ie have I still got a problem in my second photo)?

Thanks!
 
Thanks!

Please could you let me know: did you remove the panels between the engine bay and scuttle to do this, or the just the plastic scuttle cover (if that is what it is called, the plastic piece with the slots along the front, below the windscreen)?

I also wondered: once you’ve got the outlet valves opening properly, do you still need to build up a bit of water in the drain inlet area for flow to start, or should it flow right in (ie have I still got a problem in my second photo)?

Thanks!
TBH, it was Oct 22 when I did it and can’t really remember! I do remember thinking it needed the windscreen wipers off but I managed instead to leave that plastic trim in situ and lifted the engine side edge instead for access.

Re build up, once clear I think it took very little water up top to get going and then it cleared completely so no big pressure head needed.
 
Thanks!

Please could you let me know: did you remove the panels between the engine bay and scuttle to do this, or the just the plastic scuttle cover (if that is what it is called, the plastic piece with the slots along the front, below the windscreen)?

I also wondered: once you’ve got the outlet valves opening properly, do you still need to build up a bit of water in the drain inlet area for flow to start, or should it flow right in (ie have I still got a problem in my second photo)?

Thanks!
Just lift up the plastic, and you can unscrew the T30 torx screws.

Once you get to the rubber outlets, take them out (remove the side dashboard panels and disconnect them from the brown tube), and remove the flaps. Cut them out, leaving the big hole open. No water will ever collect up top.
I did it with mine after a lot of flushing didn't solve my problem anymore.
Now the water runs straight through.
 
I’ve just found my passenger mats wet and found this thread.
same issue with the pipe being disconnected & too short to reach the rubber elbow.

turns out that the drain pipe had been clipped up with the electrical wires in the A pillar and so ran a longer route.

unclipped and shifted it to what appear to be the correct metal clips. Freed up the pipe, all connected properly again & fingers crossed problem solved. HTH.

wrong!
View attachment 100117

right!
View attachment 100118
I've just found exactly the same thing after removing the A Pillar trim. So have been able to make the hose longer; however, I cannot get the hose back into the black boot, behind the heater fan one handed. What is the recommended way of getting these two pieces joined up. Should I start taking apart the lower part of the dashboard, and take out the fan? Or is there any easier way?
 
I've just found exactly the same thing after removing the A Pillar trim. So have been able to make the hose longer; however, I cannot get the hose back into the black boot, behind the heater fan one handed. What is the recommended way of getting these two pieces joined up. Should I start taking apart the lower part of the dashboard, and take out the fan? Or is there any easier way?
Sorry, no further advice other than patience, dexterity and a few choice expletives.
Recall one hand giving the hose a downward push from the A pillar and other hand from beneath the dash holding the elbow still.

Just be grateful it is the easy side - drivers side is the difficult one!
 
Sorry, no further advice other than patience, dexterity and a few choice expletives.
Recall one hand giving the hose a downward push from the A pillar and other hand from beneath the dash holding the elbow still.

Just be grateful it is the easy side - drivers side is the difficult one!
Thanks, with this info I persisted and enlisted the help of one of my kids. Small hands did the trick, and possibly the dexterity I'm lacking. Seems to be working now.
 

Similar threads

JohnCalifornia
Replies
14
Views
3K
Taff Tenor
Taff Tenor
Jabberwocky
Replies
0
Views
1K
Jabberwocky
Jabberwocky
S
Replies
11
Views
2K
mrcheesbrough
mrcheesbrough
Billywizz
Replies
8
Views
2K
Jabberwocky
Jabberwocky

VW California Club

Back
Top