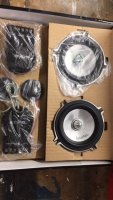
Simple rear Speaker upgrade

Bubba Gross

Bubba Gross

Messages
123
Location
Dorset
Vehicle
T5 SE 180
All, I fitted a pair of these at the weekend into the rear pull down cupboard...

Pioneer TS-E1702is 17cm 2-Way

Purchased from Amazon for £85, they are a perfect fit and use the original speaker rings and fixings. Also lined around the speaker and covers (which you pull off) with dynamat. They sound absolutely amazing just running from original head unit.
 
All, I fitted a pair of these at the weekend into the rear pull down cupboard...

Pioneer TS-E1702is 17cm 2-Way

Thanks for the recommendation – I’ve just done the same, based on your recommendation, and the speakers are even cheaper now (£68 on Amazon Marketplace).

I thought it might be useful to post a guide with some pictures (it’s not a difficult job, but fiddly if you don’t have all the bits at the start and/or haven’t done similar electrical installations before…).
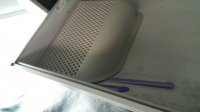

upload_2016-10-22_14-36-3.jpg


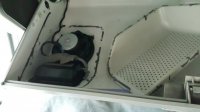
1. Remove the speaker back boxes. They are held on with double-sided foam tape, and I found that the best technique was to work a couple of plastic knives into the gap – it’s quite tough, and needs a fair amount of effort.

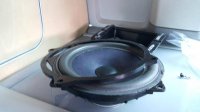
2. Unscrew the four screws holding main driver (needs a T2.5 torx driver), and unplug the connectors. Separate the speaker spacer rings from the original speakers – you’ll need these later.
upload_2016-10-22_14-36-3.jpg


upload_2016-10-22_14-36-3.jpg


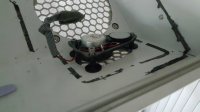
3. Remove the midrange and tweeter enclosure (again, more foam tape), and the three screws holding this assembly in place. Replace the bolts and spacers that were holding the midrange and tweeter assembly (as these hold the front end of the speaker grill in place).


upload_2016-10-22_14-36-3.jpg


4. Install the new speakers, with the spacer rings from the original set – you’ll need eight M5 bolts with a 15mm thread length (bike shops sell them), as the original bolts will be about 5mm too short.

5. Either using Scotchloc connectors, or by cutting, soldering and using heat-shrink insulation, connect the original speaker leads to the leads supplied with the speakers. Make sure that they are connected with the correct polarity so that they are in phase – the brown wire on either side is negative and goes to the larger spade terminal on the speaker.

6. Replace the speaker enclosures using some more foam tape.

And there you have it – took me about 45 minutes, once I’d got everything together. I got some Dynamat with the intention of fitting it at the same time, but I haven’t worked out whether I want to seal the speaker enclosures, so I haven’t installed it yet.

Hope this helps someone - it's a worthwhile upgrade!
 
All, I fitted a pair of these at the weekend into the rear pull down cupboard...

Pioneer TS-E1702is 17cm 2-Way

Purchased from Amazon for £85, they are a perfect fit and use the original speaker rings and fixings. Also lined around the speaker and covers (which you pull off) with dynamat. They sound absolutely amazing just running from original head unit.

Hi there,
I have just upgraded with the same speakers and a very good improvement over the OEM speakers so cheers for your original post.

On the speakers covers did you Dynamat over the holes (behind the rear of the speaker) into the draw space or keep them open. I can't make my mind up whether this is a good idea or not?

Cheers
Mark
 
All, I fitted a pair of these at the weekend into the rear pull down cupboard...

Pioneer TS-E1702is 17cm 2-Way

Purchased from Amazon for £85, they are a perfect fit and use the original speaker rings and fixings. Also lined around the speaker and covers (which you pull off) with dynamat. They sound absolutely amazing just running from original head unit.


Hi Bubba,
Do you mind giving a little bit of detail of how you managed to remove the speaker covers inside the rear roof drawer to be able to access the speakers themselves ?
I cant seem to see any obvious fixings, screws etc and don't want to snap any concealed plastic retainers or clips etc.

Thanks
They are stuck down with adhesive tape. I used a modelling blade to get into the tape at first and then a flat bladed screwdriver to ease the cover off. I don't remember any plastic retainers or clips on my 2011 Cali.
 
Hi Bubba ....I asked that question in May 2018 !!! ......and only now due to social distancing have I got round to taking it further.
I used your advice but as an added measure I carefully used a hot air gun to heat the inside plastic cover which softened the glue of the double sided tape and made the removal of the cover relatively easy.
I have now found out that the right hand speaker is in fact knackered.
I am now looking to replace both the rear overhead locker speakers.
When you fitted your pioneer speakers , did you have to do anything else. I have the original VW Radio /CD player ( 2007 Cali ) . Is it just a case of replacing the original speakers with the Pioneers ?
Do the original speaker connectors fit the Pioneers without modification. ?
Do the speaker fixing lugs line up with the original VW fixings ?

Many thanks


For the wiring if you don’t want to cut the VW look you’ll need something like this


Check your actual plugs to make sure they match as there are a few different types
 
Just removed my plastic covers today and it is a 2 way factory fitted system in my cupboard. There is a main channel and a separate tweeter each side. Any ideas how to upgrade this, as most posts seem to suggest just one speaker each side to upgrade? Is there a plug and play system anyone has bought? Wonder if it is the same as the front channel 2 way plug and play kits you can buy?!
 
Just removed my plastic covers today and it is a 2 way factory fitted system in my cupboard. There is a main channel and a separate tweeter each side. Any ideas how to upgrade this, as most posts seem to suggest just one speaker each side to upgrade? Is there a plug and play system anyone has bought? Wonder if it is the same as the front channel 2 way plug and play kits you can buy?!
Have you read the above posts? :rolleyes:
 
Have you read the above posts? :rolleyes:

Get the feeling they have a different speaker set up in their Cali. Maybe a T6 or T6.1 ?

it’s not clear from the post.
 
Just removed my plastic covers today and it is a 2 way factory fitted system in my cupboard. There is a main channel and a separate tweeter each side. Any ideas how to upgrade this, as most posts seem to suggest just one speaker each side to upgrade? Is there a plug and play system anyone has bought? Wonder if it is the same as the front channel 2 way plug and play kits you can buy?!

What Cali do you have? I can’t tell as I’m on
Mobile.

Assume you mean that your set up is different to the OP?
 
Hi Wesel, yes I read the posts. Did you read mine? I do not have a single 17cm speaker each side, I have a 2 way system, 2 speakers under each cover in the cupboard, a main channel and a separate tweeter. Main channel looks like a 17cm, tweeter is mounted in a triangle shaped mount. It is a 5.1 Cali. Any help would be appreciated into possible replacements?!
 
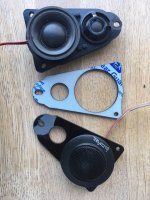
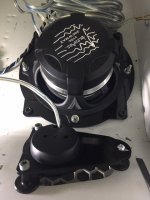
I can help with this. Out of lockdown boredom I have just been fitting replacement component speaker to the rear of my older cali and also have the OEM components the same as yours. I have fitted a t set of replacement 13.5 components with crossovers having made up some laser cut brackets to replace the originals... see pics below. easy to do after I made up the adaptors as the OEM speaker were 16cms and the new are smaller (but way better!) tight fit but all good. sound deadened the grille as well as had some dynamat left over...

laseradapters .JPG

lasercut mounts.JPG

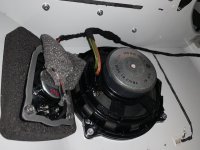
OEM tweeter and mount.JPG

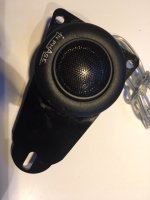
inphase components.JPG
 
The tweeters are the same as the ones in the dash... Joined up thinking from VW!
 
The tweeters are the same as the ones in the dash... Joined up thinking from VW!

Was just thinking that, therefore there are custom sets which will be a direct fit.

I have custom front speakers made for the T5, can't remember at the mo which ones.
 
My understanding is that If the original head unit is being used, or there's no amplifier some speakers can sound worse as they expect more power.

The cheap Pioneer TS-H1703 have actually been recommended for replacements when using the original head unit.
 
My fronts I fitted are Rainbow IL-C8.3 VW T5 can't find them listed now as was a few years ago.

These guys use loads of factory fit speakers so worth searching through the posts to see any that might fit

 
Those Poineers are ok and fit to the OEM speaker mounts in the locker. My OEM head unit was a single DIN one which I replaced with a Kenwood DAB CarPlay one which as more power than standard so sounds good. I might fit an online amp in the future tho. I can make the custom brackets up to spec if anyone here neaeds them as I have the CAD files now which I can tweak for different tweeter size etc.
 
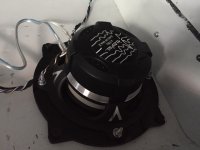
Bolted the speakers up in the locker using the CAD adapters that I laser cut to fit. just need to sort the wires out now to a suitable length for the crossovers.

woof N tweet.JPG

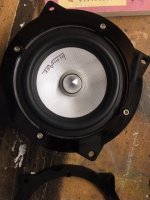
woofer.JPG
 
Back
Top