Buy all your VW California Accessories at the Club Shop Visit Shop
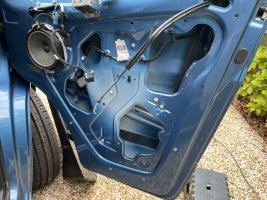
Speaker Upgrade

I did on my Cali and used Audison (supplied by Absolut T5 in Andover.

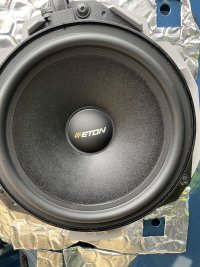
have just upgraded the Hymer with Eton.

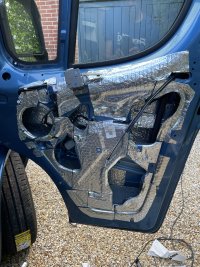
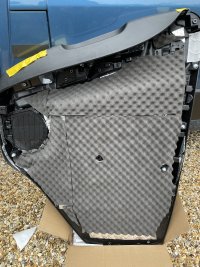
Made a huge difference on both vehicles but most important to sound deaden the door itself and the interior door panel/card. Good idea to add some insulation too as likely to be none.
Pics below are before/after on Hymer.

AC368264-DB35-44EB-97C1-F36444639FF3.jpeg

74FACF6E-A952-48ED-B1F1-AE1676372753.jpeg

CCB7BC13-CFA5-4A05-A409-AC068915F37B.jpeg

C18AC5A4-1CF7-49B7-998E-94F4F70E6327.jpeg
 
Thanks for the reply. What material did you use for.the door card?
 
There are a lot of options. I used Dodo Deadn as a sound deadening layer and dodo acoustic liner 15mm on top.
 
Has anyone upgraded thier speaker system using this plug and play Alpine one? https://www.alpine.co.uk/p/Products/sound-systems-for-volkswagen/spc-106cra2
I had this as soon as I got the GC. Noticeably more separated sound processing and the unit is very easy to install. Just be careful when putting the A-pillar panel back. If the wiring gets between it will disconnect from the tweeter dom speaker as the original soldering point is weak.
I put Dodo Mat on the door panel but no acoustic liner.
Highly recommended.
Great. Thanks for the heads up on the A pillars. I’ve ordered the kit and dodo deadn as well as some acoustic foam.
 
Great. Thanks for the heads up on the A pillars. I’ve ordered the kit and dodo deadn as well as some acoustic foam.
This is very interesting Gordon, be good to hear what you think once installed, maybe a little one of your quality “hot to’s” :thumb also
 
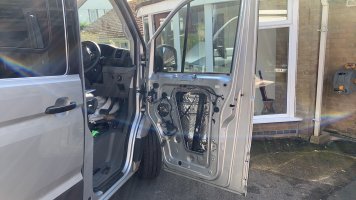
Yes. Was going to take photos etc of the install and share process. Also got a habitation area speaker ‘upgrade’ planned. Will share if successful
 
Yes. Was going to take photos etc of the install and share process. Also got a habitation area speaker ‘upgrade’ planned. Will share if successful
Brilliant thanks. The habitation area speaker sounds intriguing. Look forward to seeing this.
 
I‘ve just upgraded my speakers to the Alpine ones. Very noticeable improvement in sound quality. It took 3-4 hours to do each speaker so did it over two weekends which meant we went away with one old and one new speaker and could do a sound test using the balance. Sound is much clearer on the alpine ones and sounds much better on motorways for both music and phone. I used Gordon’s recommendation on the sound proofing.
A few observations
  • The metallic insulating ‘bubble wrap’ is heavy - we are 40kg off our weight limit when fully loaded, so all new things get weighed. 8.8kg for the box suggested by Gordon. Most of the weight is the c.3mm plastic backing
  • the foam insulation must be the world’s stickiest stuff. It sticks great where you want it too, and great wherever else it touches
  • get a set of trim removal tools from amazon or similar - £9 for the set. Tried without for the first door, much easier for the second. https://www.amazon.co.uk/dp/B09KLPXLNJ/?tag=eliteelect-21
  • Watch out for the sequence in the included Alpine instructions. I’m not one for following instructions, but these are really good and necessary to follow
  • its a two-person job to carefully hold the door panels and unplug the electrical connectors for the windows. The connectors are easy to unplug once you’ve found the release switch on each, and are all different shapes so its not possible to replug them in wrong (eg wire the mirror controls into the window electrics)
  • only problem we had was pulling out the passenger side window connector - we moved the door card too far before unplugging. the mechanism to raise / lower the window came apart and needed to be put back together. There were four tiny white plastic parts that jumped out (about the size of a fingernail clipping), plus a circuit board and plastic contact part. unfortunately we lost one small connector part (suspect it fell down inside the door and we couldn’t find it despite using a phone camera and scratching out hands looking). Window now will only go one way with the passenger side switch (chose down only).

overall - a big upgrade for <£500. We (well, me) would have specced an audio upgrade if available, so really glad we’ve done this.

IMG_2709.jpeg
 
Last edited:
Back
Top