Tailgate blind, warning,

Elly Swanson

Elly Swanson

Top Poster
VIP Member
Messages
1,976
Location
East Midlands
Vehicle
T6 Ocean 150
Word of warning:

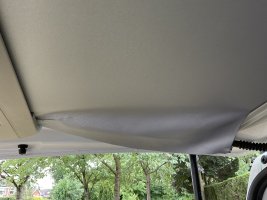
Roll the tailgate door blind down before packing the back of the van. I forgot and caught it without realising. Ripped along the stitches. Have looked up how to fix it myself and it’s so complicated, which also means it’ll be expensive for someone else to fix.

Tried to use duct tape but it won’t stick on the blind fabric.

Anyone got any suggestions?


756F129D-DC35-4F63-801A-ED3D4B3C8BEA.jpeg462FAD90-02A2-4133-8DF1-9EB653D229EC.jpeg
 
Would it be worth trying the tent repair tape both sides. May be better suited and less likely to come away in the heat.
Hope you find a solution before needing a replacement.
 
Hi Elly,


oops, I bet there was a few choice words?

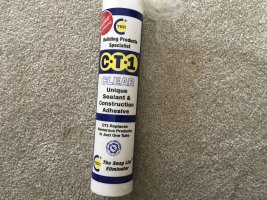
you could try some clear all weather adhesive, designed for outside use, the type that is fully waterproof , mould resistant, highly flexible, sets under water one is very very strong (goes off quickly) - available from proper builders Merch.

apply a small bead to the frame and material (use masking tape to ensure it does not get everywhere) ideally near the open end of the rip.
the first stage it to get the material back in position, to allow you to check your happy and create a bond for the second part.(Only a very small bead is required initially to fix the open edge in place.)

using two pieces of wood , or something suitable to create a sandwich effect and not Mark the blind / frame , apply masking tape to any parts that may touch the glue, including the frame and blind itself, clamp the two pieces of wood along the edge of the frame, to create a sandwich effect, the sandwich will hold the ripped section of material in place whilst the adhesive go’s off, to create an initial join to the open part.


remove the clamps and inspect to ensure a satisfactory bond of the open ripped end (after the adhesive has gone off) clean up any excess.
if the initial bond does not sit right or is not visually good , cut the bead and try again.
once you are happy with the initial bond and how the material looks :

repeat the above with a full bead of adhesive o along the ripped section (ensuring the wooden clamping pieces) has something applied to it to prevent to glue bonding to the,

take your time and be scrupulously clean , if the glue gets on anything it can only be removed mechanically (possibly peeling any residue once set)

edit you will need to prevent the blind retracting whilst you work on it , consider using wood batons clamped to the fully extracted blind , you may be able to use the multiflex, door table etc as a work surface inside the van, so the blind is not left hanging

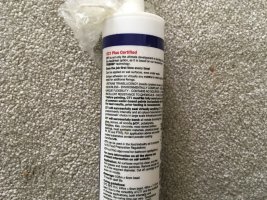
edit: something like this, I agree with @The Tall Luthier that super glue may assist in creating the initial bond to the open end, but superglue will not hold up over time so will require something like a strong clear adhesive- see photo below, something sI ial to this as a permanent glue

A5342FFC-A0E5-47A6-80DD-EF9545178784.jpeg

CA9FE4D1-9D38-4BBE-BAFF-1437983C29A5.jpeg
 
Last edited:
Superglue a small part of the join to assess whether that bonds the two sets of threads. Watch your fingers
 
Would it be worth trying the tent repair tape both sides. May be better suited and less likely to come away in the heat.
Hope you find a solution before needing a replacement.
Thanks for the suggestion, tuono0p1. Will investigate doing that.
 
Hi Elly,


oops, I bet there was a few choice words?

you could try some clear all weather adhesive, designed for outside use, the type that is fully waterproof , mould resistant, highly flexible, sets under water one is very very strong (goes off quickly) - available from proper builders Merch.

apply a small bead to the frame and material (use masking tape to ensure it does not get everywhere) ideally near the open end of the rip.
the first stage it to get the material back in position, to allow you to check your happy and create a bond for the second part.(Only a very small bead is required initially to fix the open edge in place.)

using two pieces of wood , or something suitable to create a sandwich effect and not Mark the blind / frame , apply masking tape to any parts that may touch the glue, including the frame and blind itself, clamp the two pieces of wood along the edge of the frame, to create a sandwich effect, the sandwich will hold the ripped section of material in place whilst the adhesive go’s off, to create an initial join to the open part.


remove the clamps and inspect to ensure a satisfactory bond of the open ripped end (after the adhesive has gone off) clean up any excess.
if the initial bond does not sit right or is not visually good , cut the bead and try again.
once you are happy with the initial bond and how the material looks :

repeat the above with a full bead of adhesive o along the ripped section (ensuring the wooden clamping pieces) has something applied to it to prevent to glue bonding to the,

take your time and be scrupulously clean , if the glue gets on anything it can only be removed mechanically (possibly peeling any residue once set)

edit you will need to prevent the blind retracting whilst you work on it , consider using wood batons clamped to the fully extracted blind , you may be able to use the multiflex, door table etc as a work surface inside the van, so the blind is not left hanging

edit: something like this, I agree with @The Tall Luthier that super glue may assist in creating the initial bond to the open end, but superglue will not hold up over time so will require something like a strong clear adhesive- see photo below, something sI ial to this as a permanent glue

View attachment 96159

View attachment 96160
Cheers, Perfectos for your very thorough explanation.

No choice words as I think I was so cross with myself I was actually completely gob-smacked. My hubby was very stoic about it and said “it’s only a blind, what’s done’s done”. Maybe they’ll all just come out when we’re away again this weekend and I’ll have a swear fest at the folk fest!
 
Back
Top