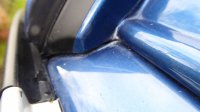
VW California T5 ONLY Roof Corrosion - General Discussion

Where do you have the Roof Corrosion on your VW California?

  • Front panel only

    Votes: 197 37.4%
  • Main elevating roof only

    Votes: 80 15.2%
  • Both Front panel and main roof

    Votes: 250 47.4%

  • Total voters
    527
I agree it's quite a coincidence to happen within a year of the repair. I don't understand why it happens now after 5 years but I'm sure the repair didn't paint the whole roof - only the sides - for 2 reasons.

Firstly, using the body shop's paint depth gauge you can clearly see the thicker (150um) respray paint at the edges and less thick (110mu) factory paint in the middle.
Secondly, there was a 50mmx2mm white stripe on my roof from new where the blue passes hadn't overlapped during painting at the factory. It's still there. If the repair had painted the whole roof I'd expect it to have gone.

So the VW bodyshop say it's not a faulty repair but faulty original paint. I can see why they say that although it's hard to understand why it takes 5 years to show up.

Since they say it's faulty paint and not corrosion they're asking VW if it's covered by the 6 year extended warranty. My understanding was the normal roof repairs were done under the 3 then 6 yr paintwork warranty and not the 12 yr corrosion warranty (which only covered through corrosion)? Is that right?

Either way, given I've already had 3.5 years living with flaking paint and it's not right to expect a roof to blister at 5 years old, I'd hope VW will do the right thing by me and fix it.

Regards
Custardtart
 
You're right, the 12 year warranty covers "through corrosion" i.e. a hole. Sorry to be pessimistic, but I think you're going to have an uphill struggle with this one bearing in mind the 3 1/2 year issue. There will undoubtedly be a lot of ducking and diving taking place, but don't let that put you off, fight the good fight!
 
Would they have put a coat of clear lacquer over the whole roof to blend in the repair. the white stripe would still show through.

Are you brave enough to pop one of the blisters to see if it is just a chemical reaction in the paint or is it corrosion underneath.

I
 
I’d be amazed if the blisters aren’t connected to the repair. Either cutting in the lacquer (as comment above) or caused by heat in the ‘baking’ process?

I’m also a little sceptical about the paint thickness argument. How do you measure the paint thickness in the centre, and what’s to say the thicknesses don’t vary at the factory painting?
 
Every good Cali owner should have one!

I still think it proves little without a sample across several other untouched Cali's. I suspect wet paint would be thicker at the bottom of vertical surfaces compared with horizontal surfaces.

I've no axe to grind, it's just that are so many examples of VW feeding customers dodgy info on this forum, it helps to be doubtful of anything they say.
 
Yes the paint thickness was measured with a meter. It just showed varying thickness with more around the edges. I believe from talking to the bodyshop (who have done about a dozen repairs) that they normally only paint around the edges. They may have lacquered further on mine - I can't tell.

Sorry - I'm not brave enough to burst a blister!

If I'm lucky, I'll hear some good news in a couple of weeks. Given the history of this van - years of corrosion, multiple repairs etc - I think it would be pretty mean-spirited if VW turn down the claim. We'll see.
 
Blistering Paintwork Front Roof Pannel

Hi All,

Anyone else have blistering paint work on the front pannel of the roof? I'm talking about the metal body pannel thing that meets the windscreen and forms the 1st part of the roof at the front.

There's another thread about this sort of thing, but I think it's a different part of the roof.

The blisters are all along the leading edge with no obvious signs of chipping. The van is only 2.5 years old, so I took it in this weekend (also having the reversing sensors sorted as they have packed in) and ask them to take a look. I will get the verdict as to whether the body work is covered under the 15 year bodywork warranty next week. I assume that if there were chips, the blistering isnt covered. I'll post with their verdict next week.
 
Hi Rob ..
Had the front panel of my Cali repaired at VW Cleckheaton May 2017 after waiting about 2 years from booking with them.
Don't know what the length of guarentee is on this .. never asked .. but they did a great job .. and so far so good.
But you need to go and talk to them. There's no charge for this repair.
Good luck.
Gary (Thornton Hieghts near Bradford)
You do realise that the post you have replied to is over 5 1/2 years old and was the original post of this 186 page Thread and an awful lot has happened since then.
 
Just got ours back.
Been done at Claridges in Southport.
Had a really good look at it at the dealers in Sheffield and it seems they have done a good job.
Came back nice and clean inside and out so a happy bunny at the mo.
 
Our previous van was on the list to be done.
It was part exchanged for our new one with the dealer who said it was transferable.
Three years ago now but I don't see why it should have changed.
Why is it taking so long? Ours was booked in last June and we could have had it done on October. That wasn't convenient so got done last month.
 
Custardtart,
Definitely looks like paint reaction due to poor prep before repainting, paintwork issue, not corrosion. If it was done less than one year ago, it must be the repairing workshop warranty.

It seems disgraceful that a vehicle of this value from a top manufacturer suffers from such a low tech unnecessary fault.
My Cal had the whole roof redone two years ago including many new parts, no recurrence. Total cost well over 4g to main dealer but done under warranty.
 
I've been on the list for over a year. Now I'm wanting to sell and buy a T6. Is the warranty transferable?
Yes its the Van that is covered not the owner, as long as you have email/paperwork saying that it has been accepted by VW for the roof corrosion repair all the new owner has to do is contact VW to transfer the name/address/contact details....I know because thats what I did, I checked it all out before I bought the van.
 
I had my whole roof replaced - took 7 weeks in total. On getting mine back from breeze it looks like my roof rails (where the roof rack slots in) have been stuck on with sikaflex or something. It’s not a particularly tidy job and is splurged out of the sides at the end s of the rails. I mentioned this to Derek at breeze and he said it’s nothing to do with them, you’ll have to take some photos and get back to them with an email and they’ll follow it up with Vw. I haven’t been able to check the interior/ bellows yet as it’s either been dark or wet when I’ve had some time spare. Fingers crossed...


Sent from my iPad using Tapatalk
 
Just got ours back.
Been done at Claridges in Southport.
Had a really good look at it at the dealers in Sheffield and it seems they have done a good job.
Came back nice and clean inside and out so a happy bunny at the mo.

Well maybe jumped the gun a bit saying it was OK.
Yesterday loaded up the van ready for a weekend away and found ice puddles on the passenger side floor mat.
Took all the mats up to find the the whole front carpet and the bit between the seats absolutely sodden.
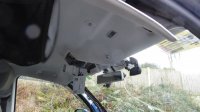
The front of the roof liner is also wet and around the control panel area.
Got the roof up and checked the front drain holes. Sure enough, blocked solid. Now these were definitely clear before it went in as I regularly check them and blow them through with a very low pressure air line.
Rang the dealer and took it in straight away. They managed to clear the drain holes, (which may or may not be the problem). The warranty manager rang the garage where the job was done and they advised to take the van back home and see if it is still leaking. To be fair Claridges have said they will sort it if it turns out to be something other than the blocked drains
It's no doubt been exagerated by the fact it has been parked on our front drive which has quite a slope on it so all the water has run forwards. However, this has never happened before in three and half years so something is wrong.
So, now got the van at home on the level. Carpets all lifted up at the front (metal floor dripping with water). A pillar trims off, control panel out and roof liner pulled down all very,very slowly drying out with two fan heaters and a dehumidifyer.
Hopefully, clearing the drains will have sorted it but I can't see why even with the drains blocked the water should not be able enter the interior. IMO it should just build up until it flows over the edge of the channel.
Icidentally, the drains I think are a bad design. The reason it's not possible to celar them (like the rears) is that the initial bit comes down to a right angle plastic connector which then goes into a rubber tube coming down the A pillar, through the bulkhead and out under the wheelarch.
The right angle connector will collect odd bits of rubbish (leaves, dust etc) and sooner or later get blocked.

I'll put some pictures up later showing the underside of the roof liner with the plastic connector and the tube running down the A pillar. If anyone is interested how it all comes to bits then I will do a fact sheet for the downloads section.

So, if/when you have your roof done, make the dealer show you that the drains are clear and water is running out from under the front wheel arches before you take it away.
 
Last edited:
Well maybe jumped the gun a bit saying it was OK.
Yesterday loaded up the van ready for a weekend away and found ice puddles on the passenger side floor mat.
Took all the mats up to find the the whole fron carpet and the bit between the seats absolutely sodden.
The fron of the roof liner is also wet and around the control panel area.
Got the roof up and checked the front drain holes. Sure enough, blocked solid. Now these were definitely clear before it went in as I regularly check them and blow them through with a very low pressure air line.
Rang the dealer and took it in straight away. They managed to clear the drain holes, (which may or may not be the problem). The warranty manager rang the garage where the job was done and they advised to take the van back home and see if it is still leaking. To be fair Claridges have said they will sort it if it turns out to be something other than the blocked drains
It's no doubt been exagerated by the fact it has been parked on out front drive which has quite slope on it so all the water has run forwards. However, this has never happened before in three and half years so something is wrong.
So, now got the van at home on the level. Carpets all lifted up at the front (metal floor dripping with water). A pillar trims off, control panel out and roof liner pulled down all very,very slowly drying out with two fan heaters and a dehumidifyer.
Hopefully, clearing the drains will have sorted it but I can't see why even with the drains blocked the water should not be able enter the interior. IMO it should just build up until it flows over the edge of the channel.
Icidentally, the drains I think are a bad design. The reason it's not possible to celar them (like the rears) is that the initial bit comes down to a right angle plastic connector which then goes into a rubber tube coming down the A pillar, through the bulkhead and out under the wheelarch.
The right angle connector will collect odd bits of rubbish (leaves, dust etc) and sooner or later get blocked.

I'll put some pictures up alter showing the underside of the roof liner with the plastic connector and the tube running down the A pillar. If anyone is interested how it all comes to bits then I will do a fact sheet for the downloads section.

So, if/when you have your roof done, make the dealer show you that the drains are clear and water is running out from under the front wheel arches before you take it away.
Hi @briwy
Very interested in your post, i would love to know how the headlining comes down as just had my hydraulic/eletro pump topped up at listers coventry at a cost of £772.41 (including service and brake fluid change)
 
Hi John.
It's fairly straightforward but a bit scary pulling things to bits like this.
Firstly remove the A pillar trims. Loz has done a sheet on this in the downloads section so I won't do it detail but bascially take off the grab handles and then they pull off.
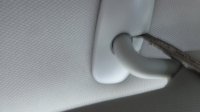
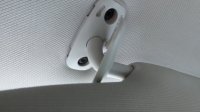
Remove the sun visors. The cover over the bolts needs to be prised off very gently. I did it with a screwdriver, then undo the bolts (i think they are Torx 20). Best to unclip the visor at the iner end before removing the bolts.
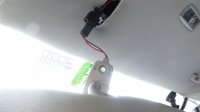
The visor just pulls down and then you can undo the wiring plug.

P1130422.JPG

P1130423.JPG

P1130425.JPG

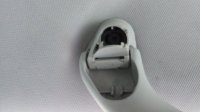
Then the side grab handles. Pull down the tabs covering the bolts, these just drop down easily with a finger nail. I took them off the handle to prevent losing them, they just pull off.
Undo the bolts, again Torx 20 and pull the handle out.
P1130427.JPG

I didn't remove any more as I could access the drain tube OK and see that they are connected alright. I guess to remove the control pod first take out the panel and and switch pod.Then there are two screws which I guess hold the panel surround to the roof. Once this is off the whole liner should drop down from the front.
I think it's also held in place round the roof hole by the plastic trim but I haven't taken that off to investigate.

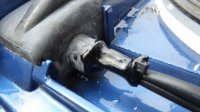
This is the rubber drain tube under the roof liner going up to the plastic right angle connector.
P1130432.JPG

Close up of the connector
P1130433.JPG

I did consider taking the tube off the connector so I could get a wire down it to remove any runbbish but it is a very tight fit so didn't want to risk breaking the plastic connector.

Control panel and switch pod out and showing the roof liner hanging down.
P1130434.JPG

This is the position of the drain hole, directly under the hydraulic pipes and wiring for the roof mechanism.
Very difficult to see and far too small IMO as crap will gather here and either block the hole or go down to right angle connector and block there. The plastic cover over this lot just pulls off upwards.
P1130438.JPG

I'n not sure whether this should be sealed or not but a definite gap between the end of the channel and the new front plastic cover.
Perhaps someone who has had the roof done could check and see if the gap is there or has been sealed.
P1130440.JPG

Hope this helps.
 
hi

got my van back a few weeks ago it was raining when I picked it up and has either been wet ever since or dark or I've been working. I haven't had chance to get the roof up until today.

Mine had the whole roof replaced. It came back to breeze and Derek noticed it was wet inside so it went back to the bodyshop and they "refitted the rubber seals properly"

When I picked it up I was dissapointed with the way the roof rack channels had been what looked like sikaflexed on. They have sealant splurged out of the ends of the channel and also through the numerous fixing holes along the length. I mentioned this to breeze who said, nothing to do with us, email us some pics and we'll send to vw.

Does anyone know the standard procedure for fixing the roof rack channels to the rook? on another van in the car park the holes seemed to have a tidy black bung/ cover in them, on mine now there is a nipple of sealant poking out of each one. I presume this will make it difficult to slide a roof rack back and forth along the track.

Today it was dry, not windy, light enough and I wasn't working so I took the opportunity to get the roof up.

As soon as I opened the hatch I got a load of water over my head/ shoulder. As the roof went up, more water ran from the bellows onto the front seats, headrests. On inspection the roof lining around the grab handles is wet and watermarked.

On putting the roof fully up, the rear section of upstairs bed mattress is absolutely sodden, the headlining at the rear is also sodden and water was visibly dripping from this onto the mattress. there are white and black mould spots on this section of mattress. The front mattress is wet in places.

The canvas bellows at the front corners are wet and stained and there is also a cut mark that aunt penetrated the canvas but looks like its been scraped with something sharp. There is also a tiny hole nr the air vent.

The strip of headlining right at the front of the elevating roof is also sodden. There are watermarks on a number of pieces of the grey headlining in the cab.

I'm really annoyed and a really gutted. I'll get into breeze on Monday and see what they say.

The roof has never leaked in the 6 yrs i've had the van. It's not been anywhere different or been parked anywhere different.
 
Thanks Wim for the video, what did you do about the start of the corrosion? Were you still in the warranty period?
 
Thanks Wim for the video, what did you do about the start of the corrosion? Were you still in the warranty period?

It was CCN in Amersfoort who pointed me out to look under the seal ( now just over a year ago) .
My Cali was bought in Belgium but CCN took me in and said they put the claim in and i am on the list.
My Cali turns six this july....
IF and i say if ...my roof ever will be repaired it will be by CCN and only CCN !
 
Thats a very useful video :thumb
So being an owner of an MY18 T6. Am I right to understand this will have evolved to have the tape under the seal to provide a waterproof barrier between the aluminium roof and the steel in the seal construction during manufacture but the seal will still pull off when eventually required?
As opposed to the repair version which puts tape on but its bonded/glued ?

If I am correct in the above, then care will be needed to avoid damage to the tape. I'm sure it's hardy enough to withstand a careful approach but maybe not with too much repetition.
 

VW California Club

Back
Top