BeagleMum
Super Poster
VIP Member
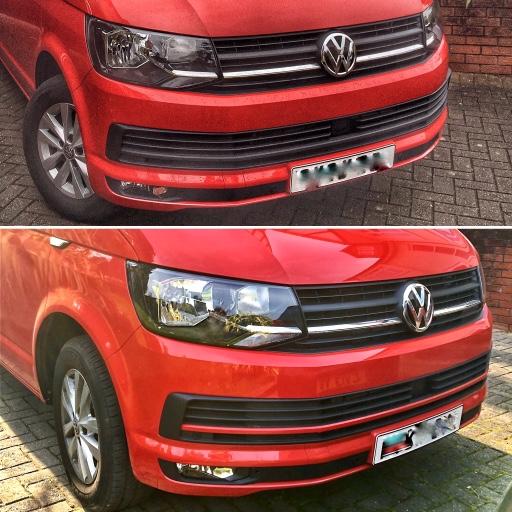
Not bought today but this afternoon I spent about three minutes refitting the lower grille trim strips today which I have colour coded to the cherry red of our van. I reckon they look alright. Thoughts? (Do posher Calis come with this trim already colour coded or in chrome?) I’m doing the same for an aftermarket protective bumper strip that will go on the back as didn’t fancy it in black or chrome/steel.
Sent from my iPhone using Tapatalk
Prefer the red to chromeNot bought today but this afternoon I spent about three minutes refitting the lower grille trim strips today which I have colour coded to the cherry red of our van. I reckon they look alright. Thoughts? (Do posher Calis come with this trim already colour coded or in chrome?) I’m doing the same for an aftermarket protective bumper strip that will go on the back as didn’t fancy it in black or chrome/steel.
Sent from my iPhone using Tapatalk
We changed our grill trim to red, added red to the mirrors, changed door handles and VW badge to black.


") Different types of steps available some just cosmetic ie don’t step on them, others like ours take weight.
Different types of steps available some just cosmetic ie don’t step on them, others like ours take weight.
 ), I really like the idea of this for being able to cook outside in the dark without needing a head torch. Appreciate you may not have tried it in anger yet...!