- Home
- Forums
- VW California T5 T6 & T6.1 Specific Sections
- VW California T5,T6 & T6.1 Specific Sections
- General Technical Advice
You are using an out of date browser. It may not display this or other websites correctly.
You should upgrade or use an alternative browser.
You should upgrade or use an alternative browser.
sapto
Super Poster
Lifetime VIP Member
hotel california T5: just stunning what u put together, all this pics and great information. Wow! Awesome!
Caroline9
- Messages
- 14
- Vehicle
- Caddy California
I am no fysicus but guess keeps it soft and prevents the rubber from getting hard and stugg.
Ok bingo, it's a bit of a blond question, I know diddley about engines and that talc thing just stuck out.
H
Hotel California
Super Poster
VIP Member
Lifetime VIP Member
hotel california T5: just stunning what u put together, all this pics and great information. Wow! Awesome!
Tkx , like to share my knowledge and experience i have so far with you guys
H
Hotel California
Super Poster
VIP Member
Lifetime VIP Member
Found a good place to store a set of spare winds screen whipers!
Changed my originals with a new set as one had a small damage leaving a mark / stripe on the window right in front of my sight.
Keeping the oldones as a spare set just in case .
Will be leaving on a three week trip soon and nice to have spares so in case one failes don't need to go search the right set in a forriegn country....
I put the oldones in the plastic wrapping the newones came in and put them here....
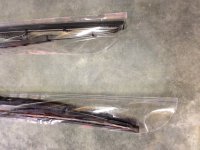
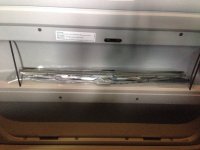
I had already a plastic canvas 2x3m rolled up stashed there but a set whipers do fit in xtra!
The plasic canvas can be handy as a grond sheet in the rain or for covering things up , just trow on the ground changing a flat tyre ,...
It is rolled up in a small zipperbag i recuperated from someting else
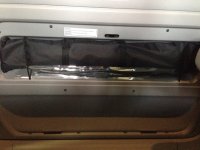
Table back in , done deal!
Changed my originals with a new set as one had a small damage leaving a mark / stripe on the window right in front of my sight.
Keeping the oldones as a spare set just in case .
Will be leaving on a three week trip soon and nice to have spares so in case one failes don't need to go search the right set in a forriegn country....
I put the oldones in the plastic wrapping the newones came in and put them here....


I had already a plastic canvas 2x3m rolled up stashed there but a set whipers do fit in xtra!
The plasic canvas can be handy as a grond sheet in the rain or for covering things up , just trow on the ground changing a flat tyre ,...
It is rolled up in a small zipperbag i recuperated from someting else

Table back in , done deal!
Last edited:
WelshGas
Retired after 42 yrs and enjoying Life.
Super Poster
Lifetime VIP Member
The bottom section could be used as well!
H
Hotel California
Super Poster
VIP Member
Lifetime VIP Member
Don't know or others had the rear headrests from the benchseat removed , but i had mine removed by VW dealer . Could be done DIY but was at dealer last time and asked them to do it , so the worst case senario of me breaking or damaging something would be excluded.
But then i came up with the problem of not beeing able to attach the table to and above the benchseat with the original VW strap , wich somtimes can be handy doing dishes or while cooking in the Cali.
Headrests can be put back in place and lifted out without any problem but as we always travel just the two and our doggy , the headrests are more trouble than fun reaching over the seat to the booth or making the dowstaires bed nothing can be stored undet the folded seat as the headresta are in the way....
So no headrest to attatch the tablestrap
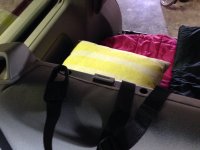
So searched for a solution......
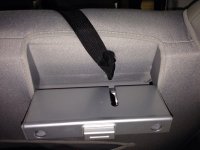
Does the job , table in place
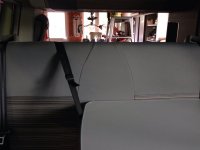
Cheers ,
Hotel California
But then i came up with the problem of not beeing able to attach the table to and above the benchseat with the original VW strap , wich somtimes can be handy doing dishes or while cooking in the Cali.
Headrests can be put back in place and lifted out without any problem but as we always travel just the two and our doggy , the headrests are more trouble than fun reaching over the seat to the booth or making the dowstaires bed nothing can be stored undet the folded seat as the headresta are in the way....
So no headrest to attatch the tablestrap

So searched for a solution......

Does the job , table in place

Cheers ,
Hotel California
Last edited:
H
Hotel California
Super Poster
VIP Member
Lifetime VIP Member
Nope , the table legs go in there ...not much room left , the area above is bigger and has bungeestraps....but also need to hold two table legs.The bottom section could be used as well!
Wonder what that space was disigned for , have to ask the dealer next time i visit!
WelshGas
Retired after 42 yrs and enjoying Life.
Super Poster
Lifetime VIP Member
I see what you mean, but you can fit something there. I've got a sheet of plastic, like your tarpaulin, but only 6' x 3' ( about 2 X1m ) and keep a Slime puncture repair kit in the top half. ( not unknown to get 2 punctures at once ).
motacyclist
Colin
Super Poster
Lifetime VIP Member
Yes they do but need to be an expert in origamiI wonder if the front blinds would fit in there rolled up ....
The only thing I could find for the table space was a roll of large bin bags I've been cursing for not fitting neatly anywhere else ... walking poles should fit in too when I find them
motacyclist
Colin
Super Poster
Lifetime VIP Member
As well as all the other kit, looks like you have a workbench, shelf unit/cupboard, Pepsi thermometer (?), something that looks like an early medical contraption and other assorted bits behind your seatDoes the job , table in place

H
Hotel California
Super Poster
VIP Member
Lifetime VIP Member
My garage is 100m/square and has a attic on top ....but unfortunatly already no space left....
It holds lots of stuff i hardly ever use but can't part with , and sometimes these thing might come up handy...
It's a old bike hanging on the sealing and to the right a circular sawtable ( don' t know the correct name)
As for the enamel signs , got lots of them hanging and stashed on the attic , like the retro and old stuff
Also kind of DIY guy , so need lots of gear and goodies
motacyclist
Colin
Super Poster
Lifetime VIP Member
Looks like you take it along in the back with youMy garage is 100m/square and has a attic on top ....but unfortunatly already no space left....
It holds lots of stuff i hardly ever use but can't part with , and sometimes these thing might come up handy...
It's a old bike hanging on the sealing and to the right a circular sawtable ( don' t know the correct name)
Also kind of DIY guy , so need lots of gear and goodies
I need someone to come and throw all the "stuff I think may be useful one day" out of my garage while I'm not looking
motacyclist
Colin
Super Poster
Lifetime VIP Member
Elevating one?My garage is 100m/square and has a attic on top
stevieb
VIP Member
Regulary check the holes that drains the water from the roof
Frontside the drainhole is underneeth this plastic cap
View attachment 7277
Remove it by holding it like this , sqeeze with your hand and pull towarts you at same time...like this .
Try to do it two handed but i had to hold my phone taking the pics..'
View attachment 7278
Clean underneeth and check te drainopening
Attention , don't push any sharp pin's ( like i do here with a nail) to deep in the hole , the rubber hose takes a direct turn and it will puncture the drain!
Use a ....how you call it ....thing to claen your ears stick
View attachment 7279
Backside is easyer and if you look good one can see light thru the drain if its open
View attachment 7280
About the same category :
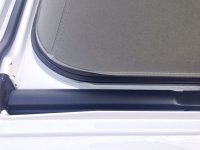
Cleaning the rubbers of the sliding window(s) with a toothbruch specialy below, preventing dirt to get stuck and resulting in waterinfiltration.
As for doorrubbers in general use talkpowder no vasline or greasy stuff
View attachment 7281
Hello
Thanks for your tips about the drain holes especially the ones at the front.
After removing the plastic covers noticed that both the torx fixing screws were starting to rust as they were in a puddle of water see attached photos. Gave them a good clean & will be checking them on a regular basis as well as the drain holes.
Thanks again for the great information.
Steve
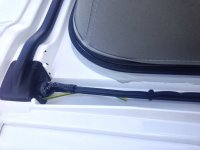
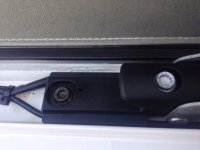
sapto
Super Poster
Lifetime VIP Member
Hello
Thanks for your tips about the drain holes especially the ones at the front.
After removing the plastic covers noticed that both the torx fixing screws were starting to rust as they were in a puddle of water see attached photos. Gave them a good clean & will be checking them on a regular basis as well as the drain holes.
Thanks again for the great information.
Steve
View attachment 9167
View attachment 9168
View attachment 9169
After our return from our holidays I am ready to do the same thing. thanks a lot in advanced for this good instruction.
I
ivorl
- Messages
- 17
Hello,
I have a blocked front drain hole (2006 California LHD) on the drivers side. I have so far not been able to unblock it using thin wire etc and water just pools in that area.
Any ideas welcome. Thanks.
I have a blocked front drain hole (2006 California LHD) on the drivers side. I have so far not been able to unblock it using thin wire etc and water just pools in that area.
Any ideas welcome. Thanks.
owen_h
Top Poster
VIP Member
High pressure air line? Think that is what the dealers do. I had the same issue and couldn't unblock it myself. If you remove the A pillar trim then the pipe is clearly visible for that part of its run.Hello,
I have a blocked front drain hole (2006 California LHD) on the drivers side. I have so far not been able to unblock it using thin wire etc and water just pools in that area.
Any ideas welcome. Thanks.
B
baffinp2
Lifetime VIP Member
- Messages
- 9
- Vehicle
- Caddy California
sbmcd
Top Poster
VIP Member
Checked our drain holes today, both fronts blocked (first time checked since new 15 months ago), cleared with short hose and old silicon tube nozzle and some lung power, ran water through same to wash out. Both rear drain holes were clear.
H
Hotel California
Super Poster
VIP Member
Lifetime VIP Member
I also had this issue (2006 LHD) - the problem is almost at the outlet -drain hose is bentView attachment 9497
Could you tell us where that pic. is taken....? It does seem the rubber hose end does not exit the vehicle?
snowy55
Top Poster
VIP Member
I was cleaning the area that is normally covered when the roof is closed today, I could see the rear drain hole that drain down the back of the body that the tailgate covers but I couldn't see any drain holes at the front.
Could someone put a picture up, pretty please.
Could someone put a picture up, pretty please.
sbmcd
Top Poster
VIP Member
I was cleaning the area that is normally covered when the roof is closed today, I could see the rear drain hole that drain down the back of the body that the tailgate covers but I couldn't see any drain holes at the front.
Could someone put a picture up, pretty please.
See post above with pics from stevieb
Similar threads
- Replies
- 4
- Views
- 1K
- Home
- Forums
- VW California T5 T6 & T6.1 Specific Sections
- VW California T5,T6 & T6.1 Specific Sections
- General Technical Advice

About us
The VW California Club is the worlds largest resource for all owners and enthusiasts of VW California campervans.


