Buy all your VW California Accessories at the Club Shop Visit Shop

Fridge Settings and Temperatures

My question is, how long and what food are you storing in the fridge? We rarely have any food in the fridge for more than 48 hrs and frequently less than 36 hrs. Salad stuff in the front maybe, alcohol in the back and milk , cooked meats etc: in the middle.
Agreed, its a short term storage option. Be interesting to see the VW design spec for the fridge performance.
 
My question is, how long and what food are you storing in the fridge? We rarely have any food in the fridge for more than 48 hrs and frequently less than 36 hrs. Salad stuff in the front maybe, alcohol in the back and milk , cooked meats etc: in the middle.
Thats a good point about what food you store in the fridge
and its a good thread from @willwander
i like it.
 
The main reason for me to install the fan modification is simple... I try to safe battery capacity in warm ambient circumstances our compressor runs almost continuous than.
So the fan reduces the warmth in the fridge box cavity and the side effect the box stays cooler over a longer period and the compressor kicks out more often.
 
If the main reason is saving battery capacity, I assume you expect not to be on EHU and then a solar panel seems like the way to go.
 
If the main reason is saving battery capacity, I assume you expect not to be on EHU and then a solar panel seems like the way to go.
You mentioned a test you did on your modern kitchen fridge. Does it have some sort of ventilation system inside?
I believe these tests leave a lot of room for error. Even in a house fridge you wouldn't want it too cold than you set it at, so where you've measured the temp may not be where the manufacturer had measured it maybe.
I'm asking if it is ventilated because, like in a car with air con, the temp of the cold air blown is a lot colder than than the actual ambient temp. Viceversa it is also true with heating.
The Cali fridge freezes on the back wall at setting 4 or 5. I.e. the cooling power is there.
The point is, how effective is it at circulating this cold, and is there a preferred way of arranging items inside to improve efficiency.
 
Yes, ours is a Samsung fridge with 'all around cooling', which means cold air is blown over each tray to create the same teperature in every spot of the fridge.

But even if this is the case, the fact that the sensor measures every x seconds over a longer period of time, will give you a realistic average temperature in the fridge.
 
Updated the original post to include the other levels and make a full set.

Thanks for all your input.
Enjoyed playing with my gadget.
 
Anyone tried putting a Fan inside the fridge?
 
Anyone tried putting a Fan inside the fridge?

Here you are, page 74:


Regards from Amsterdam,

Marc.
 
Here you are, page 74:


Regards from Amsterdam,

Marc.
Are you still using it?
 
Are you still using it?

Yes. The fan inside the box surely helps, though I didn’t do any scientific research like our members in this very interesting thread did. And I have a second fan under the fridge, so not easy to conclude which of the two does the job best. I’m too lazy to conduct seperate measurements...

Regards from Amsterdam,

Marc.
 
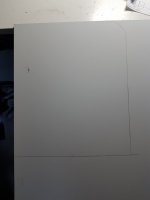
So first steps taken, it wasn't so simple to find adequate material in order to make the fan panel.
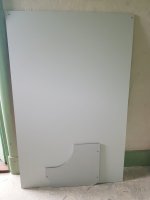
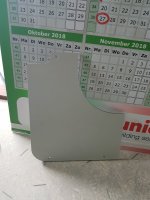
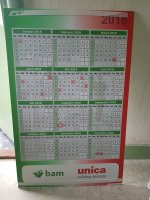
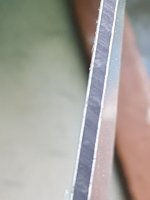
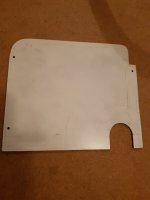
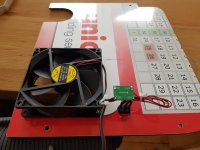
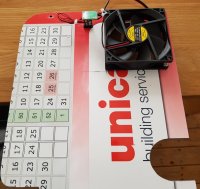
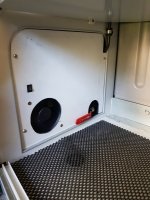
But found the perfect material at my work. In the past we have become calenders which were made of aluminium laminated plastic I have found one 2018, almost the same thickness as the original inspection panel in our cali's.

Now finding the time to cut the fan panel.

panel1.jpgpanel2.jpgpanel4.jpgpanel5.jpg

Keep you posted on my progress
Frans..
 
Update,
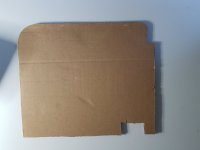
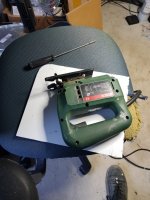
A next step taken, found some time to cut the panel.
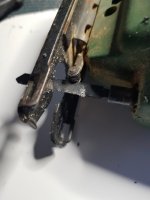
Used a jigsaw with a special metal saw blade easy job. I have added some pictures.
I have made a cardboard template just to see if the plan fits the original panel been used for the actual size.
The drain valve handle cut could be better so I have modified my plan, this cut works fine the valve works fine.
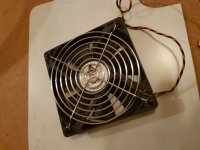
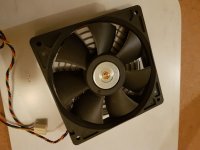
The fan on the pictures will most likely the one to use.

Keep you posted on the progress..
fan 1.jpgfan 2.jpgfan 3.jpgfan 4.jpgfan 6.jpgfan 7.jpgfan 5.jpg
 
Have installed my modified panel and have tested it during the last weekend. All worked fine, the fridge seems to go in idle mode sooner however the fan I have chosen is far to noisy. Lucky me I had the on off switch installed.
So during the night I had the fan switched off. I have ordered a new 90 x 90mm replacement fan low noise version.
Have to wait for it.

Keep you updated..

rgrds,
Frans
 
I’d be very interested in that. Do you have a link?
They don't make them anymore, the idea came from when the T5 had
the battery charger fitted underneath the fridge therefore like having
a mini heater under it like mine :(
Vw moved the battery charger to above the rear battery on the T5.1 so
the idea of optimising the fridge wasn't needed so the guy stopped making them.
 
In my recent real world testing, in a real camping site with real food in the fridge, i did put the fridge on 5 and temp reading from the thermometer placed randomly in several places inside the fridge gave me a 6-7 °C reading which i find perfect. Back wall with a little ice build proves the cooling element is doing its job. Only issue is that 7°C is still a bit too hot for enjoing a nice lager, that's why i now carry a waeco cdf 26 compressor fridge-freezer set at -15 °C for the daughter ice creams and to lower my beverages at 0.5°C . Cheers fridge freaks!
 
They don't make them anymore, the idea came from when the T5 had
the battery charger fitted underneath the fridge therefore like having
a mini heater under it like mine :(
Vw moved the battery charger to above the rear battery on the T5.1 so
the idea of optimising the fridge wasn't needed so the guy stopped making them.

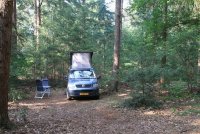
Correct, out T5 Cali (mid 2006 version) has the charger fitted against the bottom of the fridge however we barely go on the mains net. This weekend we camped in the Forrest, legally :cool: I have set the fridge to 6 deg C and the fridge was stowed with lot of stuff, most important nice bottle of white wine. I have a temperature sensor placed in the fridge box, and it measured 4,5 deg C.
I had pre-charged the leisure batteries for 12 hours, after 24 hours they dropped from 100% to 80% so happy with that.
Next will be testing my less noise fan which I purchased from E bay... and setup the high and low speed switch.

IMG_0453.JPGIMG_0464.JPG
 
In my recent real world testing, in a real camping site with real food in the fridge, i did put the fridge on 5 and temp reading from the thermometer placed randomly in several places inside the fridge gave me a 6-7 °C reading which i find perfect. Back wall with a little ice build proves the cooling element is doing its job. Only issue is that 7°C is still a bit too hot for enjoing a nice lager, that's why i now carry a waeco cdf 26 compressor fridge-freezer set at -15 °C for the daughter ice creams and to lower my beverages at 0.5°C . Cheers fridge freaks!

I'd be very surprised if the temperature placed randomly in several places gave you a 6-7 °C reading. Perhaps an average reading? The difference in temp, depending on where I place the thermometer/sensor, seems to be quite substantial in the 4 tests I have done so far.
 
Today I have finalized my project.
I have received my new fan and tested, the noise was incredibly low, on 12V you can barely hear it spinning.
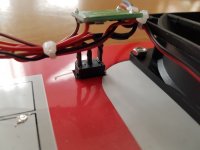
However I have decided to make it a two speed version, so I have replaced the on / off switch by an 3 position switch.
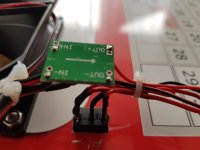
For the low speed I added a adjustable voltage down converter, I have set it to approx 5,5V
Total cost for the project: $6,68...
DC 12V 4-Pin 90*90mm Cooler Computer PC CPU Silent Cooling Case Quiet Fan $4.79
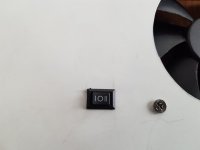
SPDT On/Off/On Mini Black 3 Pin Rocker Switch AC 6A/250V 10A/125V WS AE. $ 0,24
DC-DC Converter 5V-23V to 3.3V 5V 9V 12V 3A Step Down Power Supply Module $1.65
The panel I used was for free :);)
Today I had the chance to test it and it works fine, local ambient was 32 Celcius, the fridge was set to 5 deg. C..
The rear panel of the fridge (evaporator side) was nice and icy over the whole surface which normally took a day or so.
Fridge was loaded with water and soda bottles which where nicely cool. after 2 hours I measured 6 deg. C
Some final pictures of the project, which has been finalized for me.. I'm happy with the result, the real world use have to prove that it really works but I asume it can't be worse as the compressor and codensor staying much cooler than previous.

fridge final 11.jpgfridge final 22.jpgfridge final 33.jpgfridge final 44.jpgfridge final 66.jpgfridge final 77.jpg
 
Very interesting thread. Is there consensus on the best thermometer to use? (sorry if I missed this)
 
This isn't mentioned/discussed in this thread. I think the most important thing is to 'calibrate' whatever bluetooth thermometer you decide to buy. By placing it in your home fridge and comparing the reading to the reading of your fridge at home, which you use everyday and which has stored your food without making you sick.

I just got a 6 euro bluetooth thermometer of amazon (robbaly straight out of china) and it did the job just fine.
If it’s waterproof or can be put in a bag to make it waterproof, the best method is using a slush bath of water and lots of ice.
Reliable 0c for the check, used when a calibration source lacking.
We use it as a double check if we get odd results at work with our temperature sensors when we dont have with our 4dp calibration bath nearby, like field work.
 
Playing with my new Bluetooth thermometer. Doing some tests on fridge.

TLDR
- Use Level 5...or 6
- It colder at the back and bottom
- Max, between -2.8 and -0.5 degrees
- Level 6, between 5.0 and 6.7 degrees
- Level 5, between 7.9 and 9.2 degrees
- Level 4, between 5.9 and 9.9 degrees
- level 3, between 8.6 and 11.9 degrees
- level 2, between 9.5 and 13 degrees
- level 2, between 12 and 15 degrees

Test Conditions
- 2019 Ocean
- Empty fridge
- measured half way up wardrobe side fridge wall
- temperature logged every 60 seconds

Setting - MAX
Reach Temperature
It took 55 minutes of constant cooling to drop from 15 degrees (ambient) to min temperature of -2.8 degrees
View attachment 61264

Maintain Temperature
Temperature rose from -2.8 degrees to -0.5 degrees. Before dropping again to -2.8 degrees. 20 mins of temp rising, followed by 20 mins of cooling. These 20 minute cycles were maintained over the rest of the test period. (1 full day)
View attachment 61265
Here is a full graph so you get the full picture.
View attachment 61266


Level 6
Reach
approx 55 mins to reach 4.9 degrees
Maintain
Between 6.7 and 5.0 degrees, 20 minute cycles.
View attachment 61452
Level 5
Reach
approx 55 mins to reach 7.9 degrees
Maintain
Between 7.9 and 9.2 degrees, 20 minute cycles.
View attachment 61538

Level 4
Reach

approx 55 mins to reach 5.5 degrees
Maintain
Between 5.9 and 9.8 degrees, 20 minute cycles.

View attachment 61929
Level 3
Reach

approx 55 mins to reach 8.6 degrees
Maintain
Between 8.6 and 11.9 degrees, 20 minute cycles.
View attachment 61401
You can see the effect of warmer ambient temp,
it was quite warm outside to start with.


Level 2
Reach

approx 55 mins to reach 8.2 degrees
Maintain
Between 9.5 and 13 degrees, 20 minute cycles.
View attachment 61982

Level 1
Reach

approx 50 mins to reach 12 degrees
Maintain
Between 12 and 15 degrees, 20 minute cycles.
View attachment 62053
Warm up
Fridge turned off, it warms back up pretty quick. -2 degrees to 21 degrees in 4 hours.

View attachment 61371
If I can be bothered, I'll log some other fridge setting.
If I do I will add them here.
Was it summer or Winter when did tests ?
What was outside temperature ??
 
Back
Top