New Dual Battery Solar Regulators for 2020

I wonder about mounting a small connection box waterproof and sealed and running that cable on the inside of the canvas...?

I know the downside is drilling a small hole in the roof, but it would look much better...
Is there anyone with an original roof (no repairs made to it)?
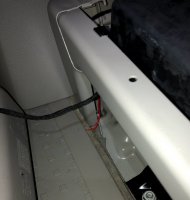
On the end of the rails on the roof, there are 2 black endings. in the middle of that plastic ending, you can lift up a tab (it clicks in and out). What do you see there underneath? I can't check mine, as mine isn't the original anymore. All I know is that under those 4 tabs, there are holes. So if, on an original roof, those holes are accessible by a grommet or something, you don't need to drill. Then you just have to find a way to get the cable from behind the headlining.
 
We are now stocking Epever dual battery MPPT chargers for 2020. Dual = charging leisure (one or two of) PLUS your starter battery (this is to clarify that in an Ocean, you are really charging three batteries !).

For most people, charging the starter battery is not required as it gets topped up with driving, but there are a fair few users out there who park up for long periods and want to keep their starter battery topped up too.

We previously sold WRM dual battery chargers but we had more failures than I was happy with so discontinued those.
Votronic also sell a dual MPPT charger, but the LCD display is stupidly expensive (£80), and another £20 for the plastic back box..... this is all before you buy the charger.

Epever have now entered the dual battery MPPT charger market. Our "standard" MPPT LCD charger upgrades have always been Epever, and in all the years I've been trading, I've sent back only one unit, so I trust the brand.

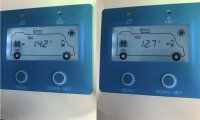
We are stocking the 10Amp (130w) unit - plenty for a single panel installation, and the 30Amp (390w) unit - to cover dual or even triple panels!. Both have a built in back-lit LCD display which shows battery levels, both leisure and starter, and also solar charging, how much, and where it is being directed. You can also add on a remote LCD display that shows exactly the same information on a panel mount display. The chargers have a low power mode where they will go to sleep when they detect that it is dark, to reduce battery drain overnight.

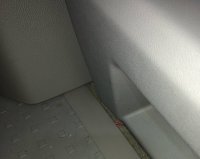
Pretty exciting stuff for us as there has been a big gap in the market for good, affordable dual MPPT chargers, and I'm often asked for them. Like I said, they are a fairly niche product, and installing does involve running an extra wire to under the passenger seat to get to starter-live, but we now stock them for anyone who needs them. They are priced very competatively for dual chargers too.

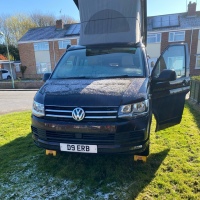
The bottom photo is from the remote LCD display (MT11). The photos were taken today and reflect the current British weather :) The battery icon under the bonnet would show more, but I use a small test battery just to get things working, and it was flat !

View attachment 55727
View attachment 55728
View attachment 55729
View attachment 55730
Hi Roger, do you have to have the display unit? Don’t really want to fix something onto the interior panels on my Cali as I’m on a PCP & if I decide to change it in 4 years I don’t want holes in it, if you don’t have to have it is there any major disadvantage other than the obvious of not knowing how much your battery is charging? Does it still show the % battery in the control unit of the Cali?
 
Anyone got pictures of the flat cable...?
I must admit, I don’t like the look of the curly cable. It looks a bit rough IMO. Sorry Roger, I’m not trying to be rude. Your kits look great, but surely there’s a better solution for this cable...?

I’ve just bought a kit from Roger and opted for the flat cable because I don’t like the look of a curly cable. I haven’t finished installing so haven’t finalised the cable run. Do you still want a photo? What surprises me is that with the roof down you can’t see the panel and the cable is very unobtrusive.


Thinking it about it.
If cable entry was under one of the panels, there
I’ve just bought a kit from Roger and opted for the flat cable because I don’t like the look of a curly cable. I haven’t finished installing so haven’t finalised the cable run. Do you still want a photo? What surprises me is that with the roof down you can’t see the panel and the cable is very unobtrusive.


Yes Erbster would love to see your install...:thumb
 
Will post when finished. I’m thinking I might use a cable tie to attach the cable to the tailgate hinge (allowing for the slack needed to raise the roof) so keep the cable in place.


Hi Roger, do you have to have the display unit? Don’t really want to fix something onto the interior panels on my Cali as I’m on a PCP & if I decide to change it in 4 years I don’t want holes in it, if you don’t have to have it is there any major disadvantage other than the obvious of not knowing how much your battery is charging? Does it still show the % battery in the control unit of the Cali?
Roger will reply in full I'm sure, but thought that I'd share my experience with this kit (dual panel, plus EPever dual battery charge controller).

You need something to convert the electricity that comes from the panels to something that can be trickled to each battery. This is what the controller does.

If you want to charge both the Engine plus Leisure batteries, then the EPever unit is the best.

I have looked at how best to install the unit, and feel that the Ocean rear cupboard is the best location as access is gained by raising the tailgate and opening the cupboard door. I do not want something that I have to bend down to operate.

It might be possible to use some very heavy duty Velcro, but I suspect this will fail eventually.

An option I am considering is to make up 2 aluminium brackets that simple hang over the top of the cupboard frame. It is then to this that I will attach the controller.

This will allow me to have no holes, and can be removeable if required at a later date and leaving no trace.....much as the rest of Roger's kit!
 
Hi Roger, do you have to have the display unit? Don’t really want to fix something onto the interior panels on my Cali as I’m on a PCP & if I decide to change it in 4 years I don’t want holes in it, if you don’t have to have it is there any major disadvantage other than the obvious of not knowing how much your battery is charging? Does it still show the % battery in the control unit of the Cali?
Sorry Sarah, I mostly don't get notifications of posts on this forum. Best to email me to be sure of a reply.

The external display merely replicates what's on the charger display. It doesn't do anything extra, and the charging works just the same. You can rest the charger on its back in the cupboard but seeing the display will be hard, unless you out it on the bottoms shelf. Cables are long enough

Your Cali display will still show the battery voltage. It won't know about the solar charging, and it'll need resetting by starting the engine if you want a true battery reading as the Cali display doesn't know about the solar and slowly goes out of sync, until you start the engine, which rests it.
 
Regarding the panel connector itself - I did look at panels with the junction box (where the solar panel cables originate) on the underside of the panel. Unfortunatley the junction box is just too bulky and would touch the roof and prevent the panel laying down flat.

The panels are designed so you cut a (big) hole in the roof, stick the panel down, and no cables or boxes are visible at all. Very nice, but very destructive.
 
Hi babble - looks like a neat job! However, I am not sure if I want to fit a display in the van.

I'm considering one of Roger's solar panels and I wonder if anyone with a "curly cable" would care to comment on whether it has marked the paint and/or flaps about noticeably. It doesn't seem much hardship to tuck a straight cable away when lowering the roof, but the curly cable seems to be "fit and forget" and I've only seen positive comments about the curly cable so far.
Thanks
Hi, I have curly cable and fitted it after I forgot to open tailgate and put the roof up. It pulled the solar plug out of the connector. Curly cable is great and I have fitted 3m transparent foil under it as it will abrade the paintwork without over time.
 
I have the curly cable and find its the fit and forget solution. My curly has stretched a bit mainly due to an assembly error by me so is fairly loose in the down position. I have now visible pait damage and certainly you cant hear it move about. I was going to put clear film under to protect the paint like others have but not got around to it.
Funny how some dont like the look of it as to me the flat cable which you have to stuff under the tailgate after each use is certainly not the professional solution.
Why all this concern over cable looks when its all bolted on with ugly angle anyway ? I think mine looks terrible with the roof up.

I have the Victron and just use bluetooth so no displays whatsoever, I have found it has the advantage I can check how things are going from outside the van which I often do.

Some wont like this but I top up my engine battery once a month using my Victron inverter plugged into the leisure batteries. Efficiency is irrelevant as the twin solars top it up just fine. I also use this to charge all my other cars and e bike so the cali never goes on hookup and is the source of eco power for my other toys.
I have two cars in carcoons each with own chargers , I might try hooking them up permanently thinking about it.
 
My kit is now fully installed and I am very happy with it. Thanks @Roger Donoghue

Here's a description and some photos, if anyone is interested

 
My kit is now fully installed and I am very happy with it. Thanks @Roger Donoghue

Here's a description and some photos, if anyone is interested

Great review of the installation, and a job well done :thumb
I will be receiving the same kit in the next couple of days (without the external display) and was starting to get anxious as to whether I would manage the installation. With your helpful pictures and Rogers instructions it seems that perhaps even I will manage.
Did you cover the red cable running from the B-pillar to the relay under the seat with anything or does that just run over the floor?
Hopefully we get some sun this summer so we can keep all batteries topped up :)
 
Thanks.

The external display was the hardest, the rest was easy enough. The photo on my blog might be misleading. I brought the red wire out of the kitchen cupboard at floor level and then stuffed the red cable under the trim and across to the seat base at the closest point, so there’s only an inch or so exposed. It is clearly visible and could be covered, but I didn’t bother.


Thanks for the review. I am encouraged to think that it might be possible for me to attempt this successfully. Like you, I have always had a nagging concern about how long the leisure batteries would hold out, especially having been used to virtually unlimited solar power on a previous motor home.
 
I'm still debating. I've got Roger Donoghue's recommendations, now I just need gear up to order it! I even have a set of hole cutters that have not seen action for years.
Picked mine up from the post office yesterday, can't wait for the weekend to have some time to get it installed. Can let you know how it goes if you still havn't decided by then :) Looks good and the instructions are very thorough.
 
Great review of the installation, and a job well done :thumb
I will be receiving the same kit in the next couple of days (without the external display) and was starting to get anxious as to whether I would manage the installation. With your helpful pictures and Rogers instructions it seems that perhaps even I will manage.
Did you cover the red cable running from the B-pillar to the relay under the seat with anything or does that just run over the floor?
Hopefully we get some sun this summer so we can keep all batteries topped up :)
I also left mine visible but it’s pretty subtle and I always keep something in that space.
E0A6E2A0-3180-4E9F-B0BF-6BB52BEA1867.jpeg68C562D9-8FCE-4098-9060-908C4BBA7F49.jpeg
 
We are now stocking Epever dual battery MPPT chargers for 2020. Dual = charging leisure (one or two of) PLUS your starter battery (this is to clarify that in an Ocean, you are really charging three batteries !).
Hi roger, I’ve got one of your kits, been fitted over a year now and works a treat. Ive got the WRM MPPT charger, is there anything I should keep an eye on as i see you no longer stock these chargers due to failures.
 
Hi roger, I’ve got one of your kits, been fitted over a year now and works a treat. Ive got the WRM MPPT charger, is there anything I should keep an eye on as i see you no longer stock these chargers due to failures.
I also have the WRM MPTT charger and was a little alarmed when Roger said he did not have confidence in them.
 
I also have the WRM MPTT charger and was a little alarmed when Roger said he did not have confidence in them.
Don't think he said he did not have confidence in them - he did have a very very few that failed and he thinks that the new ones are better. Maybe he needs to learn better marketing speak

I also have a wrm controller and the western.it help desk has been very good in helping me understand the functionality. Raise a ticket and they respond reasonably quickly.
 
Got the dual charger installed over the weekend. No problems fitting it with the great set of instructions supplied. A bit fiddly getting to the relay in the LHD, and man was it tightly screwed on! (A lot of swearing occured).
Seems to be working well.
Just wondering from you guys who have fitted the same or are in the know about solar... what kind of voltage are you seeing on the batteries? Im getting 14.2 on the leisure, is that a bit high or just that the solar is charging it?E3020DBA-5470-4CF0-9750-F368223F3659.jpeg
 
Im also wondering when you set the battery type to Gel, do you set Gel1 12V or Gel2 24V as there are two leisure batteries?
 
Im also wondering when you set the battery type to Gel, do you set Gel1 12V or Gel2 24V as there are two leisure batteries?
The batteries are wired in parallel, not in series. So it's 12 Volts!
 

Similar threads

B
Replies
1
Views
823
Vagophile
V
Californication69
Replies
11
Views
2K
Californication69
Californication69
Back
Top