You are using an out of date browser. It may not display this or other websites correctly.
You should upgrade or use an alternative browser.
You should upgrade or use an alternative browser.
Kayleigh
In the Beach, at the beach
Top Poster
Lifetime VIP Member
Can you tell me what fridge you have between the front seats?Didn’t buy it today but many moons ago when I thought the van would materialise a lot sooner!!!. Just fitted the Console for Camping Toilet, PortaPotti & Cover from Maxxcamp.
View attachment 91582
jMacdent
Of course…Dometic CDF 11Can you tell me what fridge you have between the front seats?
jMacdent
Virgil van Bike
VIP Member
R_Sargeant_CH
Hi all,
I found a really useful storage box in Amazon Germany. Strangely enough not visible on Amazon UK, but the seller seems to have no issues shipping outside the EU (I live in Switzerland).
Zedelmaier Stool, Cube Seat with Storage Space.
This 38 x 38 x 38 cm cube has a padded lid and can be used as a stool or footrest. It's ideal at the end of the folding table in our Ocean. It's deep enough to hold 1.5l PET bottles, (and more importantly wine bottles).£
Very light, strong and when empty it can be folded up and stowed completely inside the lid.
Best of all, the grey colour option exactly matches the grey seats! I plan to strap it to the back of the (LHD) passenger seat when driving to stop it sliding around, but may find a solution that allows me to clip it to the rails.
At €16.90 about the cheapest thing I have bought!
Enjoy...
RS
Elly Swanson
Top Poster
VIP Member
In the UK store, Dunelm, they do a very similar box called an “ottoman”. It’s 2 cm bigger all round at 40cm. A lot of people use it to cover their portaloo. It’s £12 and comes in a variety of colours. We have the blue oneHi all,
I found a really useful storage box in Amazon Germany. Strangely enough not visible on Amazon UK, but the seller seems to have no issues shipping outside the EU (I live in Switzerland).
Zedelmaier Stool, Cube Seat with Storage Space.
This 38 x 38 x 38 cm cube has a padded lid and can be used as a stool or footrest. It's ideal at the end of the folding table in our Ocean. It's deep enough to hold 1.5l PET bottles, (and more importantly wine bottles).£
Very light, strong and when empty it can be folded up and stowed completely inside the lid.
Best of all, the grey colour option exactly matches the grey seats! I plan to strap it to the back of the (LHD) passenger seat when driving to stop it sliding around, but may find a solution that allows me to clip it to the rails.
At €16.90 about the cheapest thing I have bought!
Enjoy...
RS
:
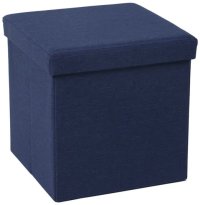
Foldable Grey Cube Ottoman | Dunelm
Designed with a sturdy construction this grey ottoman comes in a neat cube shape and features a quality padded lid to keep your contents concealed for neat, clu...
Last edited:
R_Sargeant_CH
That looks great as well! Maybe easier to get for UK people.In the UK store, Dunelm, they do a very similar box called an “ottoman”. It’s 2 cm bigger all round at 40cm. A lot of people use it to cover their portaloo. It’s £12 and comes in a variety of colours. We have the blue one
:View attachment 91666
Foldable Grey Cube Ottoman | Dunelm
Designed with a sturdy construction this grey ottoman comes in a neat cube shape and features a quality padded lid to keep your contents concealed for neat, clu...www.dunelm.com
M
MC90
VIP Member
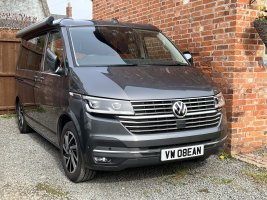
Looks great! Is this the set that is available from Vanstyle?Finally a warm enough day for fitting my stainless lower grille trims. Was never convinced with the black lower grille and I think this finishes it off a treat.View attachment 91649
Bryan2411
2014 SE
VIP Member
Can you report back on this please, I always thought the heater exhaust was situated too close and would melt it? It’s a great idea.An inflatable draft excluder. Seems to do the job and should keep fumes out when I have the parking heater on.
markheathcote
Lifetime VIP Member
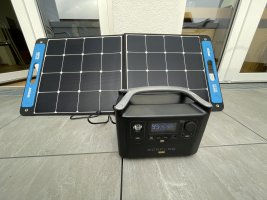
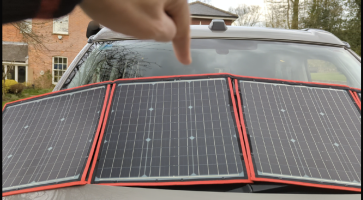
A fold-able solar panel 160w - so I can deploy outside or inside my windscreen. It is 4 panel, but I can fold into a 3 panel configuration inside the window. I can also use it to charge my Jackery. The solar panel comes with it's own charge controller and a variety of cables.
I'm preparing a video on it on my new youtube channel - to show it in use either connected with bulldog clips to the battery under the passenger seat OR via 12v cigarette lighter socket... eek!! I am thinking that will be fine since the solar panel will unlikely ever get to 10amp (the max for cigarette socket) and the cable I am going to use (on order) has a 10 amp fuse inline. Or I might permanently wire the controller to the leisure battery and then just plug into it when I deploy the panel.
This is the solar panel.. https:///3J1jgH1 - I'll do a full review on youtube once my 12v socket cable turns up later this week.
I don't want a full on installation since the van will only be temporary while we wait for the new build delays to clear. The new van will be awesome, 4motion, black, BFG, 3cm lowered

Virgil van Bike
VIP Member
Yes, that’s the one,Looks great! Is this the set that is available from Vanstyle?
Vanstyle VW T6.1 Transporter Front Grill Lower Trim Polished S.Steel
Really nice quality, better than I expected.
TheDoc
Lifetime VIP Member
I’ve had the heater on for two 14hr stints and it hasn’t melted yet. I’ll have a good look at it when I deflate it in a few days and let you know if it shows signs of heat exposure. In terms of functionality it’s working well in the current strong.Can you report back on this please, I always thought the heater exhaust was situated too close and would melt it? It’s a great idea.
B
Bill
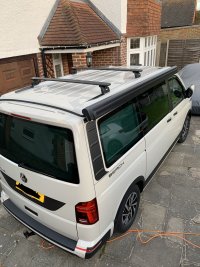
Did it involve any drilling? Or did you manage to feed the cable through the hinge without damaging the cable to solar panel if so I would keen to know where you got your solar panel from any further details you're happy to provide on installationTotal time was probably around 90 minutes - most of that was routing and fixing the cables. Connecting to the controller, and to the battery was very straightforward once the cables were all in the right places. Took my time to make sure I got it right rather than trying to rush it. And also tested it was all working before tightening/sticking it all down.
Thanks
Mattsv
VIP Member
Solar kit came from @Roger at Solar Camper Solutions. No drilling at all - panel is bolted to the roof tracks, and is foam padded to protect the roof. Cable is fed via the rubber grommet at the top of the rear doorway - just need to cut a small slit in the rubber and cable tie on to the hinge mount. There is no danger at all of it getting damaged in the hinge. I have mounted the controller in the wardrobe using super strong velcro adhesive strips. Cables were fed using an extra long tie wrap and are secured using the supplied sticky clips. It can all be easily removed without leaving any trace if necessary. The app shows exactly what the panel and batteries are doing both live and historic trends. Kit comes with comprehensive instructions and everything needed (although I supplied my own extra long tiewrap for feeding the cable and velcro for the controller rather than using the supplied screws).Did it involve any drilling? Or did you manage to feed the cable through the hinge without damaging the cable to solar panel if so I would keen to know where you got your solar panel from any further details you're happy to provide on installation
Thanks
Bumble The Van
VIP Member
Our lovely new range of wall clocks which you can have your very own number plate or made up plate on !
See the whole colour range here https://www.villagerjimsshop.com/collections/campervan-clocks


See the whole colour range here https://www.villagerjimsshop.com/collections/campervan-clocks


B
Bill
Thank you really appreciate your walk through about how you went about your installationSolar kit came from @Roger at Solar Camper Solutions. No drilling at all - panel is bolted to the roof tracks, and is foam padded to protect the roof. Cable is fed via the rubber grommet at the top of the rear doorway - just need to cut a small slit in the rubber and cable tie on to the hinge mount. There is no danger at all of it getting damaged in the hinge. I have mounted the controller in the wardrobe using super strong velcro adhesive strips. Cables were fed using an extra long tie wrap and are secured using the supplied sticky clips. It can all be easily removed without leaving any trace if necessary. The app shows exactly what the panel and batteries are doing both live and historic trends. Kit comes with comprehensive instructions and everything needed (although I supplied my own extra long tiewrap for feeding the cable and velcro for the controller rather than using the supplied screws).
Mattsv
VIP Member
No worries - if you are local to us (PO12) you are more than welcome to have a look - alternatively we will be at the Chester Food Festival this weekend (Thursday to Monday) if that is any good.Thank you really appreciate your walk through about how you went about your installation
B
Bill
Thanks I'm a little further away CT21 hope you enjoy the food festivalNo worries - if you are local to us (PO12) you are more than welcome to have a look - alternatively we will be at the Chester Food Festival this weekend (Thursday to Monday) if that is any good.
Elly Swanson
Top Poster
VIP Member
Have a great time at Chester food fest. We would normally be there and have had some cracking times, but are at centre Parcs with the grand kids as it’s been shifted 3 times due to covid. Weird being on holiday not in the van.No worries - if you are local to us (PO12) you are more than welcome to have a look - alternatively we will be at the Chester Food Festival this weekend (Thursday to Monday) if that is any good.
Multi1100
Thanks to this forum I discovered the possibilities of a RidgeMonkey! I ordered the new XXL and received it today, made our first meal (macaroni, vegetables, cheese melted) in it and it is a superb design and cooking pan. Next will be pancakes (Dutch way) tomorrow morning!
Next purchase might be sun power panels....
Next purchase might be sun power panels....
The Merle
4x4 joker
Super Poster
Lifetime VIP Member
kave
If you plan on taking photos and vids with your drone in Sweden, be aware you need permission for every photo if a photo is taken from an aircraft or drone and the horizon is visible, before making it publicly available.Thanks for the links, fortunately I understand German.
I did check all this out before I bought the Dashcam and checked out the user manuals to see what settings were available to avoid infringement .... the only defence of infringement of other peoples privacy rights is to convince the authorities there was no intent to infringe privacy rights. So IMO, rules are as follows:
1. Disable functions which are motion triggered or permanent recordings. The park feature (which records when the car is parked) can be disabled in the Vantrue N3. This is illegal in many european countries because it is seen as "systematic surveillance".
2. The recordings should be short segments which are automatically overwritten as the oldest recordings are deleted. The Vantrue N3 has this cyclic setting and also has a setting where you are reminded to format the card every month.
3. Set the camera to save only incidents when an accident occurs (measured by a sensor in the camera) - this transfers the recording when the excessive acceleration/deceleration occured to an events folder on the card which is not overwritten.
4. Don't publish any footage on social media. Footage is "for private use only". Don't offer your dashcam footage to anyone else as evidence. If you need to use footage as evidence, check with the police first.
5. If asked by another member of the public what you have recorded then show them and offer to delete it. (Unless obviously they just ploughed into your car after running a red light.)
The problem countries are Belgium, Germany, Luxemburg, Portugal and Switzerland as they have the most stringent privacy laws ... so doing all the above will help convince the authorities that you are complying with the law, and that the dashcam is for taking private recordings of scenery and accidents.
Those are the basic rules which will cover most of Europe - if in doubt then remove the dashcam in Belgium, Germany, Luxemburg, Portugal and Switzerland would be my advice, but each individual must determine their level of risk themselves.
I have also had many run-ins with members of the public while using my drone, be polite, show them what you are doing, and if you have a web-site which for example publishes "artistic" images then this is allowed as long as no personal data (faces or number plates) are visible.
E.g.
View attachment 91378
California_Ocean
Got the final parts for my solar project. 310W should just about do it.
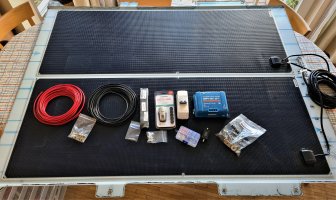
Total Cost: €1313,28 .... or €4,24 per Watt.
Parts List:
Hess Campers 320W Aluminium solar panel. €320
2 x 155W Phaesun Mare Flex ETFE panels. €657,40
Scanstrut cable seal. €31,49
63A 2 Pole Circuit Breaker for Panels. €26,64
40A MiDi Fuse holder + fuse for charging circuit. €20,76
Victron Smartsolar MPPT 100/30. €206,99
Cables, connectors, heatshrink and other sundry items (some of which I had anyway). €50
... now to fit it all.

Similar threads
B
Sorry Now Sold
For Sale: Safari G2 Residence, Bike rack, Toilet
- benvinco
- Accessories for sale
- Replies
- 3
- Views
- 3K
D

About us
The VW California Club is the worlds largest resource for all owners and enthusiasts of VW California campervans.


